Hello! I hope that you had a lovely Easter, and that you managed to steal a few moments in the sunshine, either in the garden or on a short walk? We have been incredibly lucky with the weather here in the South of England, for the last few weeks actually!
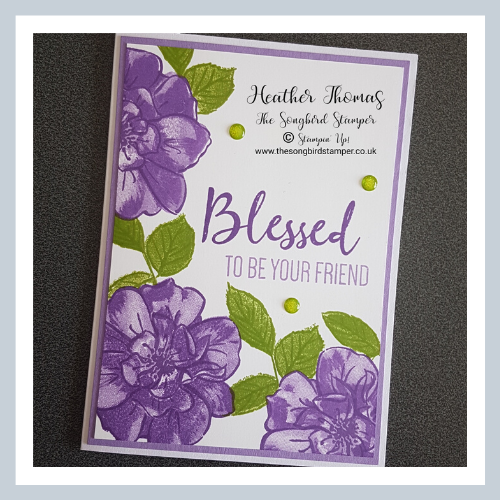
Well, I can’t quite believe that I have only just bought the To a Wild Rose stamp set! I must have totally overlooked it until now but it is such a gorgeous stamp set with its lovely flowers and leaves and some amazing sentiments, just perfect for making cards to send to friends.
It is a ‘two step stamp’, which is actually quite a mouthful to say, but these types of stamps do give a really lovely effect, they look almost 3D when they are stamped! They also mean that you don’t need any complicated layers or embellishments, so great for simple stamping.
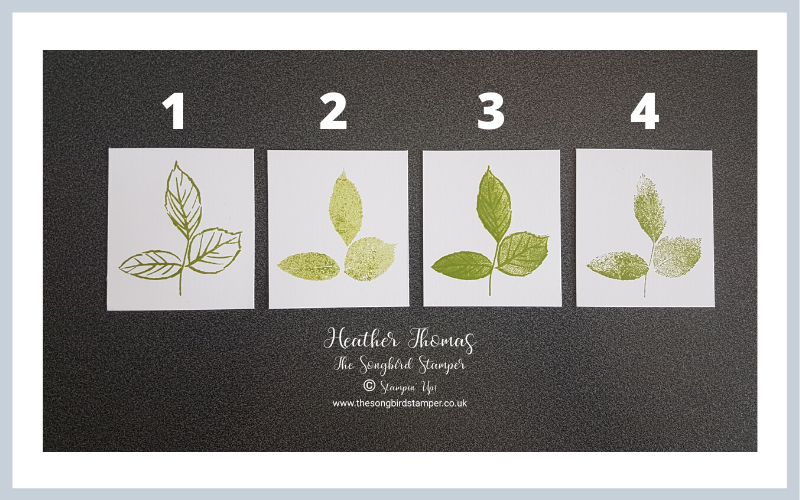
Basically, to get each flower or leaf you have to stamp three separate images, on top of each other. I’m not quite sure why it isn’t called three step stamping, I don’t know, but there we go! You get an outline stamp, then a block infill and then some detail, as shown below. The fourth image is where all three stamps have been combined.
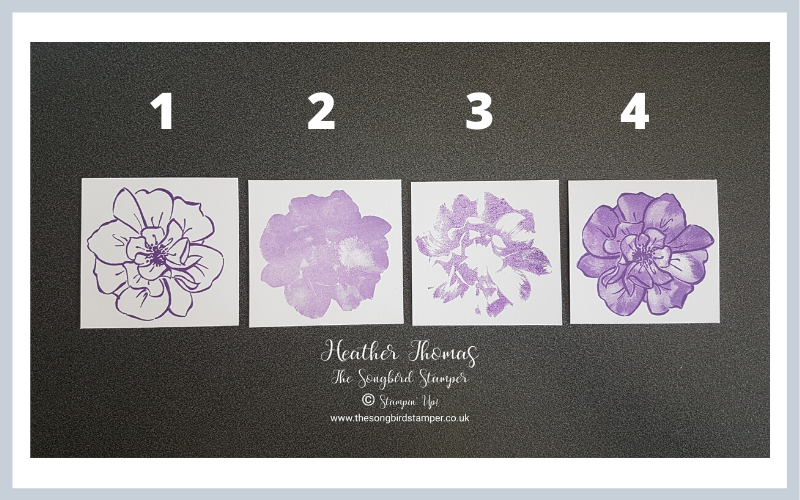
For the flowers I used two different colours, Gorgeous Grape and Highland Heather. The first stamp is in Gorgeous grape, the second in Highland Heather. The third is Gorgeous Grape but stamped off first so it isn’t quite so dark.
For the leaves, I just used one colour, my favourite green, Granny Apple Green. The first and third stamps are stamped normally, but to give some contrast the second one is stamped off, again to make it lighter.
I have also done some masking, to create my card, so that the leaves poke out from behind the flowers. You can find a detailed tutorial on masking HERE, in a blog post from earlier in the year. It is a wonderful technique which I highly recommend if you haven’t given it a go before.
Actually, I started this card by stamping the sentiment first, so that I knew it would fit! There is nothing worse than stamping all your flowers and leaves only to find that you can’t squeeze in the words you wanted to use. My top tip for the day.
I demonstrated how to make this card, and another, during my recent Facebook Live, which you can see below if you missed it the first time round. If you want to make sure you catch my videos, please do like and follow my Facebook page, that way you will get notifications when I go live. The Songbird Stamper on Facebook
Thank you so much for reading today, I hope you have had some time for some crafty fun this weekend, and if not, why not take the day for a little ‘me time’. Until next time, stay safe and stay well, Heather xx
- Shop with me online – spend over £20 and receive 10% in Stampin’ Rewards – that’s 10% of your order price back to spend on a future order!
- Click Here to come and join our amazing team of Songbird Stampers, a whole new world of fun and friendship (and discounts!!) await you. Want more information? Why not check out all the FAQs over on the Join My Team page
- Why not follow me on Facebook, for live videos, projects and updates – The Songbird Stamper
- Or Subscribe to me on YouTube – The Songbird Stamper


