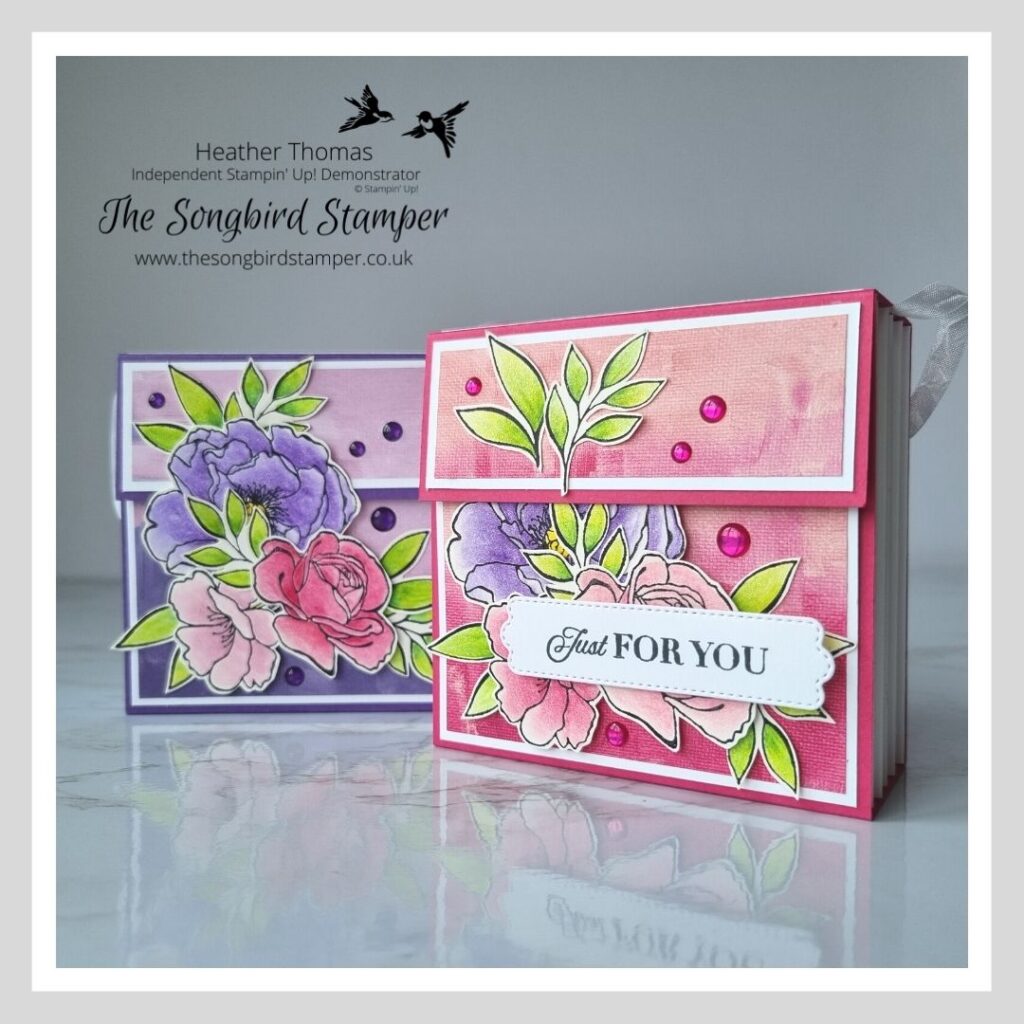
The theme for this month’s blog hop is ‘friendship’, and what better way to celebrate friendship than to gift someone this cut accordion file style gift bag, filled with goodies and treats, a handmade card and maybe even a note to show them how much they mean to you.

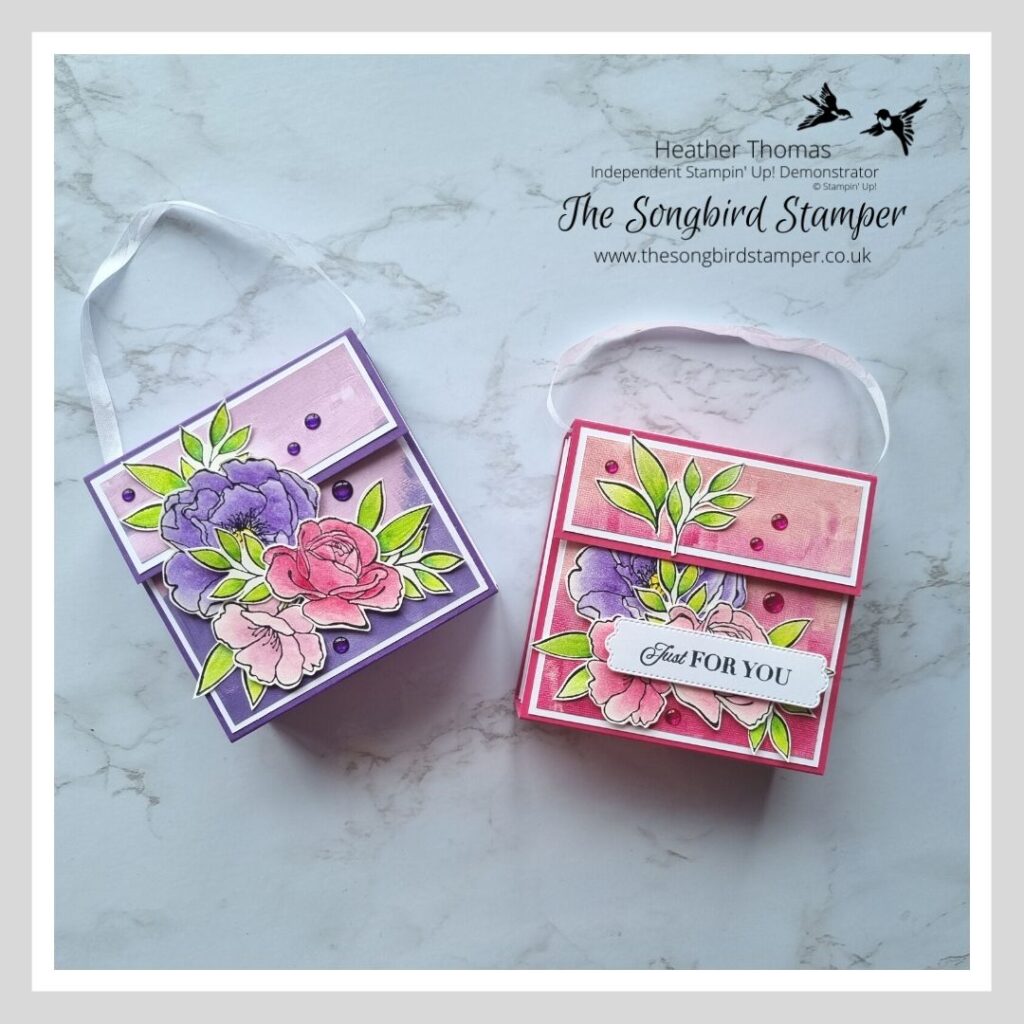
To make this accordion style gift bag you will need to choose two colours of co-ordinating cardstock. I chose Basic White and Melon Mambo for mine. Take one of those sheets cut two pieces measuring 9cm x 18cm out of it, then score each of them every 1 1/2 cm. Fold these two pieces into concertinas, these will make the sides of your gift bag.
Next, take a sheet of the other colour and cut six 9cm x 9cm squares from it. From the same colour as the squares, cut another piece measuring 9.2cm x 29.7cm and score it on the long side at 9cm, 13cm, 22cm and 26cm.
Cut three pieces of cardstock (the same colour as your concertina sides) to the following measurements:
- 8.8cm x 8.6cm
- 8.8cm x 3.6cm
- 8.8cm x 3.2cm
Cut three pieces of Designer Series Paper measuring:
- 8.4cm x 8.2cm
- 8.4cm x 3.2cm
- 8.4cm x 2.8cm
Assemble the box as shown in the short video below (I don’t even want to try to explain how to do this is words!!) I have used magnetic closure for this box, and I also show you in the video how to do this, I just love the feel and sound of a magnetic closure!
Once your box is assembled and fastened, you can start to decorate it. Adhere the DSP to the card layers and then stick those on the panels of the box. Then stamp one large flower, two small flowers and six leaves in Staz On onto Shimmery white cardstock. Use the watercolour pencils and a Wink of Stella pen to colour in the images, this will give them a really glittery look. If you don’t want a glittery look, you can just use a regular water painter.
When adhering these to the box, I started with the largest flower. I put three dimensionals onto the bottom half of the flower and then stuck it on so that the loose top half covers over the flap. The leaves at the top, under this flower, are actually stuck onto the flap itself so as not to impede the opening and closing of it. Then just adhere the rest of the flowers and leaves using dimensionals and tombow liquid glue.
The greeting I used it from the Celebrating You stamp set. This is a wonderful all occasion sentiment stamp set – perfect for a newer crafter or a great addition to an extensive stash! I stamped it onto a die cut shape from the Pretty Pillowbox dies, but you can use any label die cut or just cut it on the trimmer. The gems are the GORGEOUS new Glossy Dots Assortment – wow, these are simply stunning.
To finish the project I added some White Seam Binding ribbon to create a handle for the bag. I simply took a length, tied it into a loop and then used some red tape to secure it to the inside of the box ‘lid’.
I hope that you have enjoyed learning how to make this accordion style gift bag and I hope that you have a go at making one for a friend too. They really are lovely to make and I am sure will be gratefully received when full of gifts and treats!
Please do have a hop around the rest of the group to see some lovely ‘friendship’ projects…
Product List


")
 Designer Series Paper")

 Crinkled Seam Binding Ribbon")

- Shop with me online – spend over £20 and receive 10% in Stampin’ Rewards – that’s 10% of your order price back to spend on a future order!
- Click Here to come and join our amazing team of Songbird Stampers, a whole new world of fun and friendship (and discounts!!) await you. Want more information? Why not check out all the FAQs over on the Join My Team page
- Why not follow me on Facebook, for live videos, projects and updates – The Songbird Stamper
- Or Subscribe to me on YouTube – The Songbird Stamper
Join Our Team
If you’ve ever felt like you want more crafty friends, or felt like you want to take part in more fun events with other crafters, or felt like you want to get a nice little discount on your craft supplies, then why not think about joining our team? When you join Stampin’ Up! a whole new world opens up to you, a world I wouldn’t be without personally.
I’ve got a whole page of this website dedicated to answering some of those common questions like ‘Do I need to run events?’ (NO!!) and ‘What benefits are there to joining’ (LOADS! – Think discounts and community as well as early access to products and special events) Why not visit my Join My Team page to see if your questions are answered there, and come and have some fun with us!


Here’s a couple of photos of us having a brilliant time together – we regularly get to craft and socialise as a group and in my mind nothing could be better than that!
Well, ok, only one thing is better than that, FREE craft supplies! During January and February of 2025 we have an amazing promotion running where you can get your hands on £220 worth of craft goodies for just £99. Check out the video below to see more about this offer!
You get to choose £130 of product of your choice and then get a free stamp set and your choice of two packs of the Stampin’ Write Markers also totally free. They retail at £35 a pack so that’s a great saving!
What an absolutely gorgeous project Heather. Paired with those gorgeous papers it is so stunning. Are you sending one of these to all of your friends? hint hint LOL
wow what an amazing project! thank you so much for sharing xx
What a wow project!
What a fabulous project, Heather! Lucky friends! Beautiful gift packaging. Thanks for sharing.