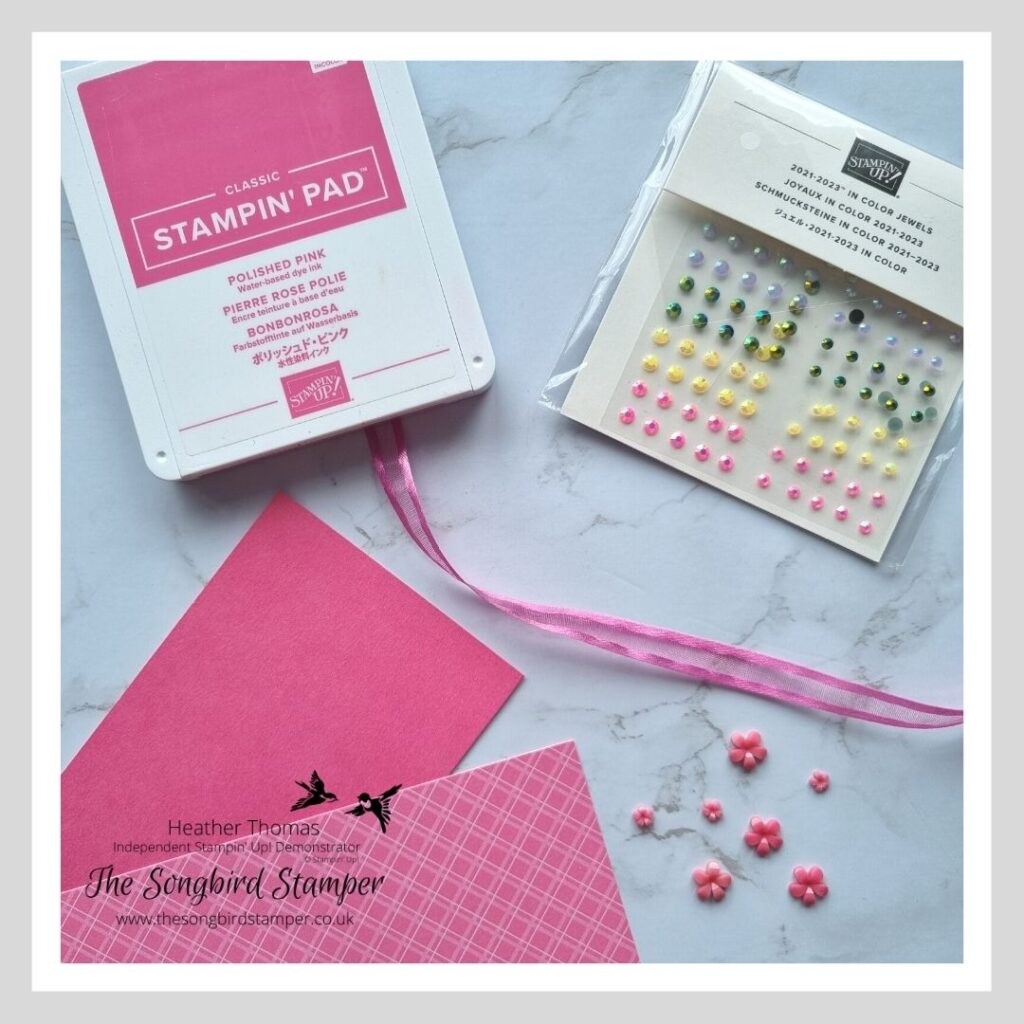
The theme for this month’s blog hop is ‘Pretty in Pink’, so it seemed an ideal time for me to tell you all about Colour Coordination by Stampin’ Up! If you were to ask people what they love about Stampin’ Up! craft supplies you would probably get two answers… 1. Quality (it really is outstanding) and 2. Colour Coordination. Only a crafter will understand the pain of trying to find different pinks to match, so what a joy that you can get it all in one place, in the colour of your choice!

Who are the Tech 4 Stampers? We are a wonderful group run by the fabulous Louise Sims, who enables fellow Stampin’ Up! Demonstrators to build their own websites and learn about all things tech related – I personally would be lost without her support and guidance!
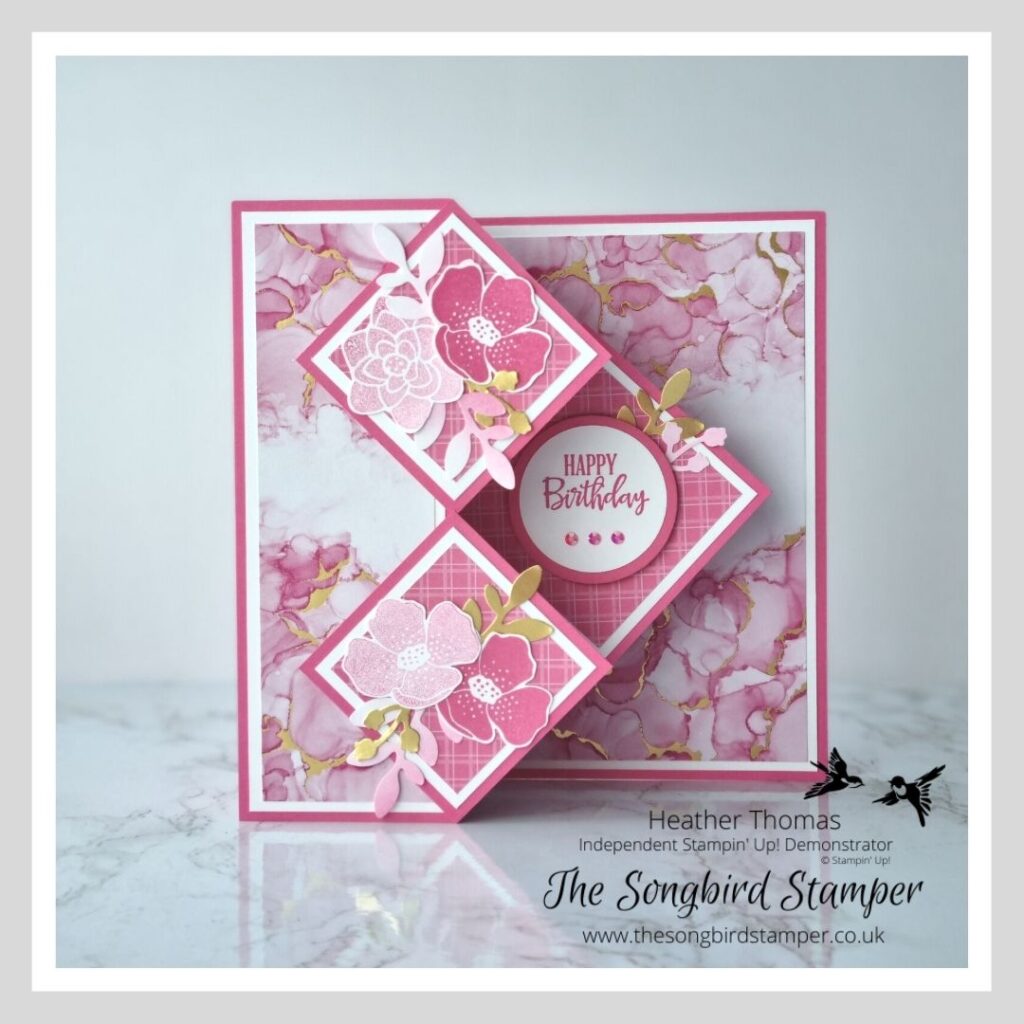
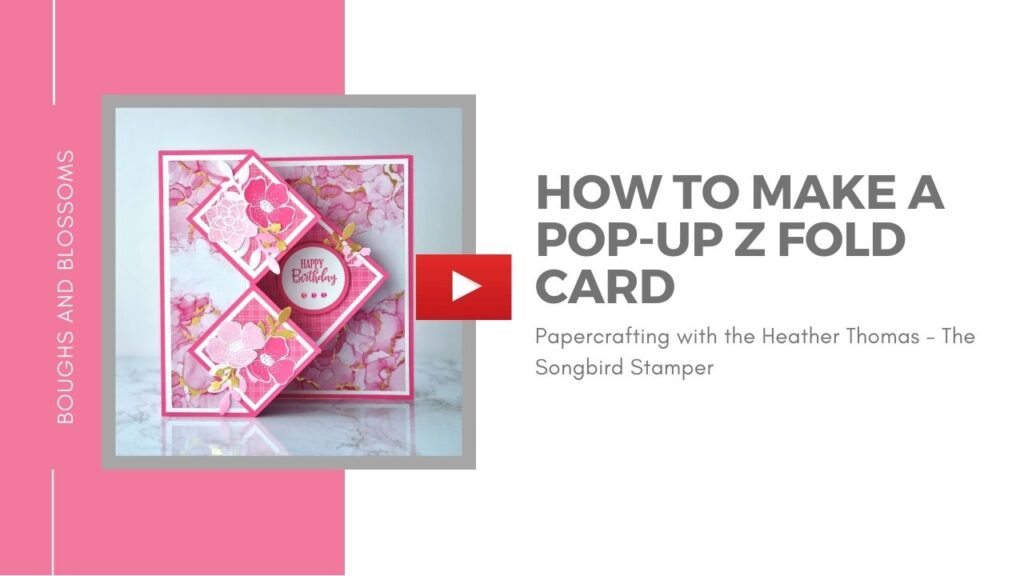
I’ve got a fabulous fun-fold card for you today – the Pop Up Z-Fold card! Such a fun card but really not as difficult as it looks (isn’t that the same for most of the fun folds??) My class ladies made these at a recent event I held, and they all had such a good time choosing papers for their special occasions. I chose the papers from the Artiscally Inked collection and the lovely Boughs and Blossoms bundle, which comes with a gorgeous stamp set and a dual leaf punch.
To make this card you will need the following supplies:
- One piece of coloured cardstock measuring 10″ x 7″ (scored on the long side at 2 1/2″ and 5″)
- One piece of Basic White card measuring 4 3/4″ x 6 3/4″
- Two pieces of Basic White card measuring 2 1/4″ x 6 3/4″
- One piece of DSP measuring 4 1/2″ x 6 1/2″
- Two pieces of DSP measuring 2″ x 6 1/2″
- One piece of coloured cardstock measuring 3″ x 3″
- Two pieces of coloured cardstock measuring 2 1/2″ x 2 1/2″
- One piece of Basic White measuring 2 3/4″ x 2 3/4″
- Two pieces of Basic White measuring 2 1/4″ x 2 1/4″
- One piece of DSP measuring 2 1/2″ x 2 1/2″
- Two pieces of DSP measuring 2″ x 2″
- One piece of coloured cardstock measuring 3″ x 4″ (scored on the long side at 1″, 2″ and 3″)
Phew – that might seem like a LOT of pieces, but trust me, it will come together much quicker than you think! If you would like to watch a video of how I put this card together (and to see more about Colour Coordination by Stampin’ Up!), please do have a watch by clicking the video below. If you’d rather not, read on for the written instructions!
- Layer together all of the mats and layers and stick down with glue.
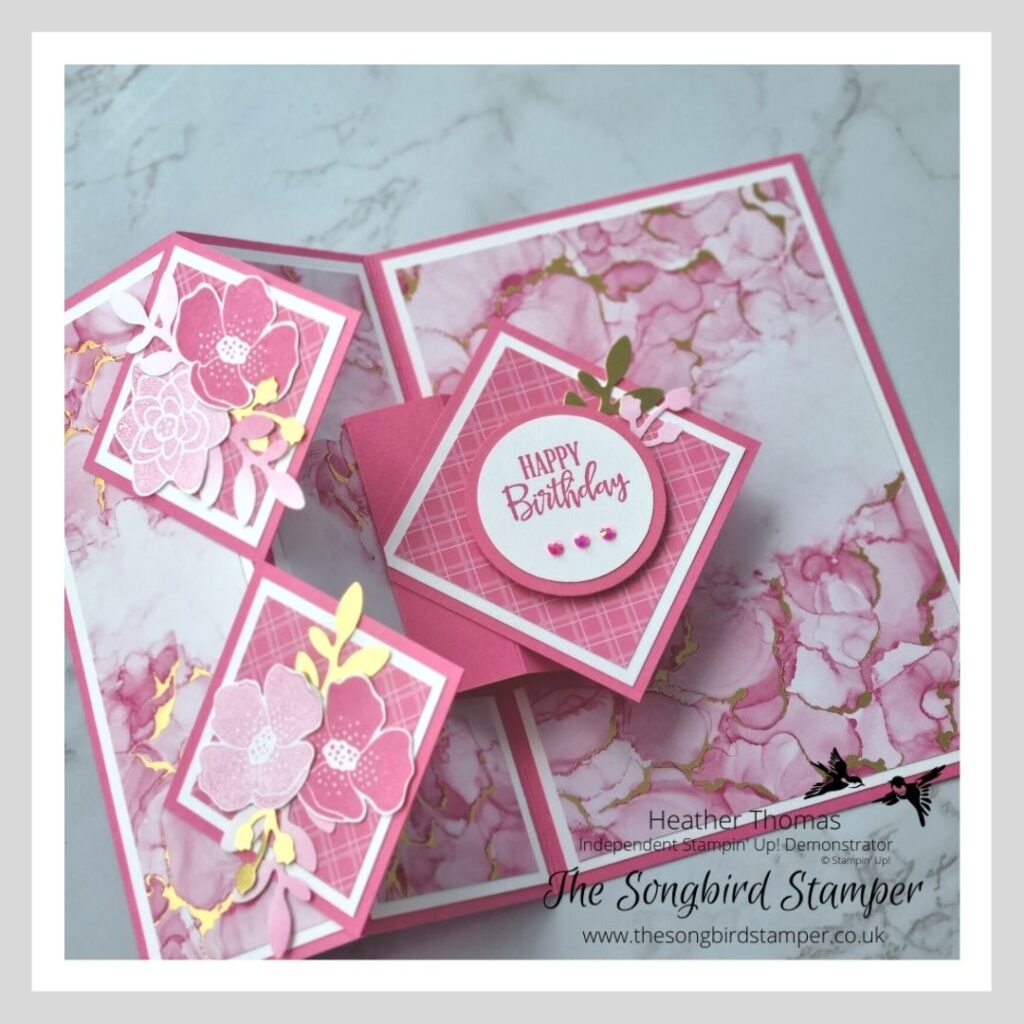
- Fold the base card into a Z Fold format and then stick the two smaller squares on to the top and bottom, in line with the Z Fold, in a diamond orientation.
- Take the support structure and fold and burnish all of the score lines.
- Take a ruler and mark in the main middle fold of the card at 2” and 5”.
- Fold the support so that the two outer flaps are tucked under, then put glue on the right hand of these flaps. Line it up so that the centre of the support is lined up to the centre of the card and that it is between the pencil marks, then stick down.
- Put glue on the left hand flap and then stick this down to the left of the centre fold.
- Line the diamond up with the left hand edge of the support, then flip it over and close the card. It will overhang the right hand edge of the card – just pencil mark where it overhangs and then cut this off before turning it back the right side up and sticking it down onto the support.
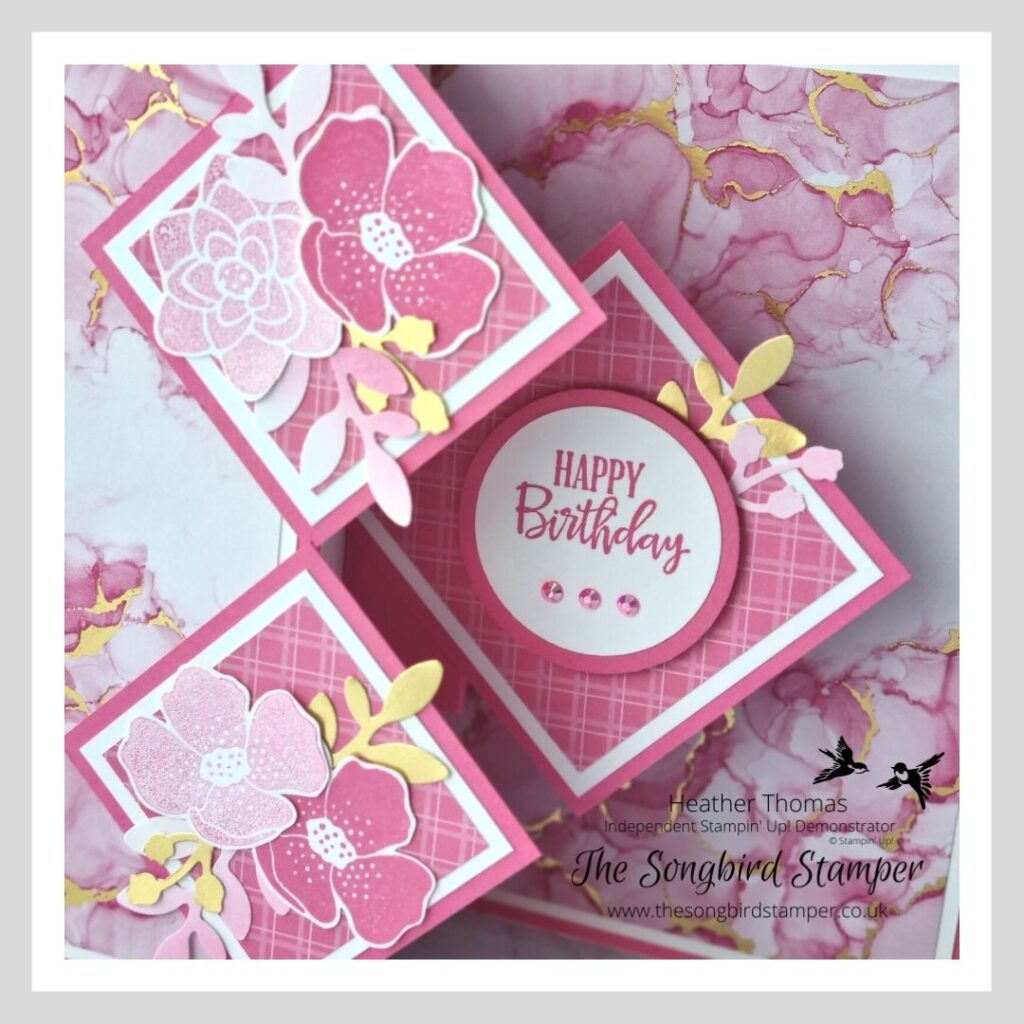
- Stamp a sentiment and mat and layer it onto a piece of card before adding any ribbon and gems that you would like.

Thank you so much for stopping by today, to learn all about Colour Coordination by Stampin’ Up! and to see how I made this Pretty in Pink Pop-Up Z-fold card. I hope that you have enjoyed creating with me and I hope you enjoy seeing what the rest of the blog hop team have made for you.
Unitl next time, Happy Stamping xx
Product List Open Weave Ribbon")


 Designer Series Paper")
")


- Shop with me online – spend over £20 and receive 10% in Stampin’ Rewards – that’s 10% of your order price back to spend on a future order!
- Click Here to come and join our amazing team of Songbird Stampers, a whole new world of fun and friendship (and discounts!!) await you. Want more information? Why not check out all the FAQs over on the Join My Team page
- Why not follow me on Facebook, for live videos, projects and updates – The Songbird Stamper
- Or Subscribe to me on YouTube – The Songbird Stamper

I am incredibly excited to be offering this awesome Happy Hedgehog Class in May, both in person and via zoom on the following dates:
Fareham – Thursday 12th May – 10am – 1pm
Denmead – Friday 27th May – 9.30am – 12.30pm
ZOOM – Saturday 21st May – 10am – 1pm
The price of the class is £30 (for stamps and kit) or £42 (for stamp and punch bundle) (plus P&P if required)
Bookings are now open and you can reserve your place at either an In Person Class or a Zoom Class using the buttons below…
That’s so fun! I’ll have to give this a try. Love the DSP choice.
LOVE this sheet of DSP – so sad it’s nearly all gone!
Stunning card Heather & I can’t wait to try your tutorial
Thanks Sara – I hope you enjoy creating it
Wow! Fabulous card Heather, as always xx
Ah, thank you Leighsa, I don’t normally do fun-folds but I enjoyed this one!
Stupendous! Such a wow factor. Beautiful as always. tfs, Heather
Thank you Elaine – it was fun making this one!
Absolutely stunning! I watched your video tutorial too, well done xx
Love, love love this card! Will have to try it myself…thanks for sharing!
I am definitely going to watch your video and make this fun fold card. Love it !
I love fun fold cards and as always you’ve created a beautiful project Heather – I am going to have to have a go using your tutorial xx
What a fabulous fun fold card, so clever. I will have to have a go at making one.
Tfs x
Wow, this is a really fabulous design, I love to make fun fold cards for friends and I’ll have to give this one a go. Fantastic!