I had a fabulous time on my Facebook Live this morning demonstrating how to make a Mini Stationery Set, and I wanted to share the instructions here with you today. This is such a lovely little project, perfect for giving as a gift or for selling at craft fairs, which are starting up again now!
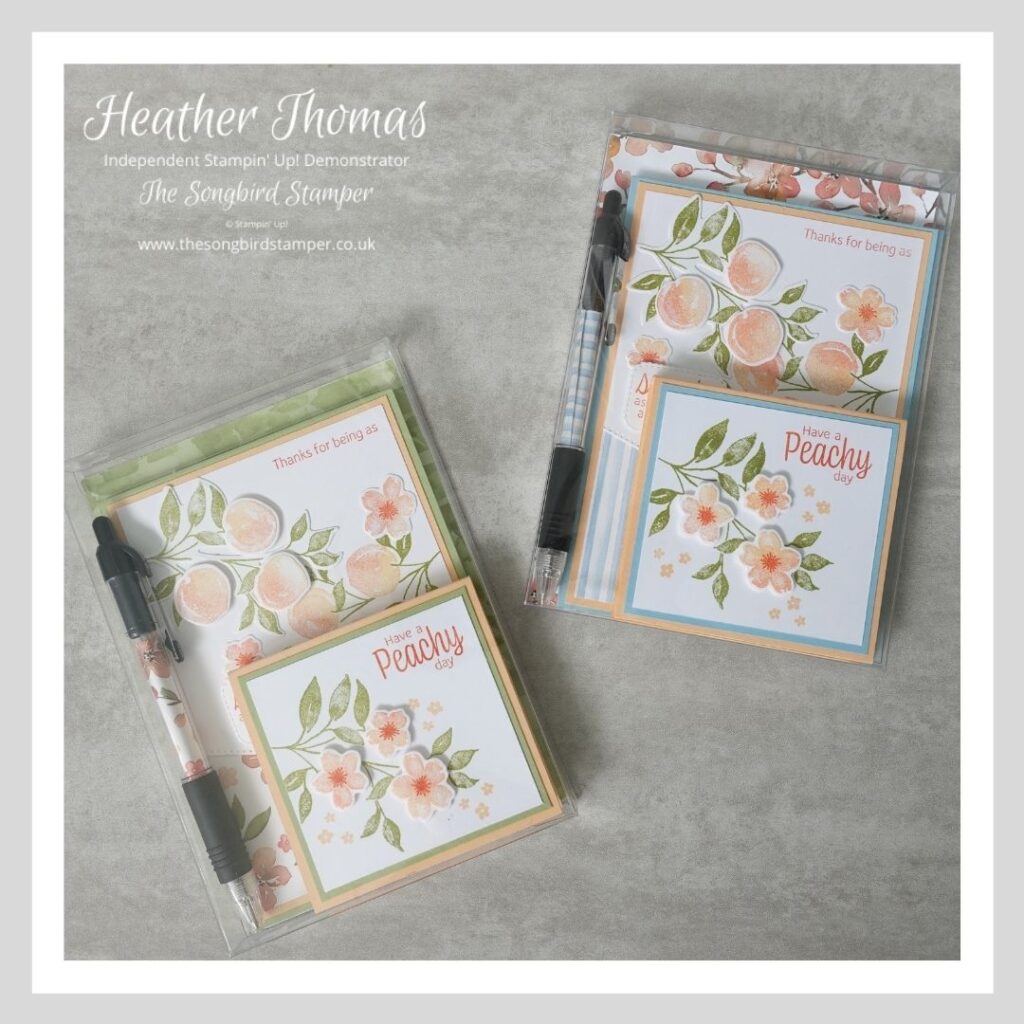
These sets contain a notepad, a set of sticky notes and a pen, all presented in one of the Stampin’ Up! acetate card boxes. I used to sell these sets for about £5 in the craft fairs, but it depends on what your materials cost you really. The sticky notes alone used to be a great seller, and are so quick and easy to make. These also make lovely table gifts or ‘stocking fillers’.
I have used the Stampin’ Up! Sweet as a Peach suite for this project today, I think this bundle is AMAZING value at just £34 for the stamps and the dies. Think how many wonderful creations you could make with this. In fact, the whole suite including the papers and some cute mini jam jars is just £54, and you could get the whole suite for FREE if you sign up and join my team before the end of May.
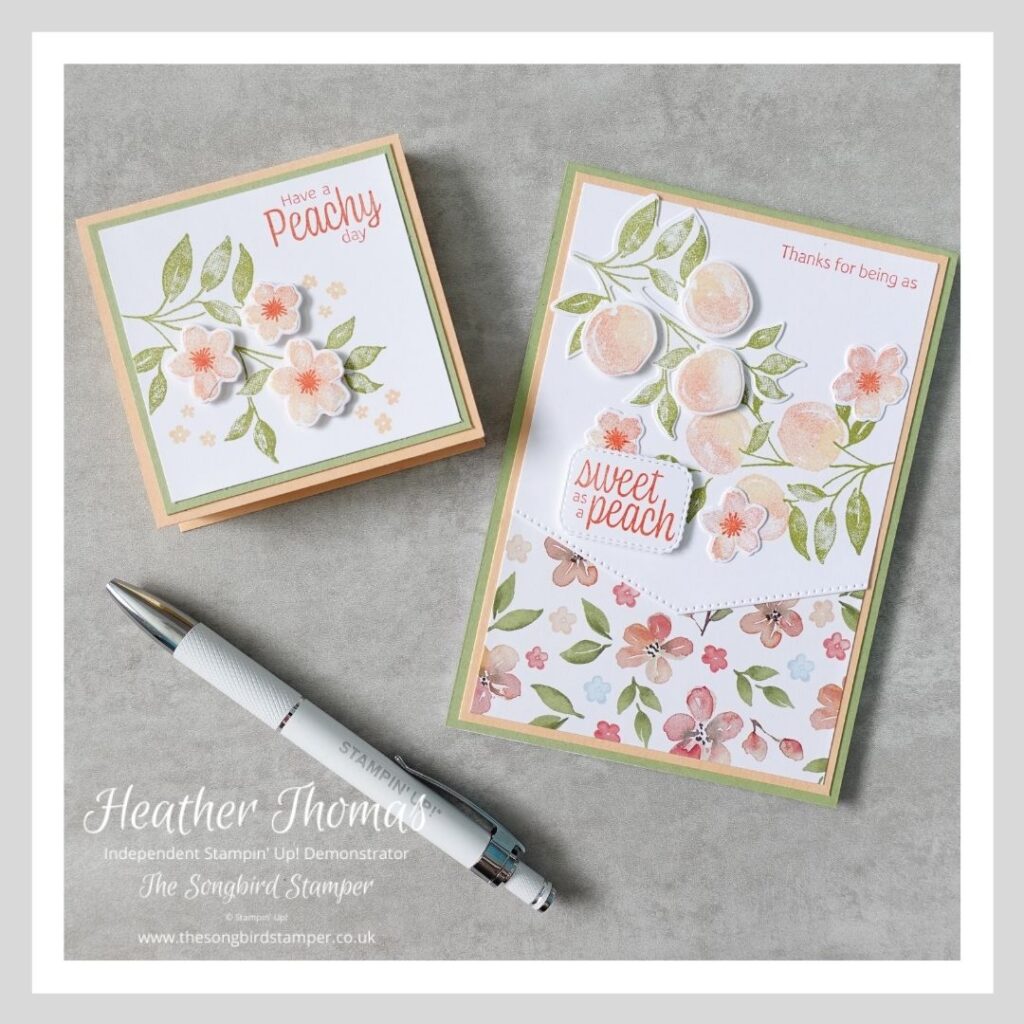
To make the sticky notes ‘book’ you will need a piece of cardstock measuring 6 5/8″ x 3 1/4″. Score this on the long side at 3 1/8″ and 3 1/2″. This is the basic cover for your notes to be stuck in to. For the card mat, cut a piece to 3 1/16″ x 2 15/16″ and for the layer, cut a piece of Basic White cardstock to 2 7/8″ x 2 3/4″. This can then be decorated how you like. I keep mine fairly simple normally.
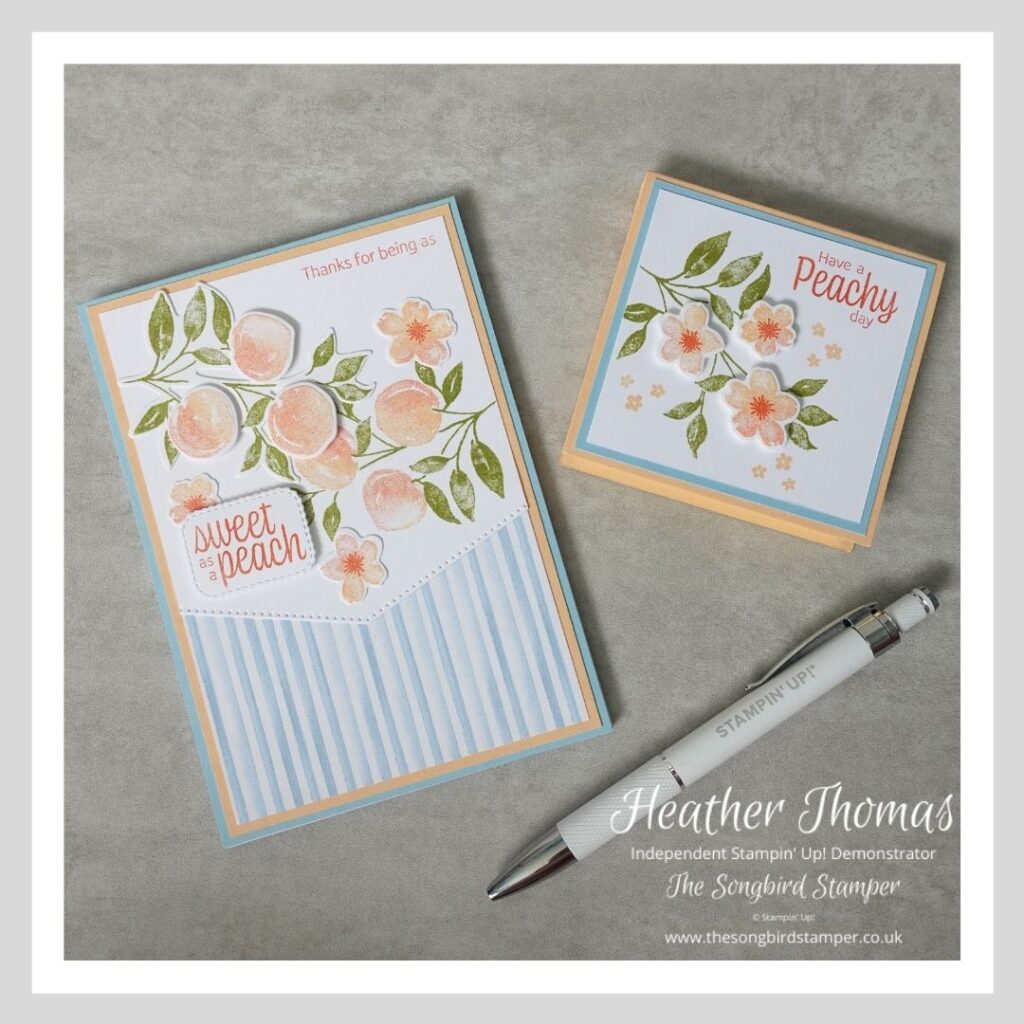
During the Facebook Live I switched up the colours a little, adding some Balmy Blue to the Pear Pizzazz and Pale Papaya that I had used in my first sample I quite like the contrast in colours and the added freshness that the light blue brings.
The notepad is made using a piece of cardstock 10.5cm (or however wide your notebook is!!) by 21cm, approximately. Really you just need to make sure it is long enough to cover the front of the notepad, bend over the top and then have a flap at the back. Score it on the long side at 1 1/4″ and 1 7/16″, although these may need to change depending on how thick your notebook is. Mine was 3/16″ wide, and they were purchased from The Range, here in the UK, you get 4 for a £1.
The coloured card mat is 10cm x 14.5cm. The patterned paper is 9.5cm x 6cm and the white piece is 10.5cm x 9.5cm. To see how I put them all together why not have a watch of my video over on YouTube.
I do hope that you have a go at making a Mini Stationery Set for yourself, or as a gift to give away or sell at craft fairs. They are such lovely little projects and a fabulous way to spend an hour or two. If you would like to purchase any of the products that I have used here today, please do visit my online store where you can get hold of all of your crafty supplies.
Thank you so much for stopping by today, until next time, Happy Stamping
Heather xx
Free PDF and Video Tutorial
Would you like a free PDF and video tutorial for this amazing birthday calendar? Simply sign up to my newsletter to get your copy today!


- Shop with me online – spend over £20 and receive 10% in Stampin’ Rewards – that’s 10% of your order price back to spend on a future order!
- Click Here to come and join our amazing team of Songbird Stampers, a whole new world of fun and friendship (and discounts!!) await you. Want more information? Why not check out all the FAQs over on the Join My Team page
- Why not follow me on Facebook, for live videos, projects and updates – The Songbird Stamper
- Or Subscribe to me on YouTube – The Songbird Stamper
")
 Designer Series Paper")


I love these gifts, thank you for sharing 😃
Thank you so much 🙂
Hi Heather. I love the mini stationery set and can’t wait to try out your tutorial. I was wondering what program did you use to get your name and information on your photographs. I too have been stamping since 2017 and I’m a demonstrator in Winnipeg Manitoba Canada. I have yet to find out how to do what I’m asking so any help you can provide would be greatly appreciated. Thanks in advance, Connie
Hi Connie, Thank you so much! I hope that the tutorial works well for you, and sorry for the delay in getting back to you, I have been taking a couple of weeks off this month. I use Canva to watermark my photographs, but there are lots of programmes out there that you can use. I hope that helps a little. All the best from across the pond!