Sometimes something calls for a handmade card with a little something extra, so I am going to share with you today how to make a greetings card for a special occasion, something to put a little more time and effort into than normal. I wanted to make a card for my Stampin’ Up! team member who promoted to the next title last week. I wanted something to show her how much having her as part of the team meant and to give her the congratulations that she deserved.
If you would like to be part of a lovely group of crafters who celebrate each other’s successes, why not think about joining my team, the Songbird Stampers. We would love to welcome you into the fold. Find out more information and FAQs over on the Join Stampin’ Up! page.
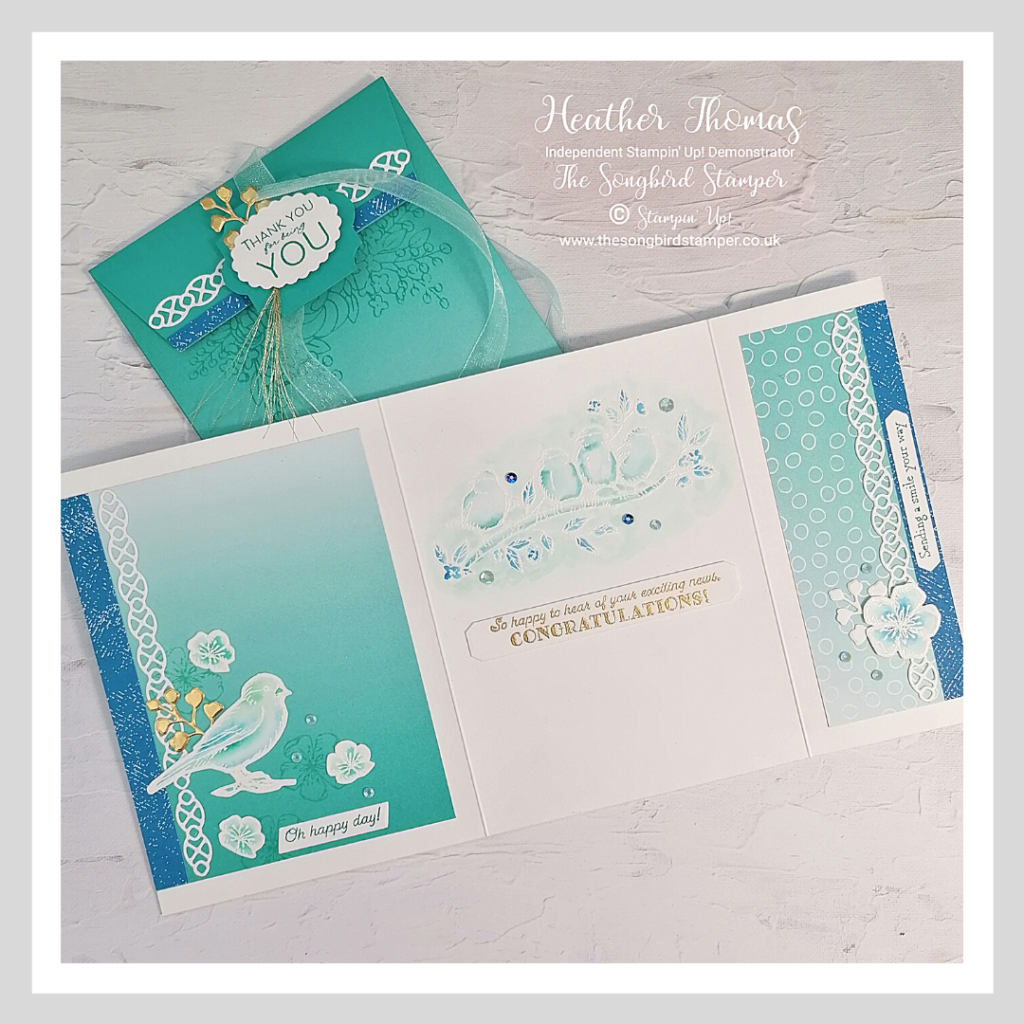
First of all, the shape of this card is a little special, it is 14cm high, just shorter than a standard card, but I cut it to 26cm long, so that I could have an extra fold out flap. It is then scored at 10.5cm and 21cm. This is the inside of the card that you can see, and where I wrote the message.
I wanted to use a lot of elements in this card, and decorate as much of it as I could. I think that makes it that little bit more special. I have used white heat embossing onto watercolour card, which gives quite a clean and simple look while being quite striking I think. A lot of fussy cutting too, because sadly the Free As A Bird set does not come with dies which cut out the shapes!!

Sometimes it can e difficult to know how to make a greetings card for a special occasion, so why not start with the recipients favourite colours. The colours here are Pacific Point, Coastal Cabana and Bermuda Bay. This is the front of the card and again you can see the White heat embossing, the watercolouring and the fussy cutting. The background was created using a stamp, from the Painted Pppies stamp set. It really tied in with the watercoloured effect.
I used a lot of greetings on this card, all of which came from the Many Messages stamp and die set, and the papers are the Oh So Ombre DSP, available now as a Sale-A-Bration item. I really enjoyed picking out the suitable ones and choosing where to put them all, so there was something to be shared at every turn. The added dies are the Nature’s Thoughts dies, some gorgeous accents in there!
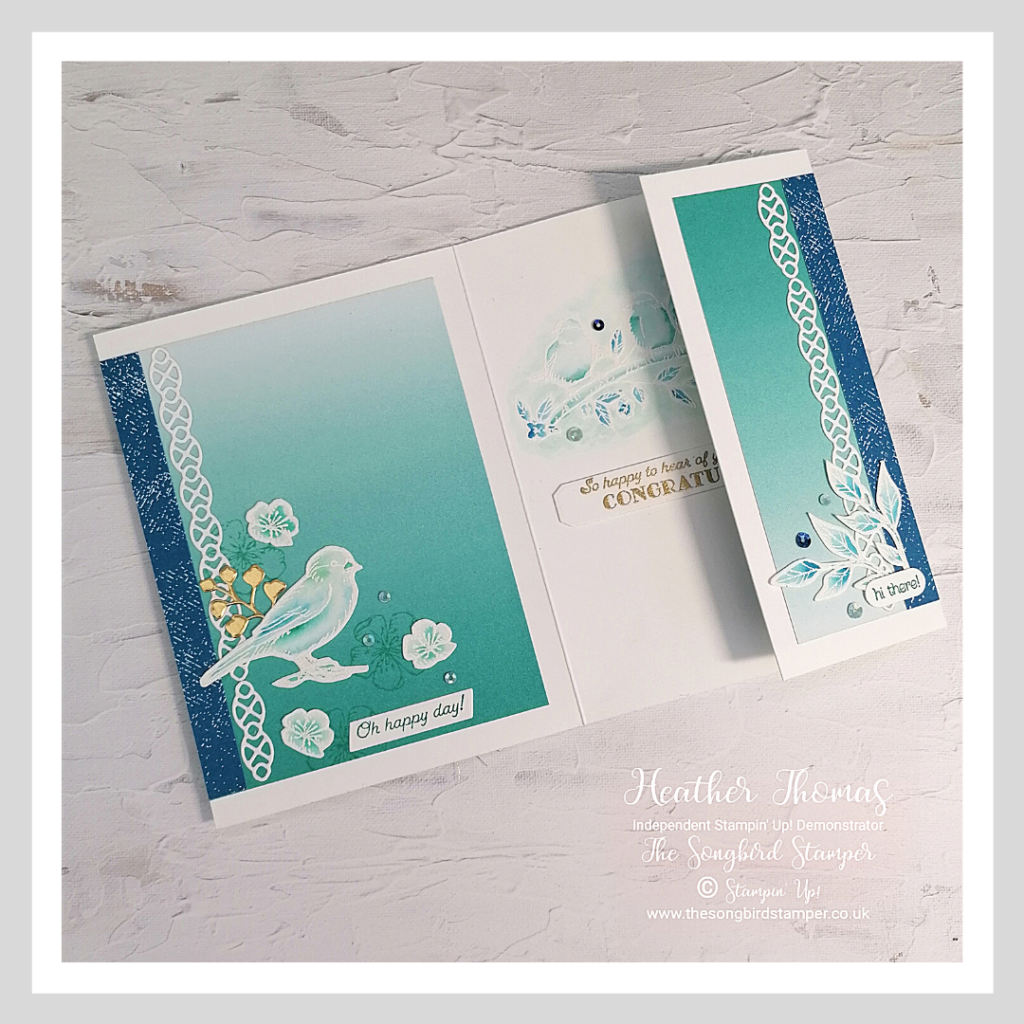
Some die-cutting of borders and strips of paper really add to the interest of this card, and the white and the gold really helped to make this a very special card, with a little help from the Whale of a Time sequins too!
Now, this wouldn’t be a ‘how to make a greeting card for a special occasion’ post if I didn’t share with you how to make a special envelope for it too. This might just be my favourite part of the card!
The measurements of the envelope will depend on the measurements of your card, but here I will tell you how to make an envelope for the dimensions I listed above. First of all, take a piece of DSP (this is the Oh So Ombre DSP again) and cut it to 13cm. Score it at 1cm on three of the four sides. The side you don’t score, will be the top of the envelope.

Take a piece of co-ordinating cardstock (I used Bermuda Bay) and cut it to 14.3cm x 11cm. This will form the back of the envelope. Take another piece of Bermuda Bay cardstock measuring 10.8cm x 5.5cm and score it on the short side at 1cm to create a small flap. This will be the section that folds over to create the closure. Can you see in the photo how I cut at a diagonal on the largest part of this, so that it looks more like an envelope?
To assemble, take the piece of Designer Series Paper and burnish all of the score lines. cut away the two small bottom corner squares and then fold the three sides in, glueing in place on top of the back panel of co-ordinating card. Put some strong tape adhesive on the thin strip of the closure flap and (with the bulky card already in the envelope) slide this into the envelope sticking the flap on the inside. I used magnets to help seal the envelope, and some ribbon to add a little flourish to the outside.
Why not watch the short video where I show how to put all of the components together.

I hope I have shown you a little of how to make a greetings card for a special occasion. Think about adding elements, colours, touches of metallic and of course that all important co-ordinating envelope.
Until next time, Happy Stamping xx
- Shop with me online – spend over £20 and receive 10% in Stampin’ Rewards – that’s 10% of your order price back to spend on a future order!
- Click Here to come and join our amazing team of Songbird Stampers, a whole new world of fun and friendship (and discounts!!) await you. Want more information? Why not check out all the FAQs over on the Join My Team page
- Why not follow me on Facebook, for live videos, projects and updates – The Songbird Stamper
- Or Subscribe to me on YouTube – The Songbird Stamper


 Designer Series Paper")

 Sheer Ribbon")

Beautiful works! Keep doing what you love best! You are unique and very impressing in your work! Love the colours you picked! Different and makes me want to use Pacific Point which is sitting on my shelf! Thanks for sharing!
From Moncton, New Brunswick, Canada
Loving your work Heather xx