I used many a paper trimmer before I found Stampin’ Up! and I must say I get the best cuts with this one, so I wanted to show you today how to make a 3D triangular box using the Stampin’ Up! Paper Trimmer.
I first saw this type of box at the Stampin’ Up! On Stage event in Dortmund in 2019 and as soon as I held it I loved it, it is just so strong and tactile thanks to the triangular shape .
First off, cut the Blackberry Bliss cardstock to 10cm x 21cm and score it on the long side at 10.5cm. One of the things I LOVE about this Stampin’ Up! Paper Trimmer is that you can cut and score using the same tool. It really is brilliant and makes my life so much easier!
See the black knob at the top? That is the cutting blade, and the grey one at the bottom is the scoring ‘blade’. It gives a really good score too, perfect for making 3D projects.

Next, turn the card around by 90 degrees so that the short side is at the top, then line it up at the 5cm mark and, with the scoring blade, just mark the top of the card. You can also use a pencil in between the cutting guide if it is easier to see.
Then, line up the pencil mark at the top of the cutting guide and the half way score line at the bottom, and score between these two points. You need to do this step on all four sides, but why not watch the short video here which will make it all much clearer!
How to make a 3D triangular box using the Stampin’Up! Paper Trimmer
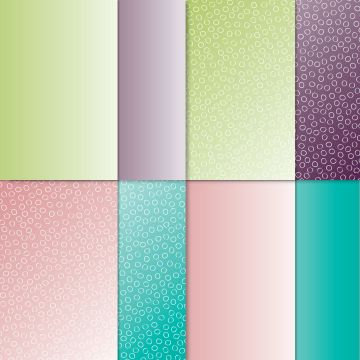
With your card all cut and scored, take two pieces of co-ordinating Designer Series Paper. I have used the new Oh So Ombre paper which can be earnt for FREE during Sale-A-Bration, with a qualifying purchase of £45. There are some lovely designs in this pack, and a whole 48 sheets to play with!
Cut two pieces the same size, 9.5cm x 9.5cm. You need to make a mark at the halfway point, as before, but the easiest way to do this with paper is just to gently fold the paper in half and make a tiny crease at the top. Then, as with the card, line the crease mark up at the top of the cutting guide and the bottom corner of the paper at the bottom of the guide and this time, cut the paper. Repeat for the other side and for the other piece of paper, so that in total you have two large triangles and four small ones.
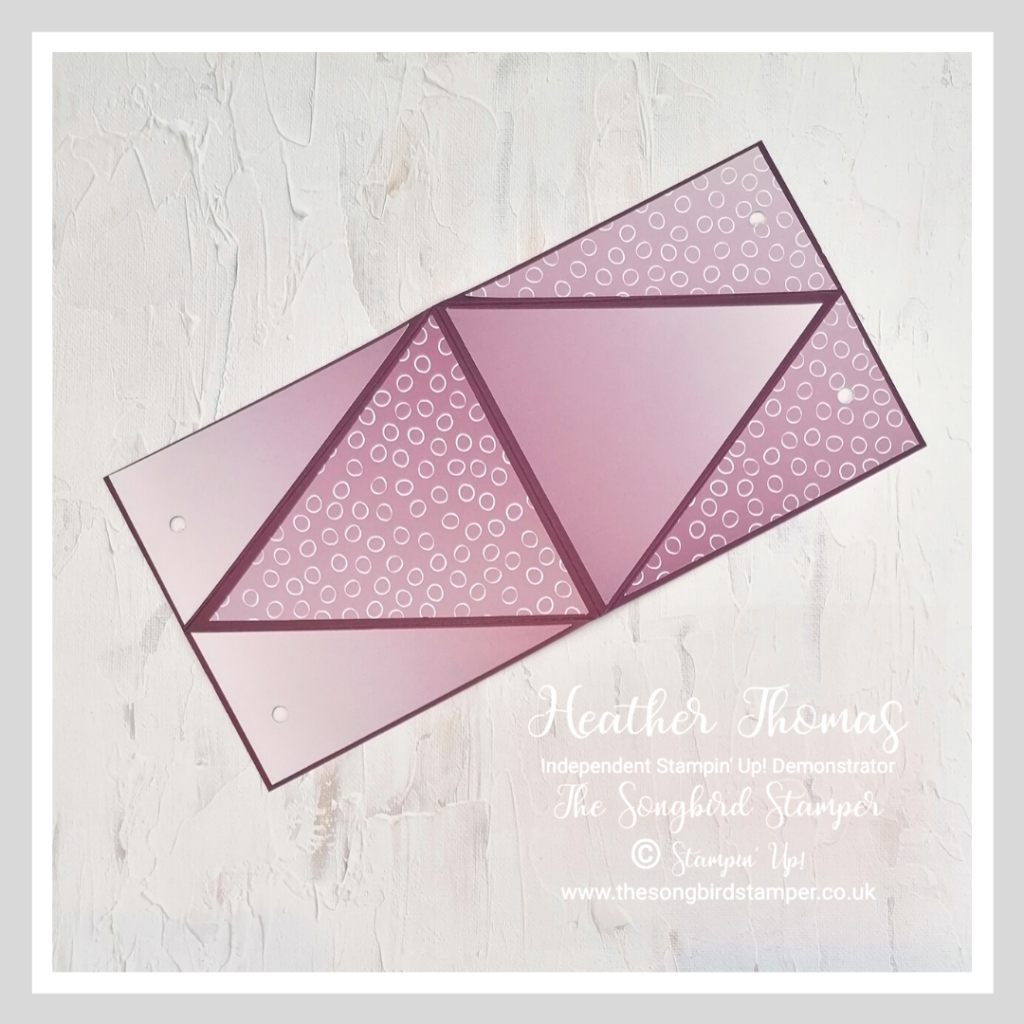
Now, stick the triangles onto the card so that on each side you have the two different designs, this will give your front and sides a different design when the box is fully closed and sealed.
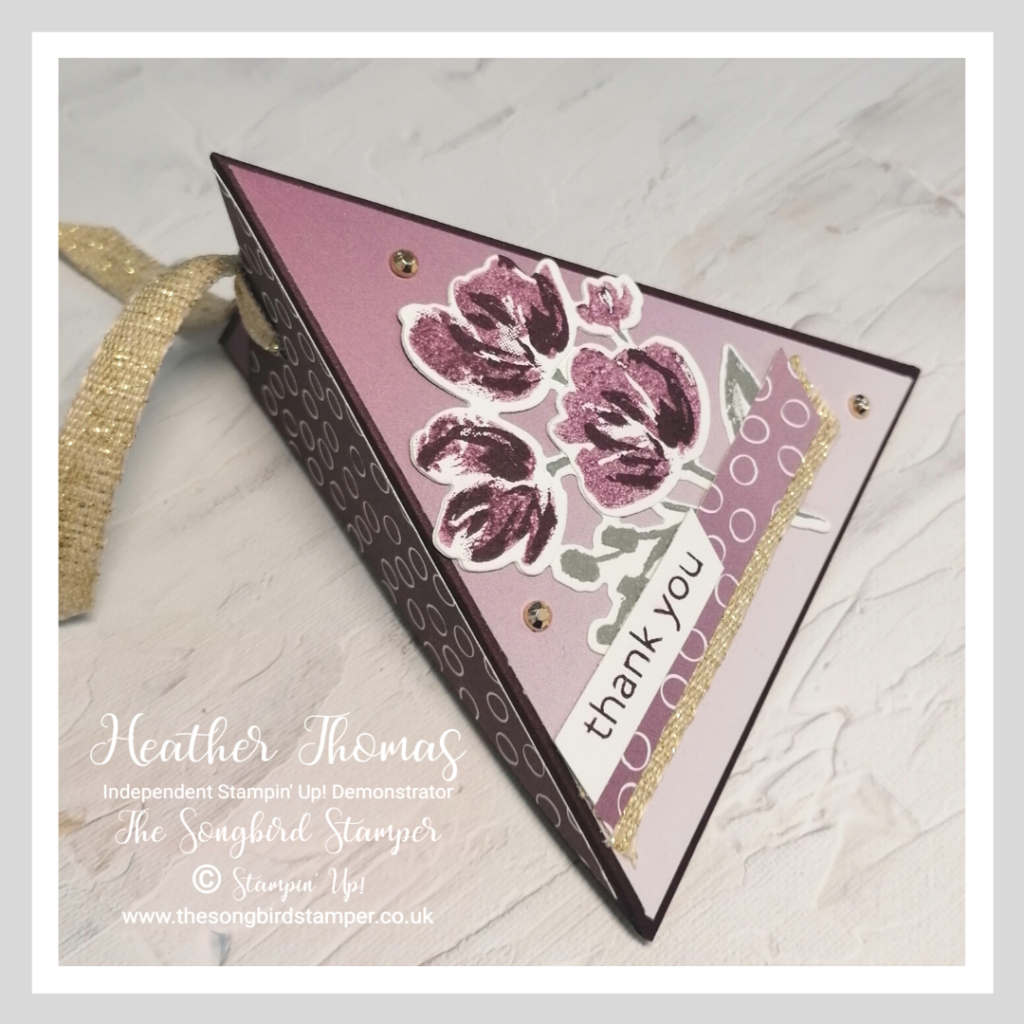
To make the box closure, simply close one half of the box at a time and use a hole punch or a Crop-a-dile to punch a hole through the two sides of the box. This will ensure that your holes line up perfectly. Once you have done one side, do the other, beofre feeding ribbon through and tying in a knot (once you have filled with goodies!!)
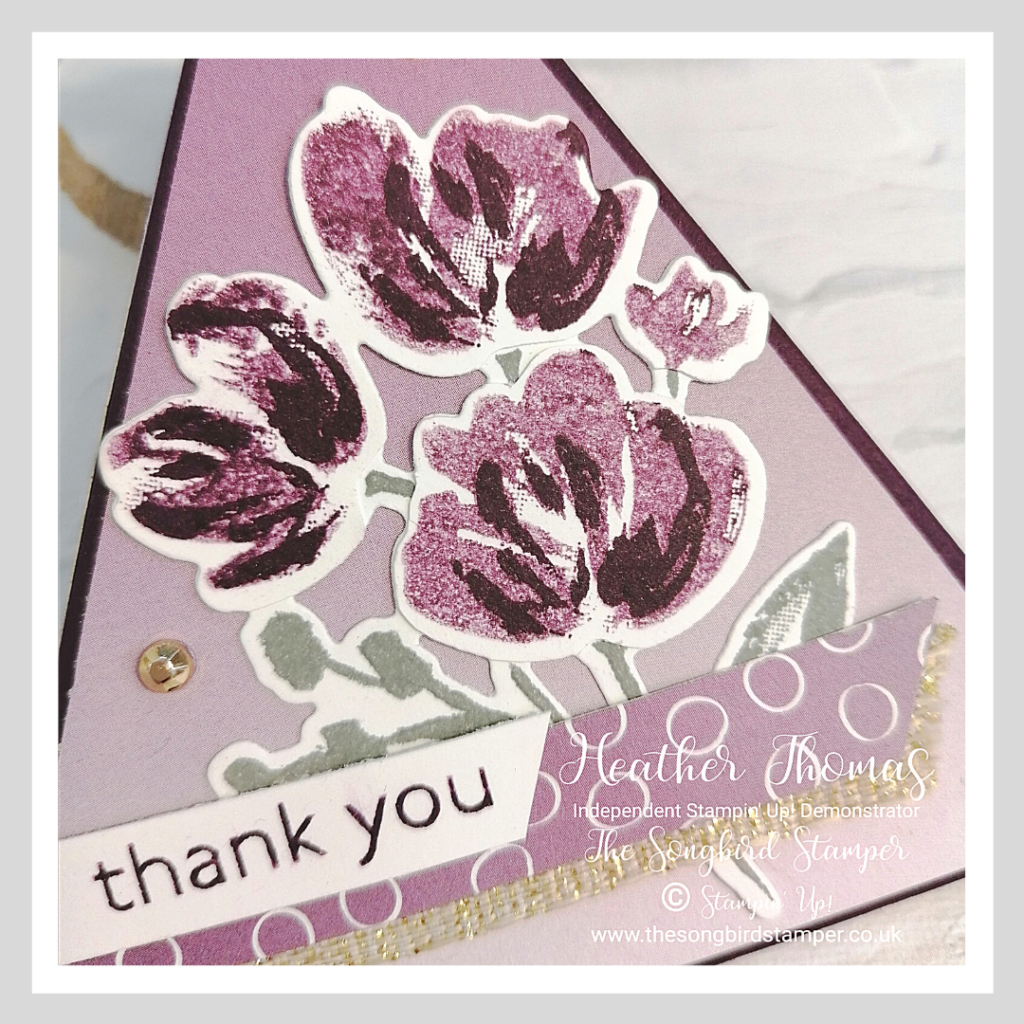
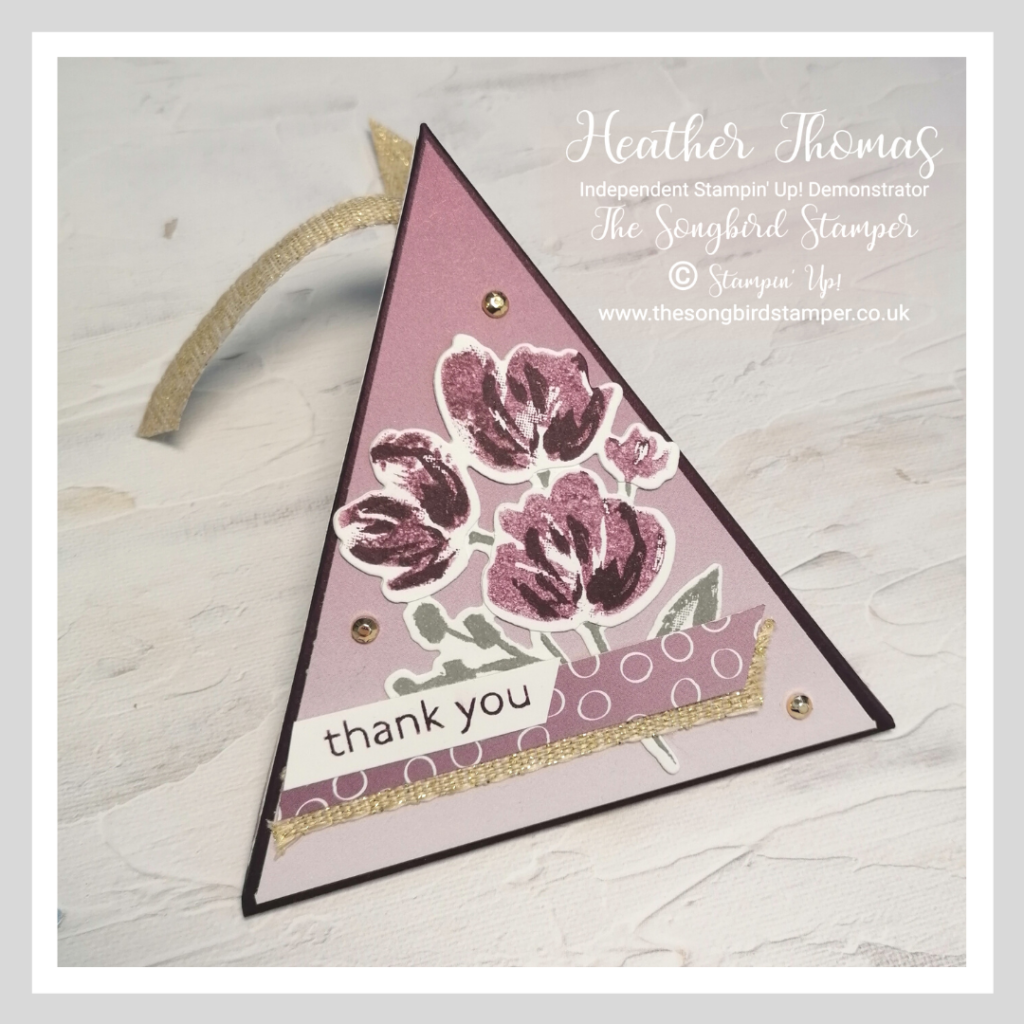
To decorate I have used the Art Gallery stamp set and dies. First of all I stamped one of the small cluster of flowers in Basic Grey and one (stamped off) in Blackberry Bliss. I then used the smaller two step stamp to accent the flowers in full strength Blackberry Bliss, before cutting out the flowers from that one and overlaying them onto the Basic Grey one so that the leaves and stems were still showing.
Next I used a strip of the DSP, some ribbon and a small sentiment to make an accent and finished it off with some Gilded Gems. I hope that you have enjoyed me showing you how to make a 3D triangular box, and I hope I have inspired you to have a go yourself, they really would make a lovely little gift for someone.
Thank you for stopping by today, until next time, Happy Stamping xx
- Shop with me online – spend over £20 and receive 10% in Stampin’ Rewards – that’s 10% of your order price back to spend on a future order!
- Click Here to come and join our amazing team of Songbird Stampers, a whole new world of fun and friendship (and discounts!!) await you. Want more information? Why not check out all the FAQs over on the Join My Team page
- Why not follow me on Facebook, for live videos, projects and updates – The Songbird Stamper
- Or Subscribe to me on YouTube – The Songbird Stamper

 Designer Series Paper")


 Fine Art Ribbon")