Well it is that time of year again, as we approach June and the launch of the new catalogue, that I look at my paper stash and realise that I really should use up some of these pretty papers! I bought the Perennial Essence papers when they first came out, because they just look so pretty, but for some reason I haven’t really used them. I think they were waiting for the right project, and this flower wreath is definitely it.
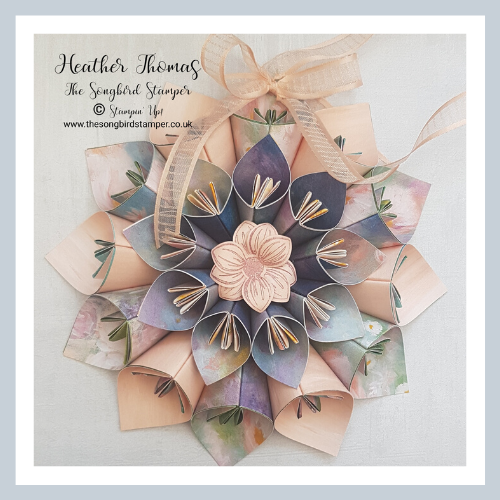
To make the wreath, you will need 12 pieces of paper measuring 15cm x 15cm to make the outer circle and 9 pieces measuring 10cm x 10cm to make the inner circle. Because I needed 3 sheets of 12″ for the outer circle, I actually used two different types as you can see here, and used 1 and a half sheets of each. You can make the inner circle out of just 1 sheet of 12″ x 12″ paper which is just perfect.
Each cone is made separately, and whilst it might look liked a daunting task to fold all of these, it really is fairly quick when you get going. I have made a short video showing you how to do the folds for the petals of the flower wreath, so please do watch. It ends abruptly I am afraid, the filming stopped without me realising!
I hope you can see enough of how to assemble it, but basically just glue down a side of each ‘petal’ and glue it in place next to the other one, making sure that the middle points and the top edges line up. Keep going until all of your outer circle is stuck together. To assemble the inner section, simply take one of the smaller petals and choose where to start. Put some adhesive on the back and glue it in place, again lining up the point to the centre of your flower. Then keep working round in a circle as before.
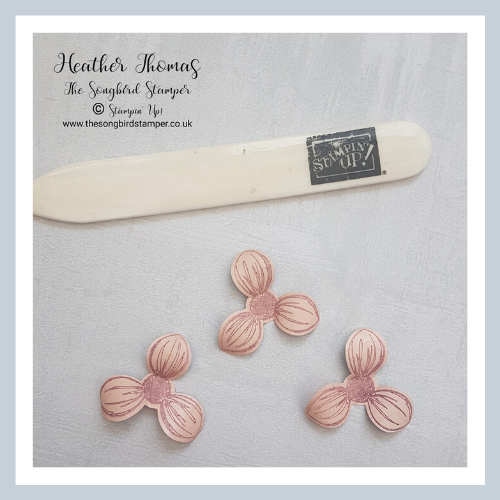
Once you have the main flower put together, punch a hole in one of the petals and loop some ribbon through, so that you can hang your piece up. Alternatively you could lay it flat as a table centre. To make the middle flower, I stamped the three ‘petalled’ flower from the Floral Essence stamp set and stamped in Blackberry Bliss ink three times, punching each out with the co-ordinating Perennial Flower punch. I used my bone folder to gently curl each of the petals before sticking them together to make a single flower.
To stick the small flower into the centre of the main flower wreath I used 15 dimensionals, all stuck on one top of the other. They are super sticky so they will hold fast and give enough height for the flower to fit in the middle. I finished the project off by using a glue dot to stick a lovely bow where the hole I punched earlier was, to add a little ‘je ne sais quoi’.
I hope you enjoy this project, it really is a fabulous way to use up those retiring papers, or to be able to look at those papers that we admire the most. Better to have them hanging on display than in a drawer somewhere. This paper is actually on offer at the moment, while stocks last, and is down from £10.75 to £8.60 – a bargain for 12 double sided sheets of 12″ x 12″ papers. As always, the links below will take you straight to the online shop where you can browse the products at your leisure.
Have a lovely weekend, take care, stay safe and Happy Crafting,
Heather xx
- Shop with me online – spend over £20 and receive 10% in Stampin’ Rewards – that’s 10% of your order price back to spend on a future order!
- Click Here to come and join our amazing team of Songbird Stampers, a whole new world of fun and friendship (and discounts!!) await you. Want more information? Why not check out all the FAQs over on the Join My Team page
- Why not follow me on Facebook, for live videos, projects and updates – The Songbird Stamper
- Or Subscribe to me on YouTube – The Songbird Stamper


That’s one of the prettiest 3D projects I’ve seen. Just beautiful, thank you for sharing.
Absolutely amazing project. Thanks for sharing the “ how to”.