Our theme this month for the Stamptastic Friends blog hop is favourite colouring techniques, and I really wanted to share with you all how to colour fur with alcohol markers, especially because we have an amazing new stamp set out called Fluffiest Friends!
The Stamptastic Friends are a lovely bunch of Independent Stampin’ Up! Demonstrators from around the world who come together every month to share lots of crafty ideas with you – be sure to check out the links for the hop at the end of this post.
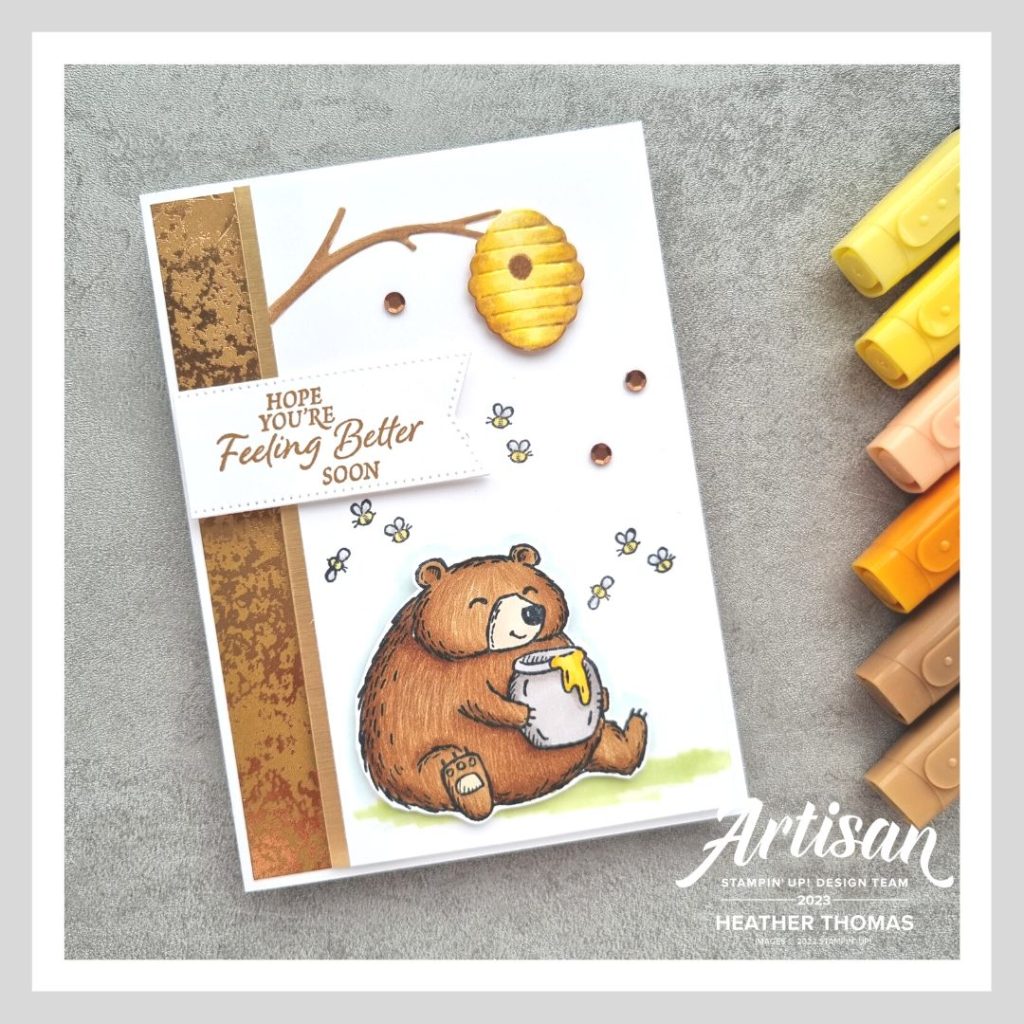
I just love love love the cute critters in this new stamp set, and felt that it was the perfect time to talk a little bit about how to colour fur using alcohol markers. This is something I teach on my alcohol marker course, and it always go well with those who attend.
Firstly, I always colour the animal just as I would normally, using the dark marker (Pecan Pie in this case) in the shaded areas and light marker in the areas that would have more light hitting them. Once the animal is coloured normally, it is time to start bringing it to life. There’s nothing wrong with a flat colour, but it can look just that, a little flat.
Firstly, I bring in the colour lifter, and holding the pen as upright as possible, I start to make small flicking motions, in the direction the fur would be, about 8mm long. I do this all over the animal, creating some lighter ‘strands’ of fur.
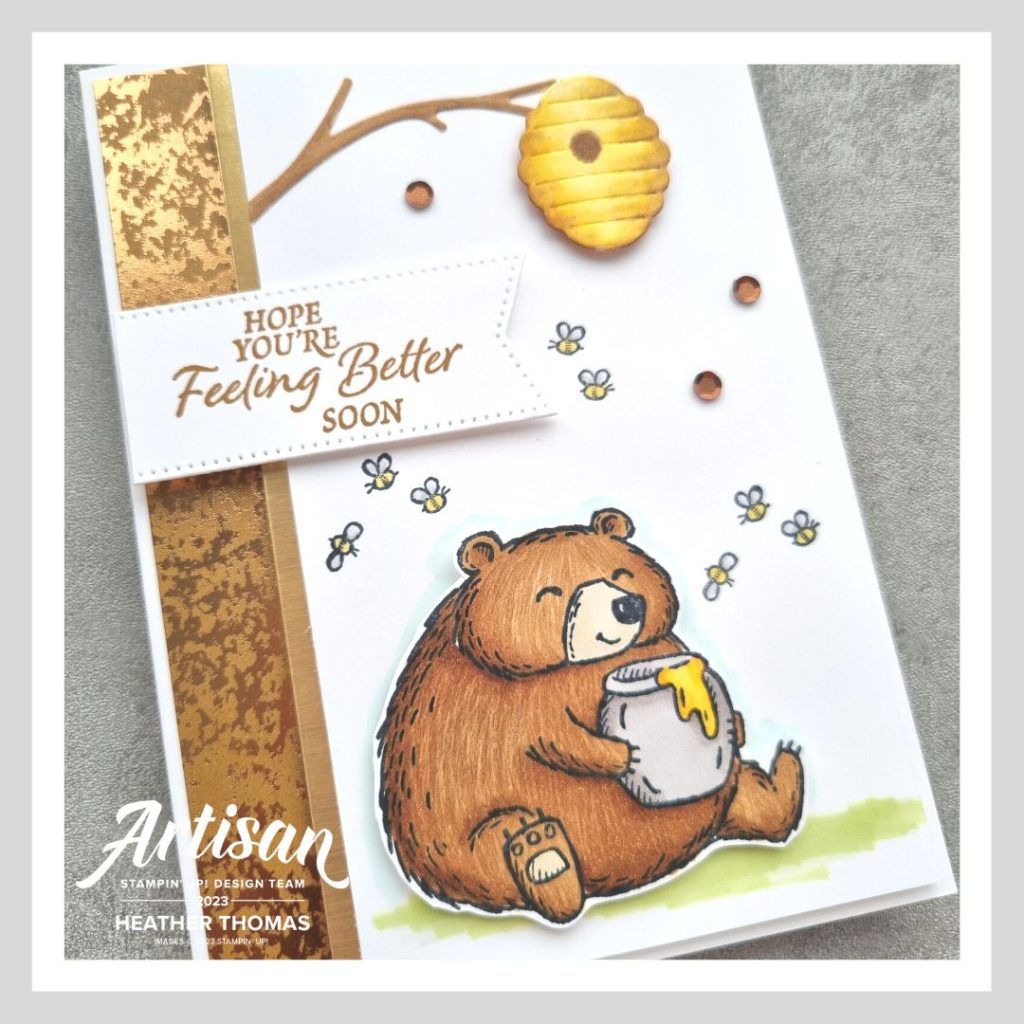
Once I have covered the whole animal with this technique, I bring back in the light marker, and go all over again, creating short flicking motions in the direction of the fur. It can feel (and look) a bit odd at this point, but just keep going, as it will all come together in the end! Then I take the dark marker and repeat the action, but only in the areas where we initially put the darker colour. Don’t stray into the lighter areas.
Then finally, I bring back the Colour Lifter for a final round of creating those flicking marks. This should help to tie everything together and ‘blend’ the darker and lighter areas together. If after you have done this, it all feels or looks a bit odd still, I would suggest repeating the process. There is no rule for how many times you can keep going over your animal, just keep working until you are happy.

And that is how to colour fur with alcohol markers! Then it is just a case of creating your final card with your special coloured piece. I’ve used the co-ordinating dies here and love how the beehive looks coloured with alcohol markers too!
Thank you so much for stopping by today, and if you are interested in learning more colouring techniques, why not hop around the rest of the team’s posts using the links below. Until next time, Happy Stamping!
- Shop with me online – spend over £20 and receive 10% in Stampin’ Rewards – that’s 10% of your order price back to spend on a future order!
- Click Here to come and join our amazing team of Songbird Stampers, a whole new world of fun and friendship (and discounts!!) await you. Want more information? Why not check out all the FAQs over on the Join My Team page
- Why not follow me on Facebook, for live videos, projects and updates – The Songbird Stamper
- Or Subscribe to me on YouTube – The Songbird Stamper
Love the coloring technique. I am going to give it a try Thanks
Ahhh, thank you so much, I hope you have fun coloring, it always makes me happy!