So, I may have gone a little rogue today, as the theme for this month’s hop is actually ‘fancy fold’ cards, but I had an idea in my head that wouldn’t go away, so I decided to share how to make a pull tab card instead. It’s kind of like a fancy-fold, right?

The Creativity Abounds Blog Hop Team are a team of global demonstrators who come together twice a month to share the very best of Stampin’ Up! with you all, once to create tutorials and once to share our inspiration in blog hops like this one.
I must say that I am definitely not a fan of fancy folds, or fun folds. I really struggle to get motivated by them, which is strange, because I love designing 3D projects – so this month has been a bit of a challenge for me!
That said, I hope that you like my card using the new ‘On the Ocean’ bundle, and that this quick ‘how to make a pull tab card’ post will inspire you to have a go at making one for yourself.

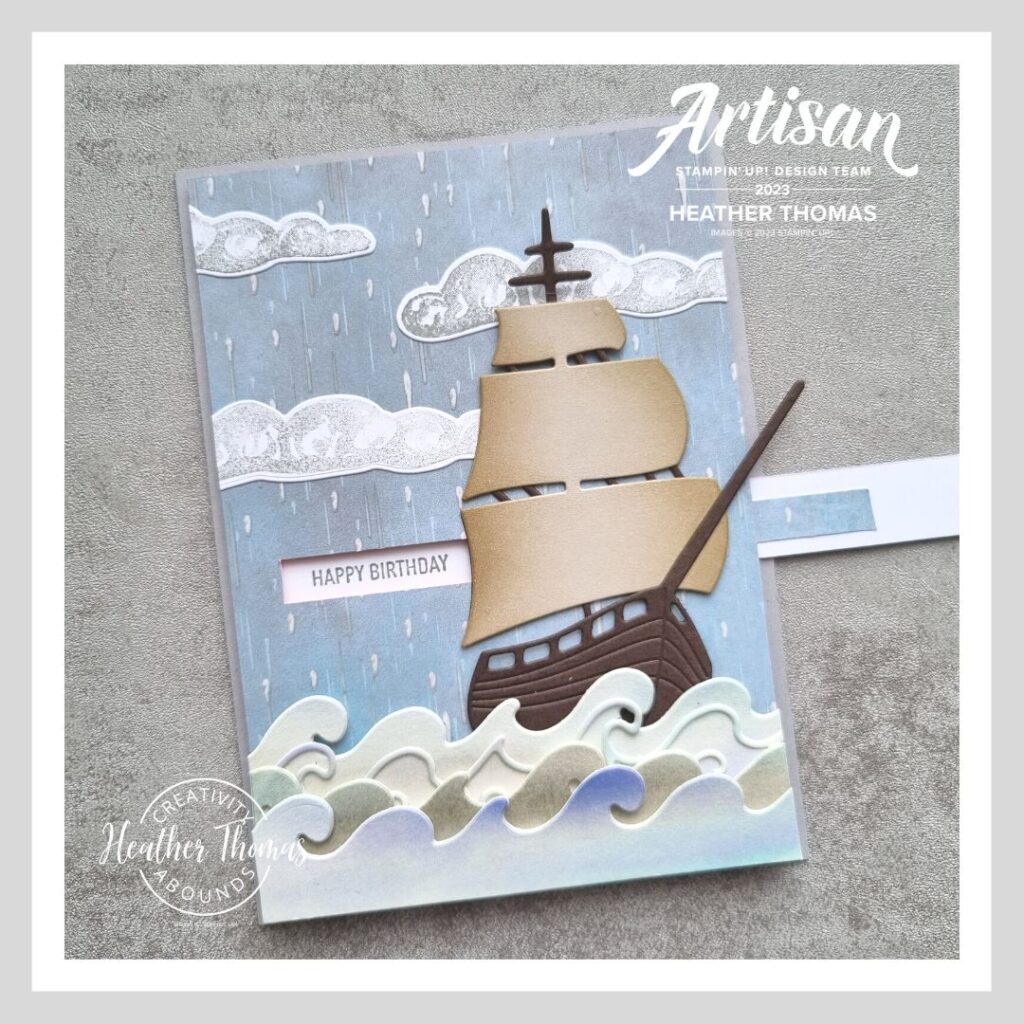
To make the card, I simply started with a standard sized card base in Smoky Slate, and then cut a standard size mat from some of the gorgeous Rain or Shine Designer Series Paper. I knew as soon as I saw this sheet in the paper pack that it would work well with the stormy seas from the dies in this lovely bundle, and reminded me of my time on the ocean.
Next up, I watercoloured some Fluid 100 watercolour cardstock with Night of Navy, Balmy Blue and Smoky Slate ink, and then die cut several of the waves dies out of this. I placed them down on my card, but did not adhere them yet.
Next up, I used the dies to build a ship, with Early Espresso for the hull and Sahara Sand for the sails. To add some depth I sponged some Crumb Cake ink onto the edges of the sails. Love how that turned out!
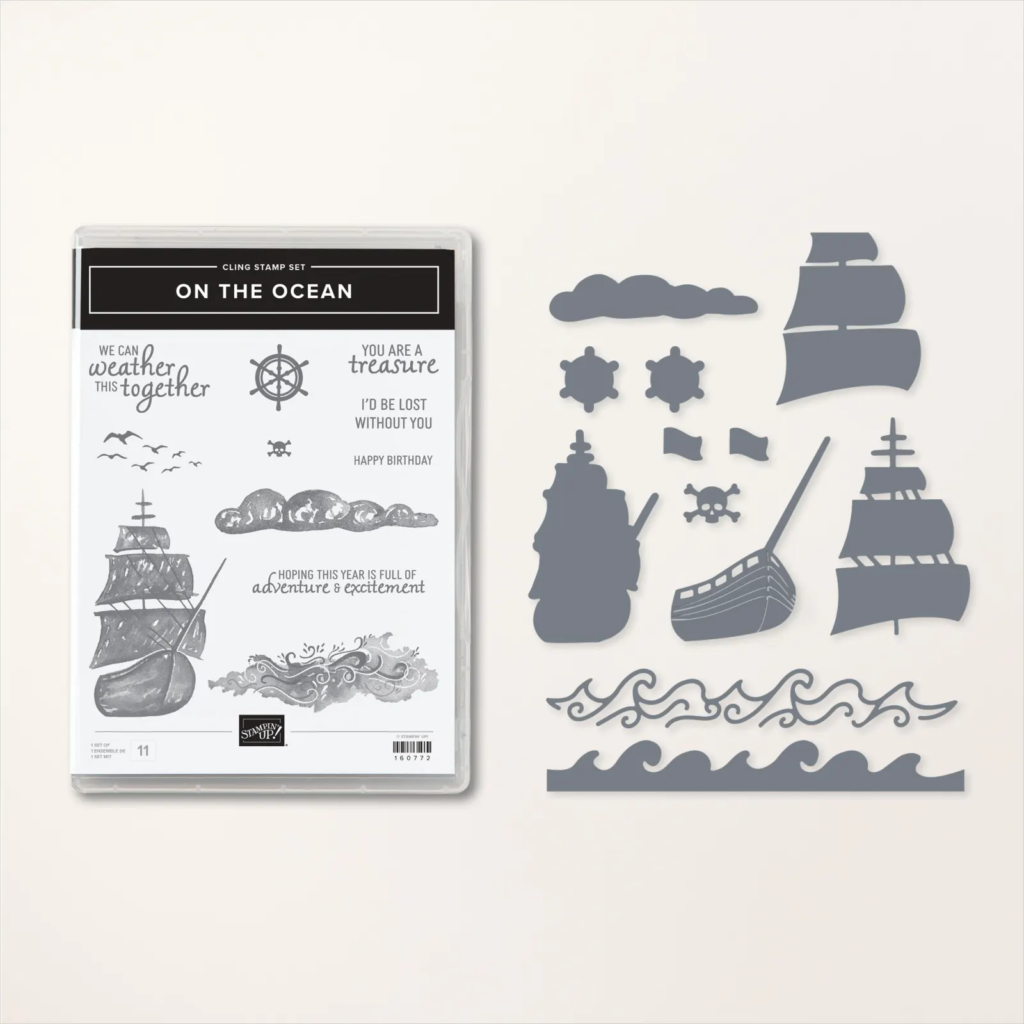
The clouds are stamped in Smoky Slate and die cut, and again, everything was just laid out on the card to get the right placement before I started to make the card properly.
Once I was happy with where everything was going to be, I made a mark on my Designer Series Paper underneath that bottom sail. Then I removed all of the elements and cut a long slit, around my pencil mark, measuring 7mm x 7.5cm. (1/4″ x 3″). Save the piece of paper you remove!
Cut a piece of Basic White Cardstock just slightly smaller than the Designer Series Paper, and line that up underneath it. On the left hand side of the slit, on the Basic White Cardstock, I stamped the greeting Happy Birthday. It fits just perfectly!
Once you have stamped the greeting, layer the Designer Series Paper onto the Basic White layer using dimensionals, making sure to line up that sentiment through the ‘window’, and making sure that you don’t put any dimensionals on the right hand side of the slit, as you need to slide the pull tab in and out.
The next step is to take a strip of white card measuring 10cm x 1.5cm (4″ x 1/2″) and slide it in between the DSP and the white card, keeping it straight and horizontal. Once in position, stick the cut out piece of DSP onto this, lining it up with the window. This just means that when the pull tab is full in, the white card doesn’t show through.
Now, with it exactly in position, add some mini dimensionals to the left hand edge of it, through the window and only under where the sail will be. Then stick the boat down.
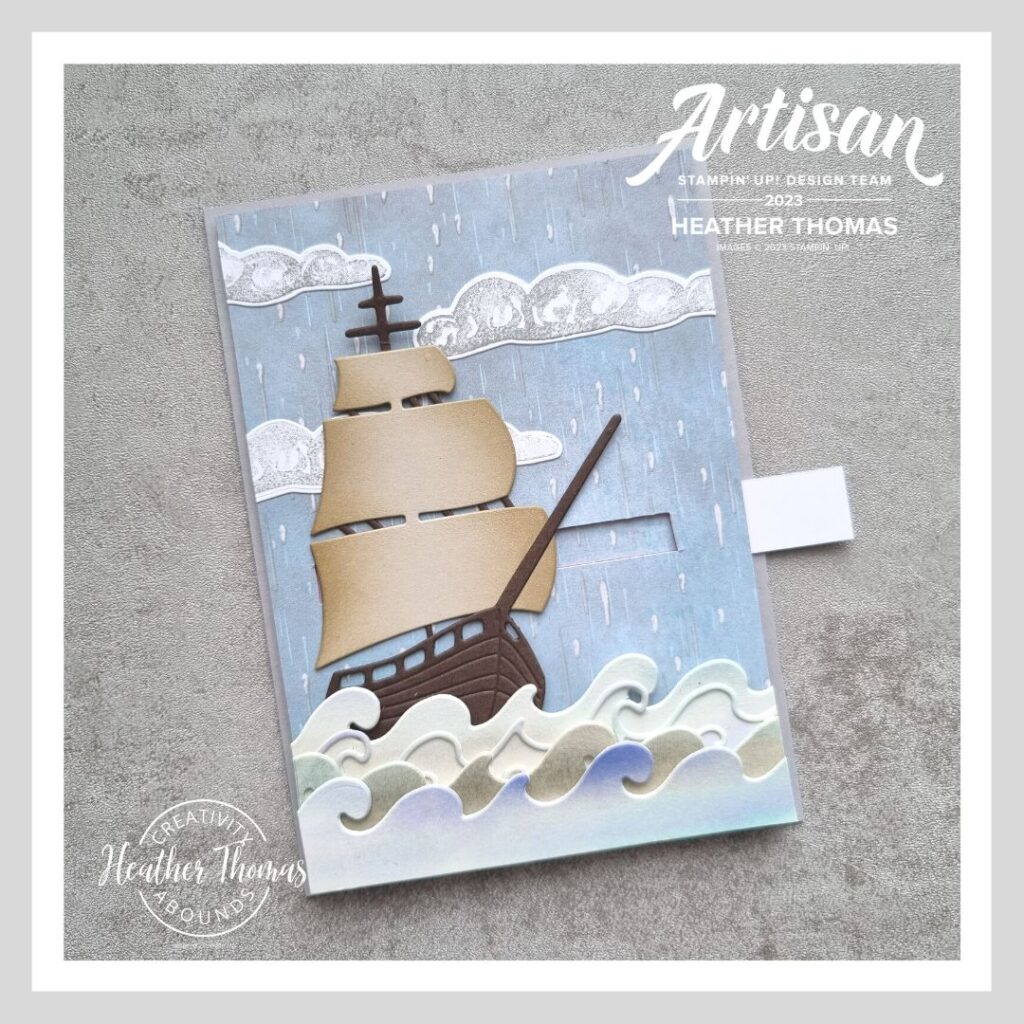
Now all you need to do is stick the clouds down and add the sea, making sure to use dimensionals on at least the first layer, so the boat will run free.
I hope that this ‘how to make a pull tab card’ tutorial is good enough for you to understand – I think trying to explain things like this in written text is one reason I am not a fan of Fancy Fold cards, lol, it’s so hard! If you would like more inspiration, please do have a hop around the rest of the team’s blogs, I am sure there will be some delights in store!
Until next time, Happy Stamping! xx
- Shop with me online – spend over £20 and receive 10% in Stampin’ Rewards – that’s 10% of your order price back to spend on a future order!
- Click Here to come and join our amazing team of Songbird Stampers, a whole new world of fun and friendship (and discounts!!) await you. Want more information? Why not check out all the FAQs over on the Join My Team page
- Why not follow me on Facebook, for live videos, projects and updates – The Songbird Stamper
- Or Subscribe to me on YouTube – The Songbird Stamper
Stampin’ Blends Course

Bookings are now open for my next Stampin’ Blends Course, starting on Sunday 5th February 2023, with four zoom classes running over several months (to give you plenty of time to practice in between). All of the classes are recorded into a Private Facebook Group too, so you can watch and rewatch as many times as you like. The course also includes a 17 page written course guide, with accompanying worksheets.
There are two options for this course, a product based option (available UK only) and an online only option (available WORLDWIDE). The online only version is £70 and the product based version is £180 – for which you get access to the whole course, the course guide, £180 worth of product (4 stamp sets and 21 Stampin’ Blends) Sale-A-Bration goodies and free postage too.

Because you also get your choice of 4 level one Sale-A-Bration items, this option is a real bargain if you love Stampin’ Up! products, and as always you are free to swap out for other product of your choice.
If you would like to learn all my tips, tricks and techniques, please do visit this page to sign up or register your interest today!
Amazing card Heather
I love your card Heather!
Great card! I love the pull tab!
Stunning Card!
Fantastic card! Love it and those waves and spectacular!
Wow Heather This is an amazing card. I am going to have to give this a try