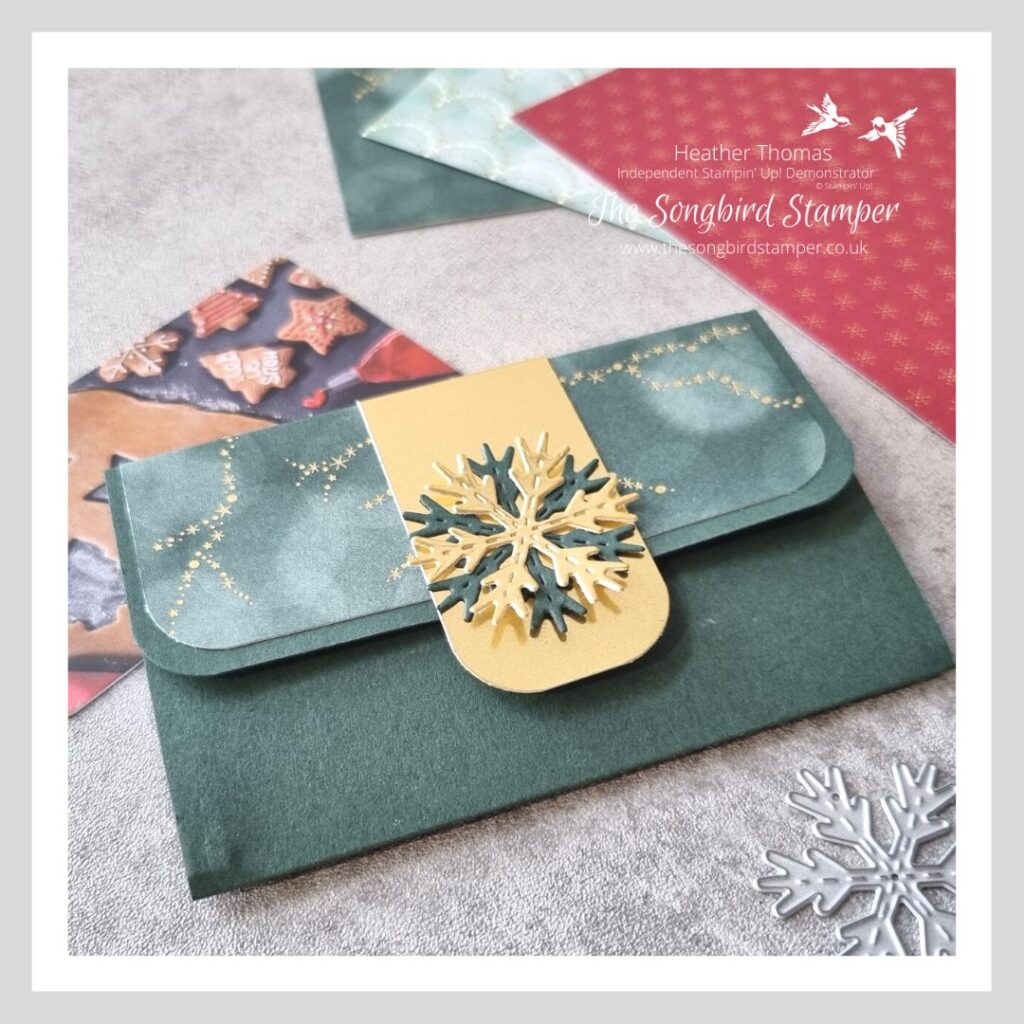
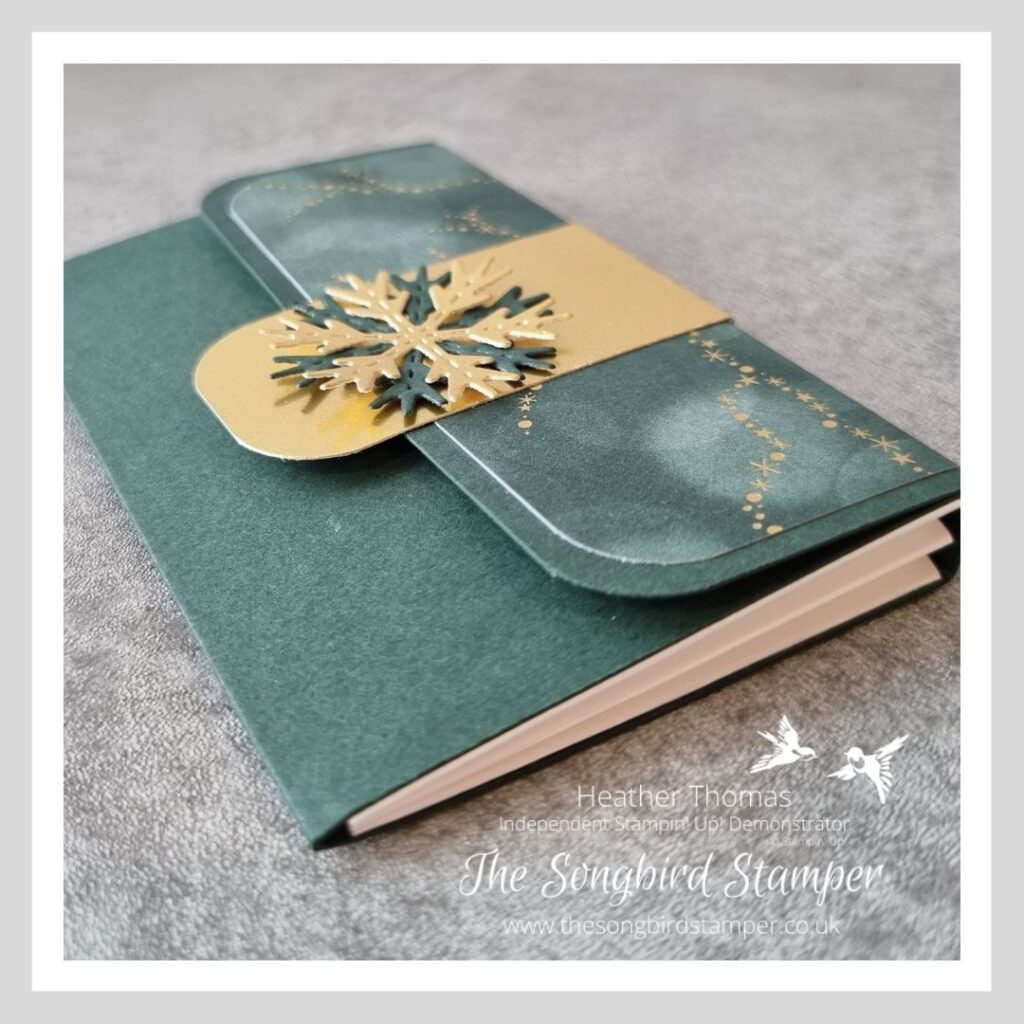
Hello and welcome to the Creativity Abound Blog Hop where today I want to show you how to make a magnetic gift card holder. Our theme this month is Christmas gift packaging, so I might be a little off piste here, but all our nieces want these days is money or gift cards, so it’s nice to be able to decorate these up a bit.

The Creativity Abound Blog Hop Team are a group of demonstrators from all around the world who want to share our love of all things stamp, ink and paper with you.
You can make two of these gift card holders from a single sheet of A4 cardstock, so it’s quite economical on card too, always a bonus in my book!
I’ve used the stunning Lights Aglow Designer Series Paper for this project, and an Evening Evergreen cardstock – the only thing I will say is this might not be the right design for the girls, lol.
To start, you will need a sheet of cardstock measuring 10.5cm x 18cm (4 1/4″ x 7″) and a piece of paper measuring 11cm x 10cm (4″ x 4 1/4″). Round the corners of the DSP on the corners of the shorter side, and of the card on the corners of the single flap. I hope that makes sense! Then stick the DSP onto the card so the rounded corners are together.
Score it on the long side at 6.5cm, 13cm and 14cm (2 1/2″, 5″ and 5 1/2″), and this will create the body of your magnetic gift card holder.
To make the concertina sides, take two pieces of Basic White cardstock measuring 6cm x 3cm (2 1/4″ x 1 1/2″) and score on the short side at 1/2cm intervals (1/4″). Glue the outer edges of each of these concertinas and glue to the sides of the gift card holder. This will create a kind of folder effect.
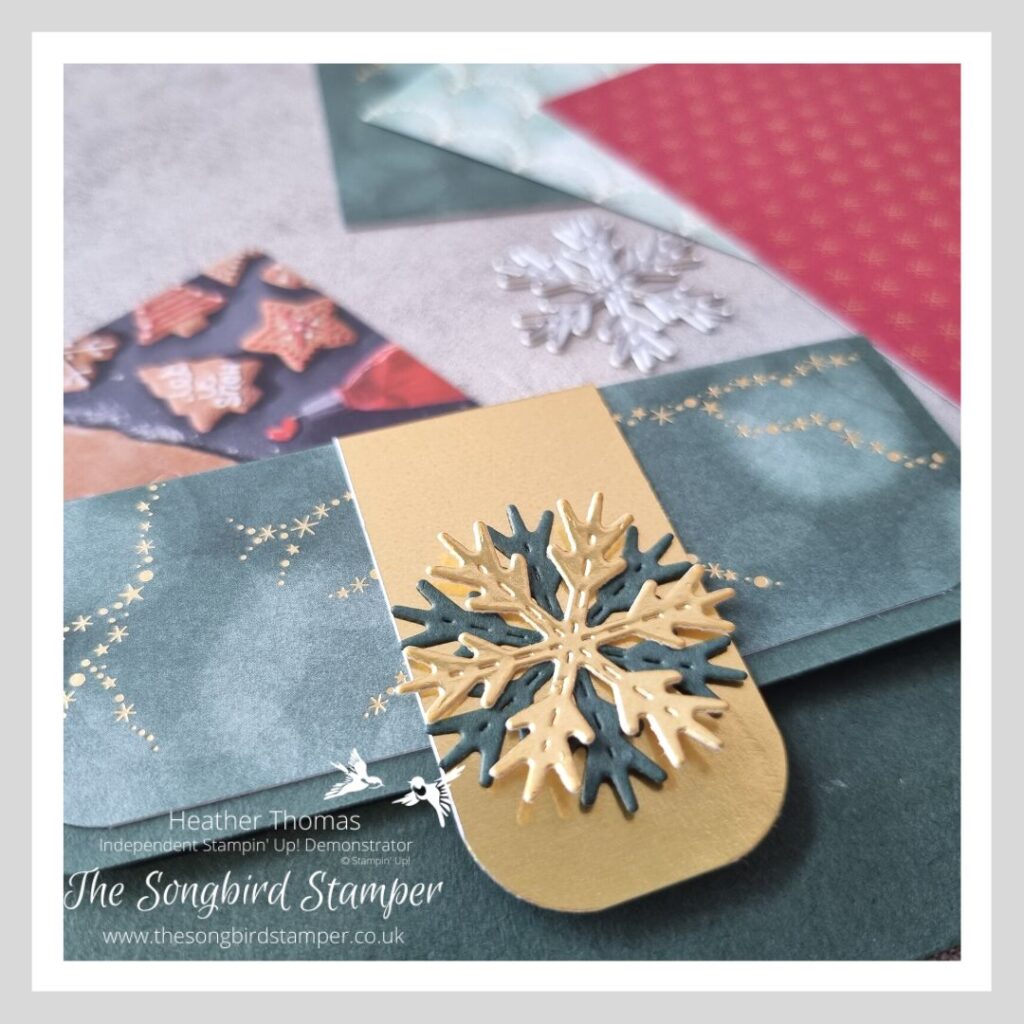
The Gold Foil band is 3cm x 10.5cm (4 1/4″ x 1 1/2″) and is scored at 5.5cm and 6.6cm (2 1/4″ and just over 2 3/4″) Bend this round the top flap of the holder and glue in place on the back, top and front flap. It should overhang as you can see in the photo above – this is where the magnetic part of the magnetic gift card holder comes in.
Take two magnets and with them stuck together put a glue dot on each side of the pair – then just stick this to the middle of the overhanging bit and then press it down to stick the tab to the bottom section.
All that’s left to do is to die cut two snowflakes from the Celebrate with Tags dies set in Evening Evergreen and Gold Foil. Simples!
I think that’s all from me for today, I hope you have a go at making a magnetic gift card holder, but first, please do hop around the rest of the team and see what amazing projects they have in store for you.
Until next time, Happy Stamping xx
- Shop with me online – spend over £20 and receive 10% in Stampin’ Rewards – that’s 10% of your order price back to spend on a future order!
- Click Here to come and join our amazing team of Songbird Stampers, a whole new world of fun and friendship (and discounts!!) await you. Want more information? Why not check out all the FAQs over on the Join My Team page
- Why not follow me on Facebook, for live videos, projects and updates – The Songbird Stamper
- Or Subscribe to me on YouTube – The Songbird Stamper


 Specialty Designer Series Paper")

")
Join Our Team
If you’ve ever felt like you want more crafty friends, or felt like you want to take part in more fun events with other crafters, or felt like you want to get a nice little discount on your craft supplies, then why not think about joining our team? When you join Stampin’ Up! a whole new world opens up to you, a world I wouldn’t be without personally.

I’ve got a whole page of this website dedicated to answering some of those common questions like ‘Do I need to run events?’ (NO!!) and ‘What benefits are there to joining’ (LOADS! – Think discounts and community as well as early access to products and special events) Why not visit my Join My Team page to see if your questions are answered there, and come and have some fun with us!


Here’s a couple of photos of us having a brilliant time together – we regularly get to craft and socialise as a group and in my mind nothing could be better than that!
Well, ok, only one thing is better than that, FREE craft supplies! During January and February of 2025 we have an amazing promotion running where you can get your hands on £220 worth of craft goodies for just £99. Check out the video below to see more about this offer!
You get to choose £130 of product of your choice and then get a free stamp set and your choice of two packs of the Stampin’ Write Markers also totally free. They retail at £35 a pack so that’s a great saving!
Love this gift card holder!
Beautiful project Heather!
Great gift card holder Heather.
Such an elegant and pretty gift card holder! Love the colors!
I love this gift card holder! So Pretty!