Hello and welcome to the Stamptastic Friends Blog Hop, all about colouring techniques, and I have a great one to share with you today, a little bit of mixed media colouring. Read on to find out what I mean by that and how to combine your colouring mediums in one image.
The Stamptastic Friends are a small group of Independent Stampin’ Up! Demonstrators who come together once a month to offer you some creative inspiration. Check out the links at the end of the post to see what colouring techniques the rest of the team have in store for you.

Now, I fell in love with the Apple Harvest stamp set from Stampin’ Up! as soon as I saw it in the Jul-Dec Mini Catalogue, but it was one of those stamp sets that I didn’t really know what I was going to do with it before I bought it – we’ve all been there, right?
So I just took out my Stampin’ Blends and started to colour it in, as you do. But I just couldn’t get the results I was looking for with this, the apples just weren’t the right colour and I couldn’t get the depth of shading in the leaves that I wanted, so I dug out my watercolour pencils and started to lay them over the top of the coloured in images! I don’t know about you but I LOVE the effect, and I wanted to show you in a bit more detail how I achieved this look.
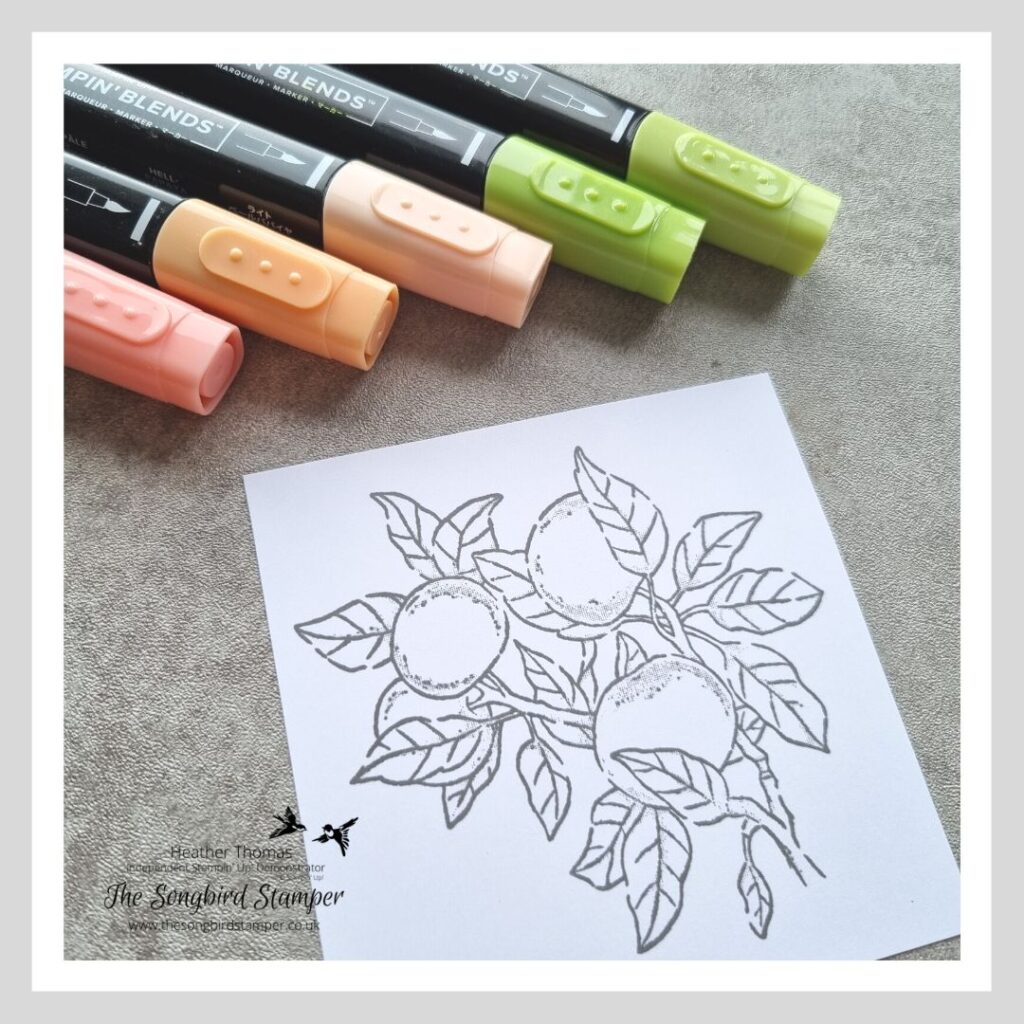
The image (stamped in Basic Gray) in the middle is purely coloured in with the Stampin’ Blends – I used Calypso Coral and Pale Papaya. As you can see it is really flat and they don’t look like apples at all. I didn’t want them deep red though, either, hence why I didn’t use the Poppy Parade or Real Red blends.
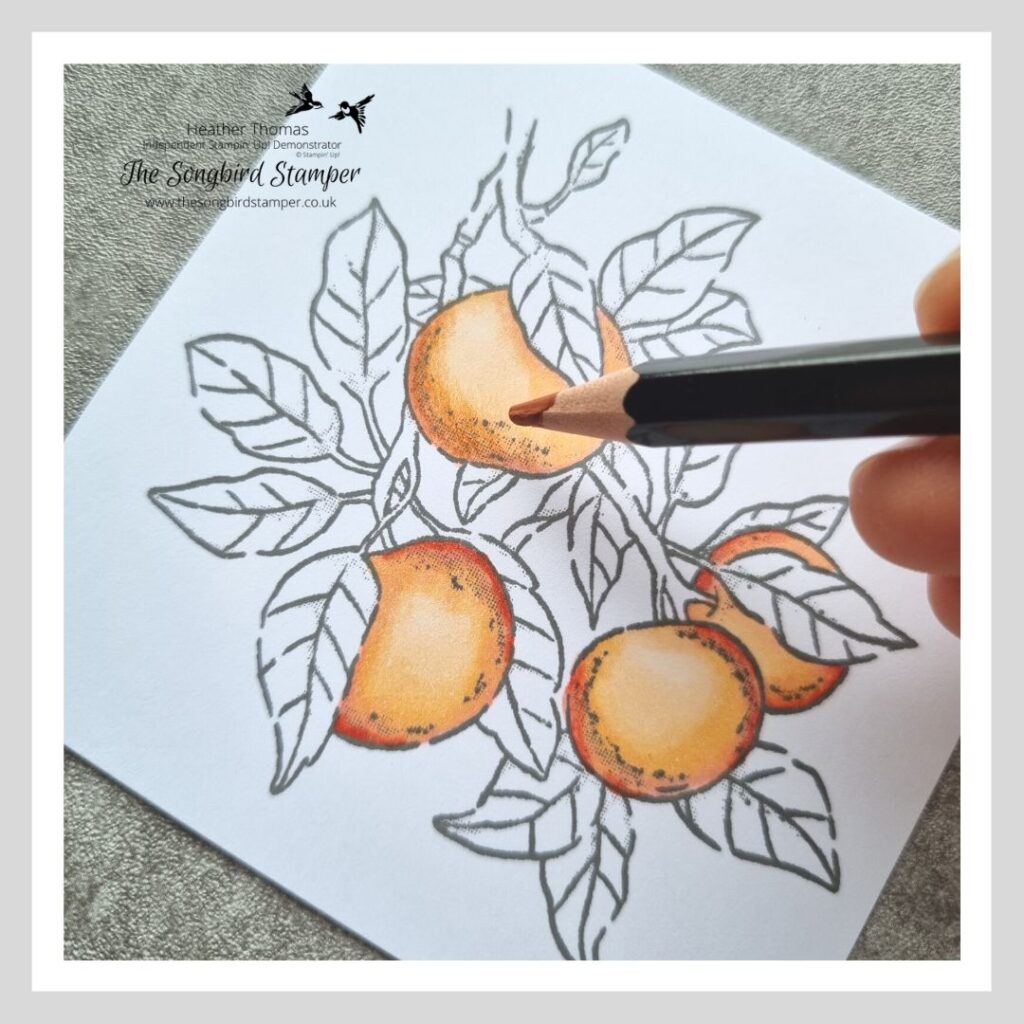
The first colours (from the watercolour pencils) I used to colour over the top were Cajun Craze and Pumpkin Pie, just to give a nice bit of depth to the apple. Can you see the difference in the last picture, with the apple at the top? How much richer the tones are and how much more shading I got using the pencils?
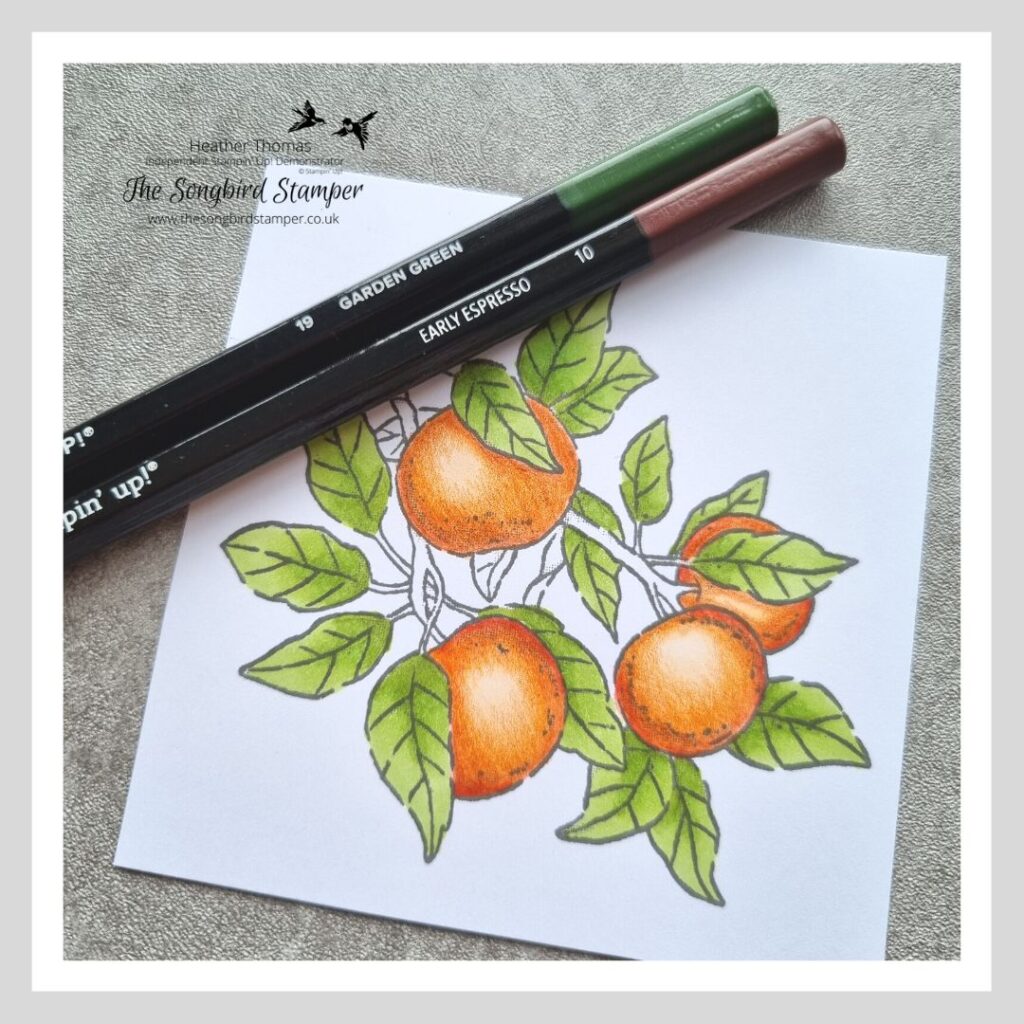
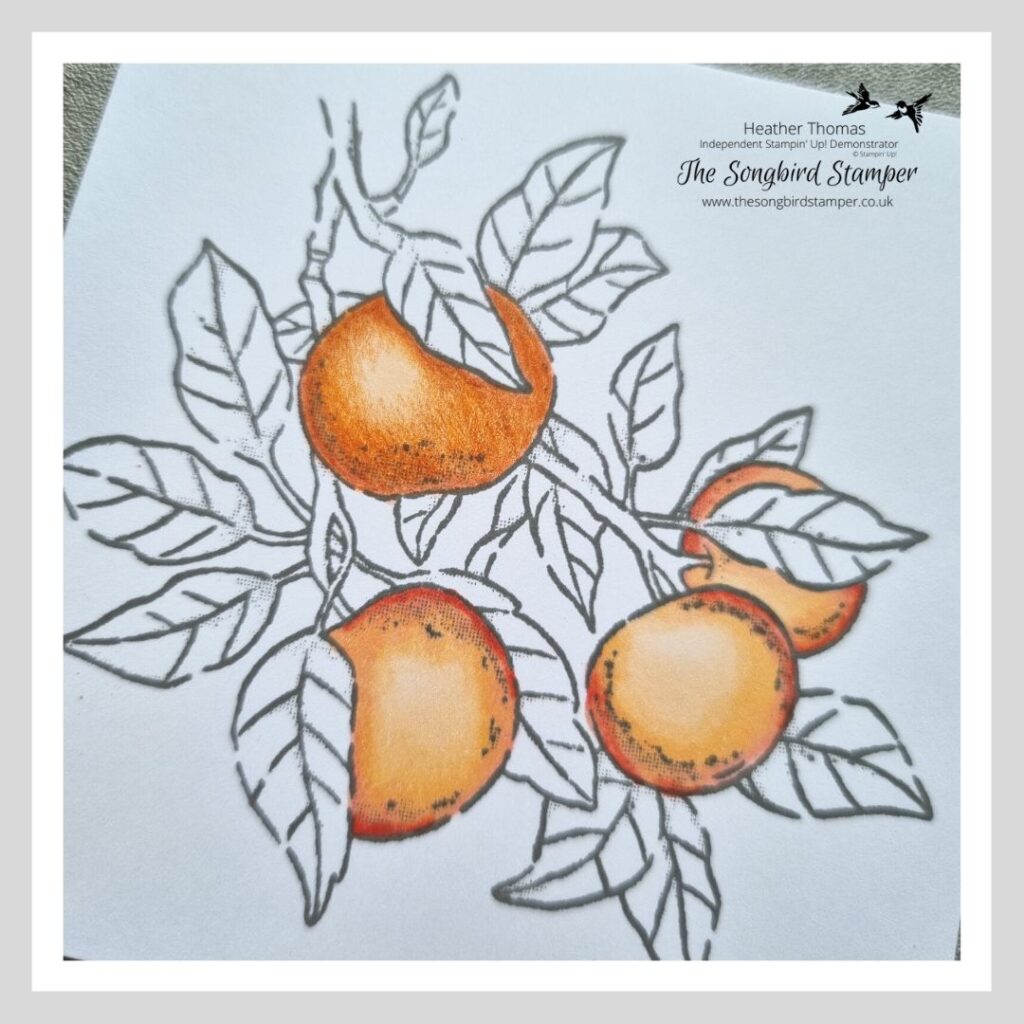
I then went ahead and coloured the leaved in using just my Granny Apple Green Stampin’ Blends – they give a good colour but without a darker green they still just looked a little ‘dull’ to me. I think it is such a shame that we don’t have a Garden Green alcohol marker, but here is where your Mixed Media Colouring really comes into its own – you can use any colours that we have in the pencils and just lay it over the top, leaving the lighter ‘wash’ underneath!
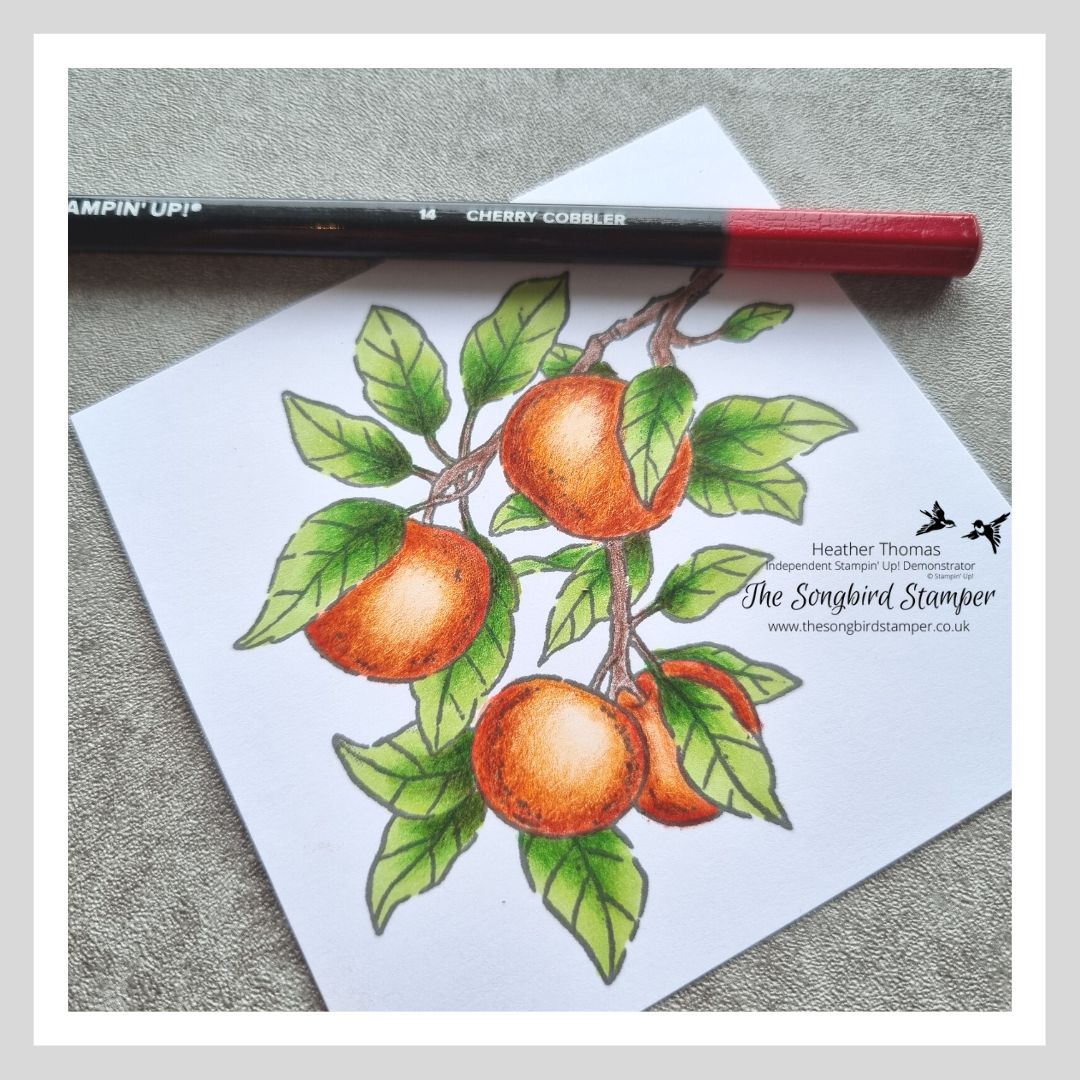
How much more vibrant is that picture of the apples now!?! The Mixed Media Colouring technique really brings your artwork to life! I also went in and added a bit of Cherry Cobbler pencil to the apples as I wanted them to be a bit more red than they were. The key to using the pencils is just slowly, slowly, gently, gently. The harder you press the more pigment you lay down. To blend it into the lightest areas you need to be really gentle with it.
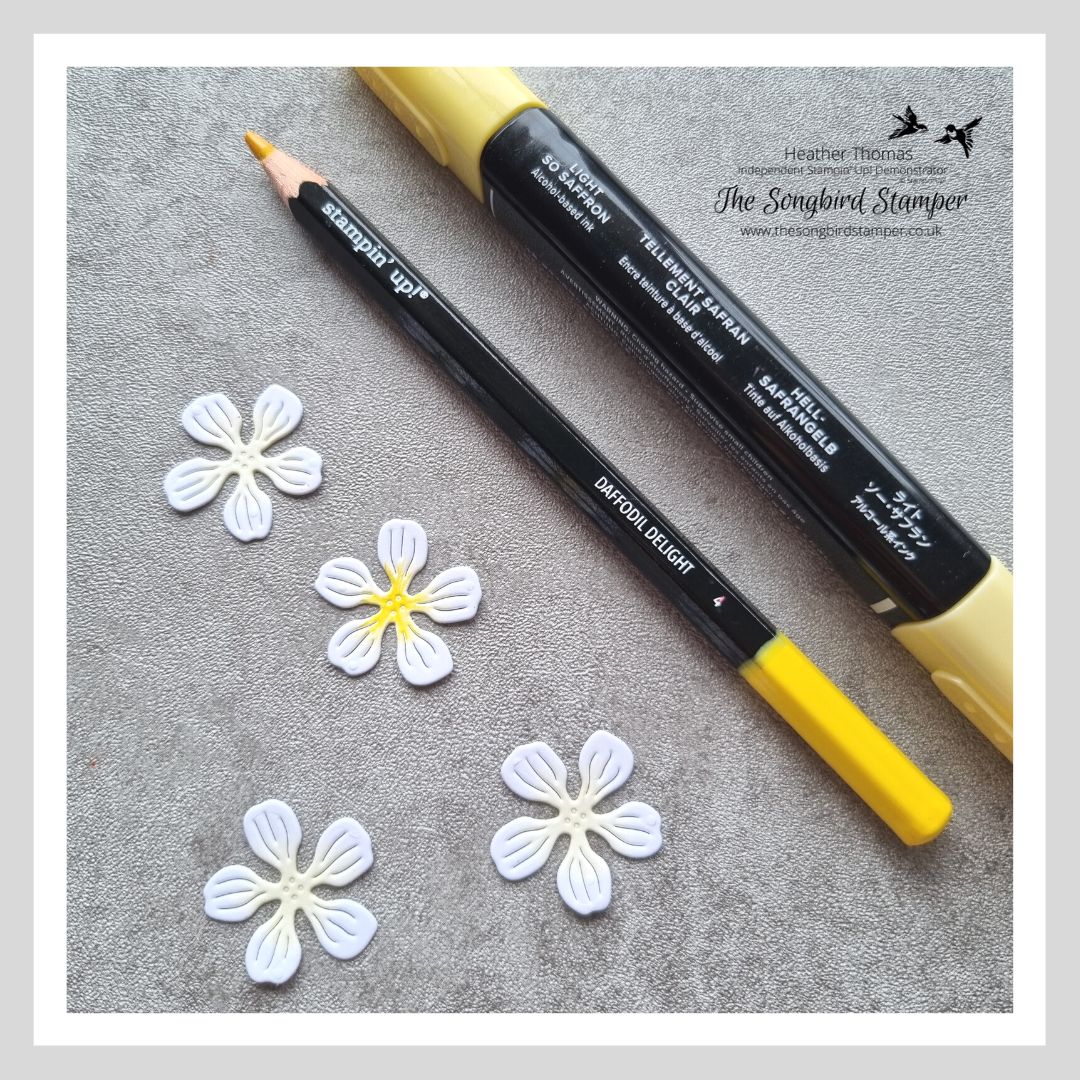
I treated myself last week to the set of Apple Blossom Dies, soon to be available to customers. These dies are part of the Perfect Partners promotion and coordinate beautifully with the Apple Harvest stamp set that I have used today. Here I cut out three of the flowers and five leaves, and used the same technique for colouring them in. I lay down a wash of So Saffron alcohol marker and then went over the top with the Daffodil Delight coloured pencil (for the leaves I used Granny Apple Green blend and Garden Green pencil).
I hope that this post has inspired you to have a go at a bit of Mixed Media Colouring for yourself, it really is a lot of fun. Before you start, why not have a hop around the rest of the team’s posts to see what other colouring inspiration you can pick up!
Until next time, Happy Stamping! xx
Product List
")


Stampin’ Blends Course

Bookings are now open for my next Stampin’ Blends Course, starting on Sunday 5th February 2023, with four zoom classes running over several months (to give you plenty of time to practice in between). All of the classes are recorded into a Private Facebook Group too, so you can watch and rewatch as many times as you like. The course also includes a 17 page written course guide, with accompanying worksheets.
There are two options for this course, a product based option (available UK only) and an online only option (available WORLDWIDE). The online only version is £70 and the product based version is £180 – for which you get access to the whole course, the course guide, £180 worth of product (4 stamp sets and 21 Stampin’ Blends) Sale-A-Bration goodies and free postage too.

Because you also get your choice of 4 level one Sale-A-Bration items, this option is a real bargain if you love Stampin’ Up! products, and as always you are free to swap out for other product of your choice.
If you would like to learn all my tips, tricks and techniques, please do visit this page to sign up or register your interest today!
- Shop with me online – spend over £20 and receive 10% in Stampin’ Rewards – that’s 10% of your order price back to spend on a future order!
- Click Here to come and join our amazing team of Songbird Stampers, a whole new world of fun and friendship (and discounts!!) await you. Want more information? Why not check out all the FAQs over on the Join My Team page
- Why not follow me on Facebook, for live videos, projects and updates – The Songbird Stamper
- Or Subscribe to me on YouTube – The Songbird Stamper