The Stamptastic Friends have got a super hop for you this month as we all showcase our favourite tools, and I am demonstrating how to make a masculine z-fold card to highlight the awesome Stampin’ Up! Paper Trimmer.

The Stamptastic Friends are a friendly bunch of crafters who want to share their passion for all things crafty with you, so do be sure to hop around using the links at the bottom of this post for more ideas and inspiration.
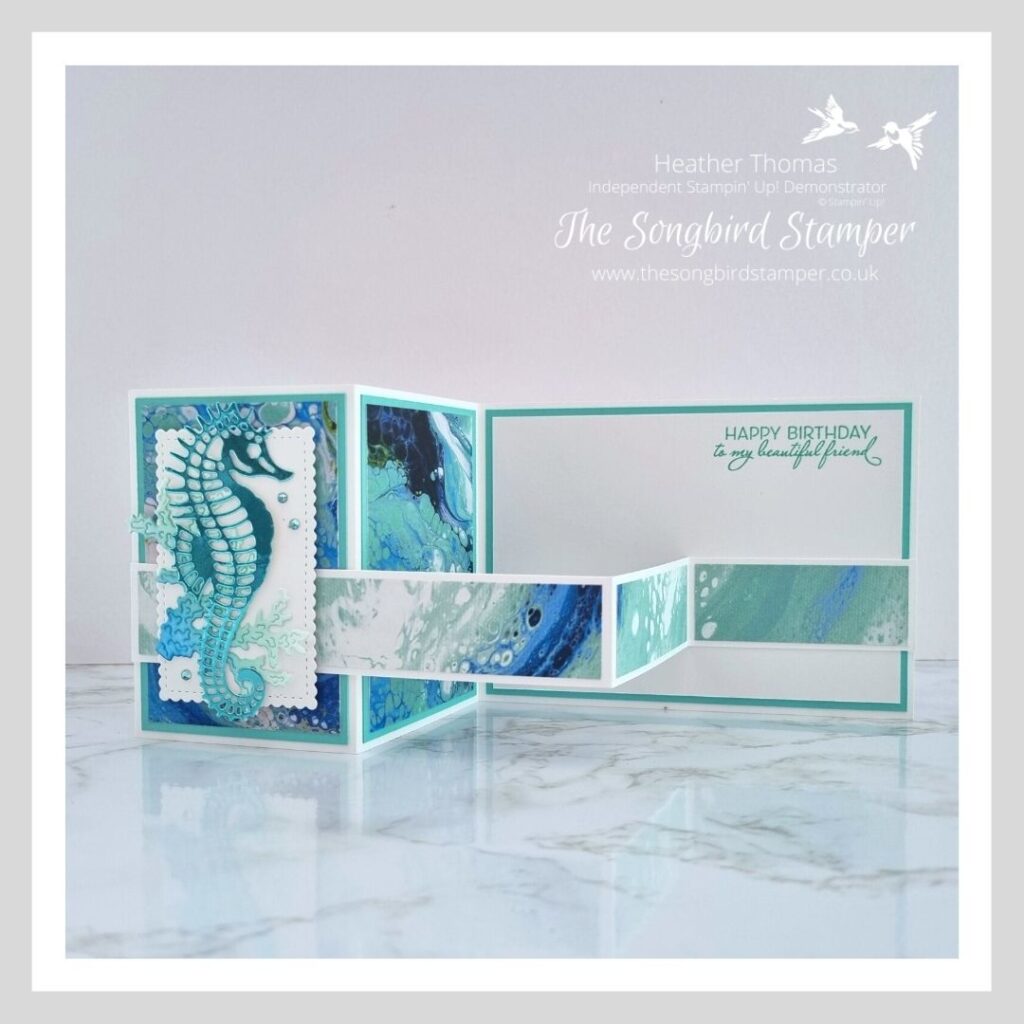
I must admit I have been absolutely blown away by the new paper offering, Waves of the Ocean. It is simply stunning, and I couldn’t wait to get crafting with it again, and I just love how this z-fold card turned out. All of the measurements and instructions for this card are below, but first of all, let me introduce you to my personal favourite Stampin’ Up! tool – the Paper Trimmer!
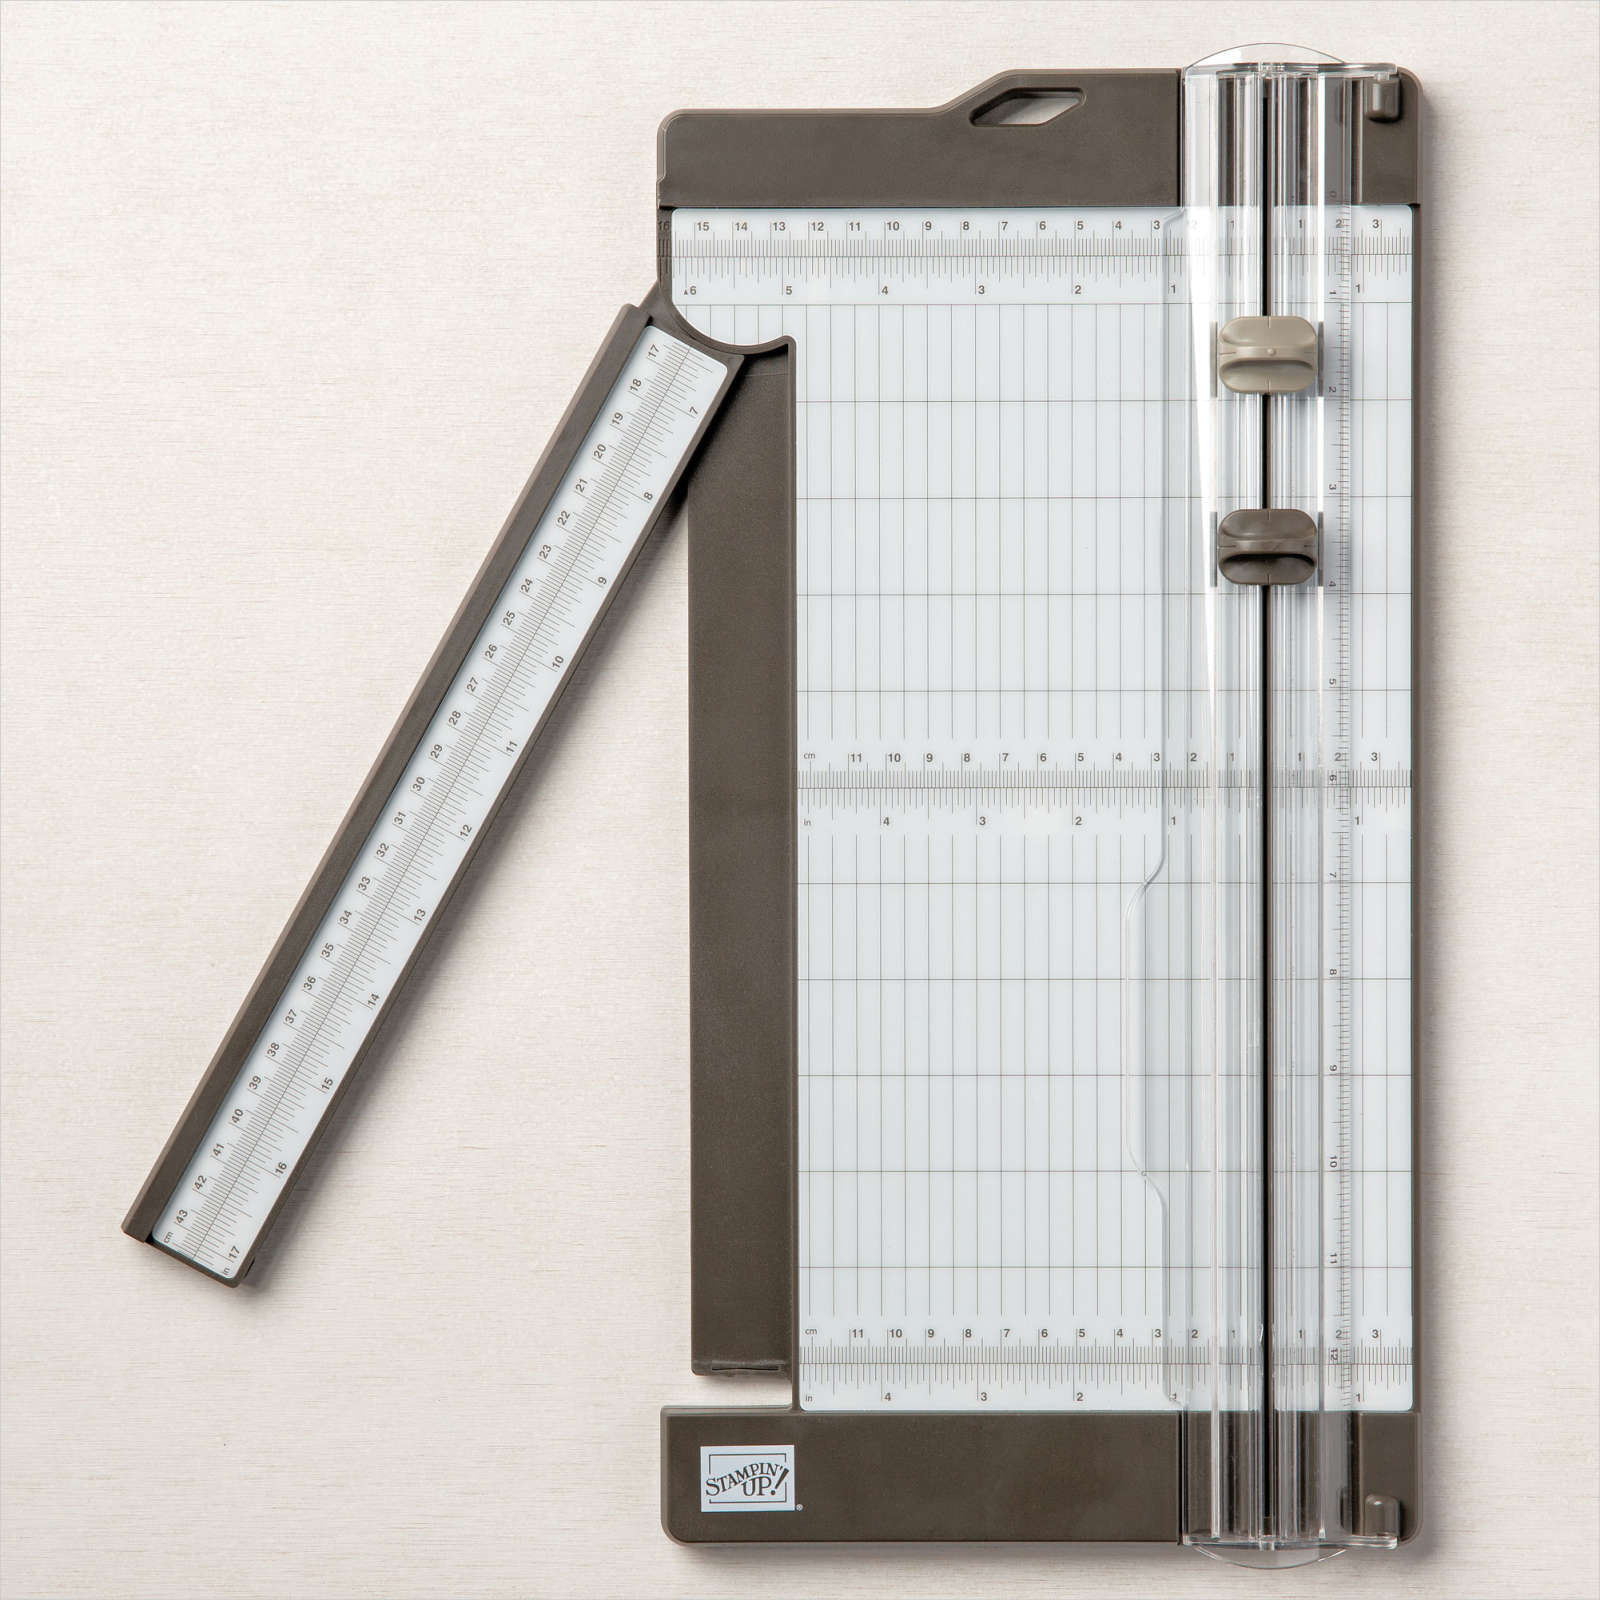
The Stampin’ Up! Paper Trimmer was truly THE FIRST paper trimmer that I used that I actually got on with. All of the (many) ones I had tried before just didn’t give me a straight cut. I’ll go as far as to say that after the third or fourth one, I thought I must be doing something wrong, but then I used this cutter and WOW, good, clean, straight cuts every single time.
It has an extendable arm so that you can measure, cut and score to up to 12″ (30cm), and comes with both metric and imperial measurements, meaning you can follow all of those online tutorials with ease. The blades are fully replaceable and for a minimal price you can purchase a metric blade guide too.
Add to that the fact that the trimmer comes with a built in scoring blade, saving both money and time by not needing a scoreboard, and you have lots of reasons why this is my personal favourite Stampin’ Up! tool. And it’s reasonably priced too, at £23!
To make a masculine z-fold card like this you will need a sheet of Thick Basic White card, a sheet of Coastal Cabana cardstock, some scrap Basic White card and some of the stunning new Blue Foils. Oh, and the Sea Life Dies too – just loving that seahorse!
On your trusty paper trimmer, cut the Thick Basic White card so that you have two pieces, one measuring 29cm x 10.5cm and one measuring 29cm x 2.5cm. Now, on your trimmer still, but with the scoring blade not the cutting one, score both pieces of card on the long side at 7.25cm and 14.5cm.
Fold and burnish both pieces of cardstock.
Cut three pieces of the Coastal Cabana cardstock, two measuring 10cm x 6.75 cm and one measuring 10cm x 14cm. Next cut two pieces of DSP measuring 9.5cm x 6.25cm and one piece of Basic White card measuring 9.5cm x 13.5cm. Stamp a sentiment onto the top right of the white panel and then stick these to the Coastal Cabana card, and then onto the main white card base as shown above.
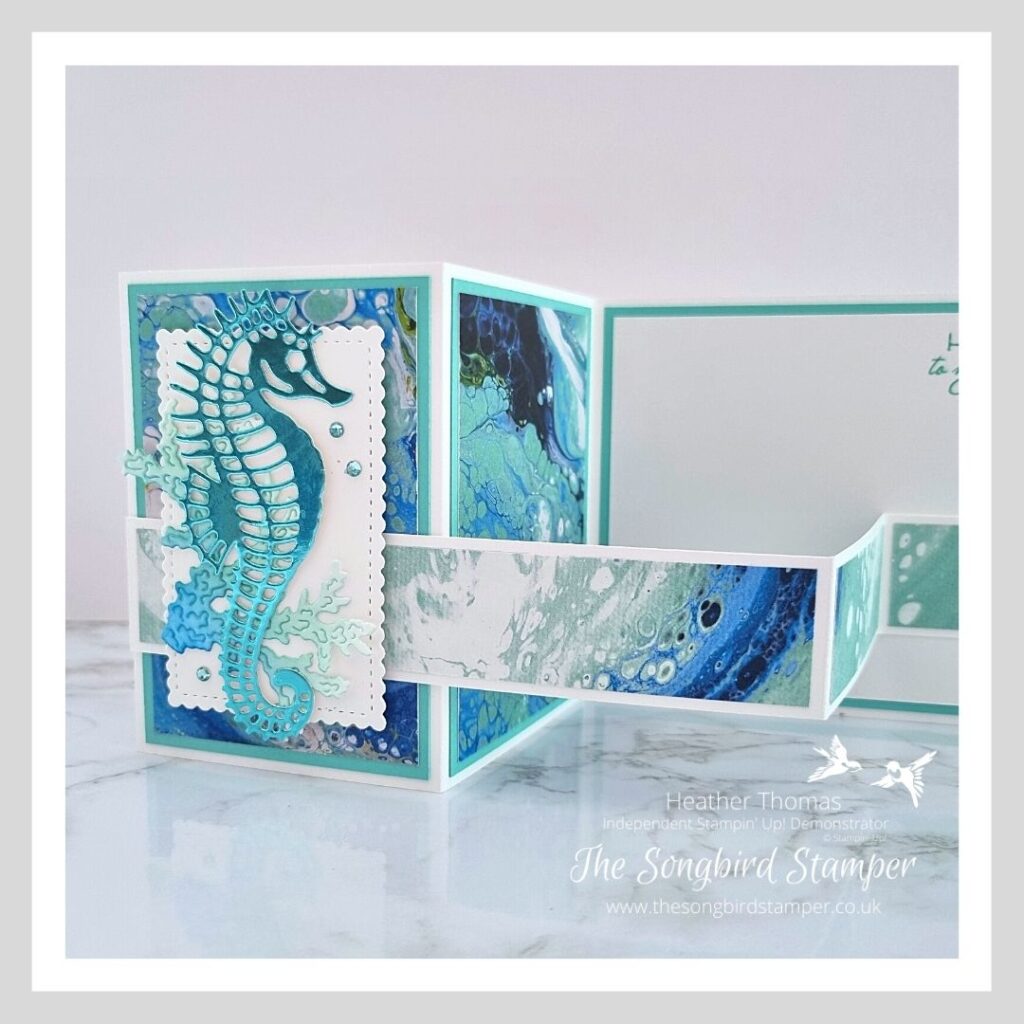
Next up, cut three pieces of DSP, one measuring 2cm x 14cm and two measuring 2cm x 6.75cm. Stick these onto the strip of thick card again as shown above. Now you are ready to assemble the main card. With the sections folded and laid as above, pop some adhesive onto just the left hand side of the long section of the thin strip and on the right hand short section, then with the card folded and closed, glue this in place.
Make sure you don’t glue any of the other sections of the strip, because your card won’t open if you do!
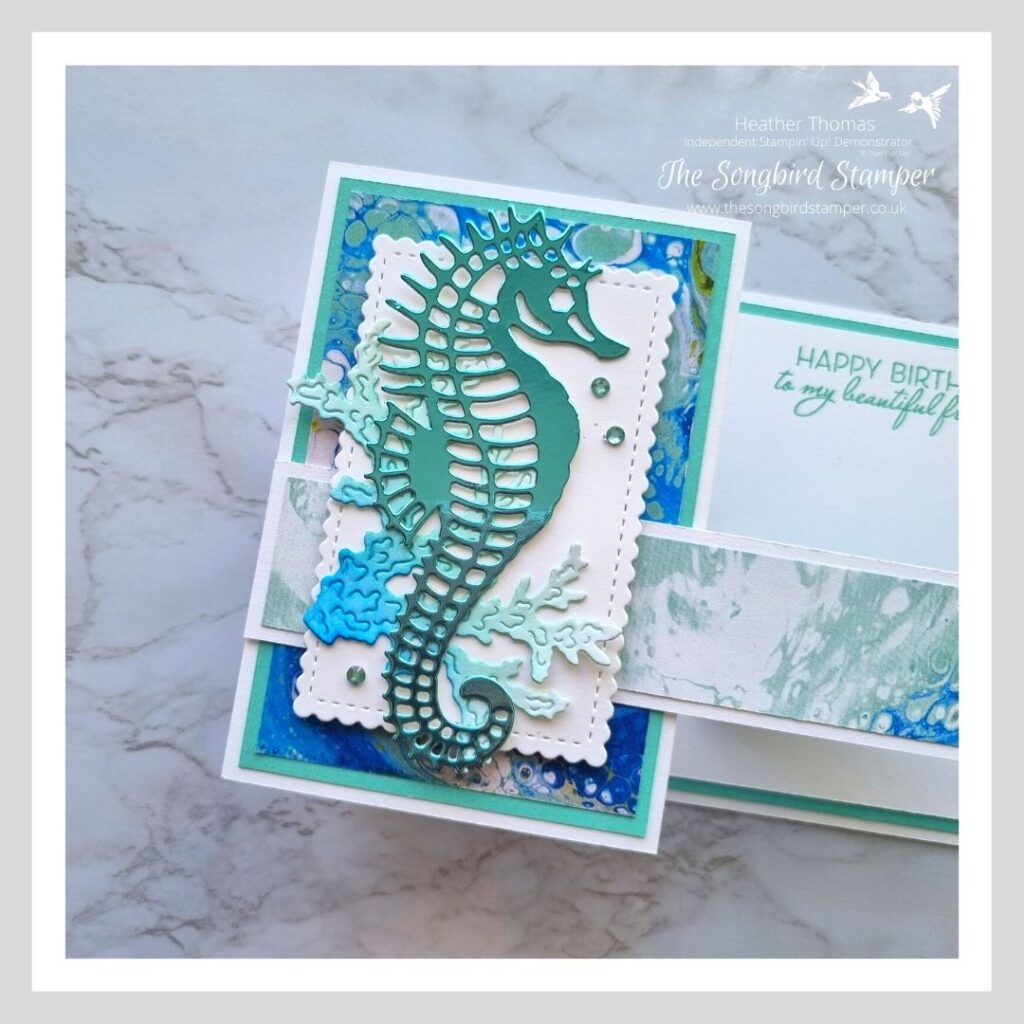
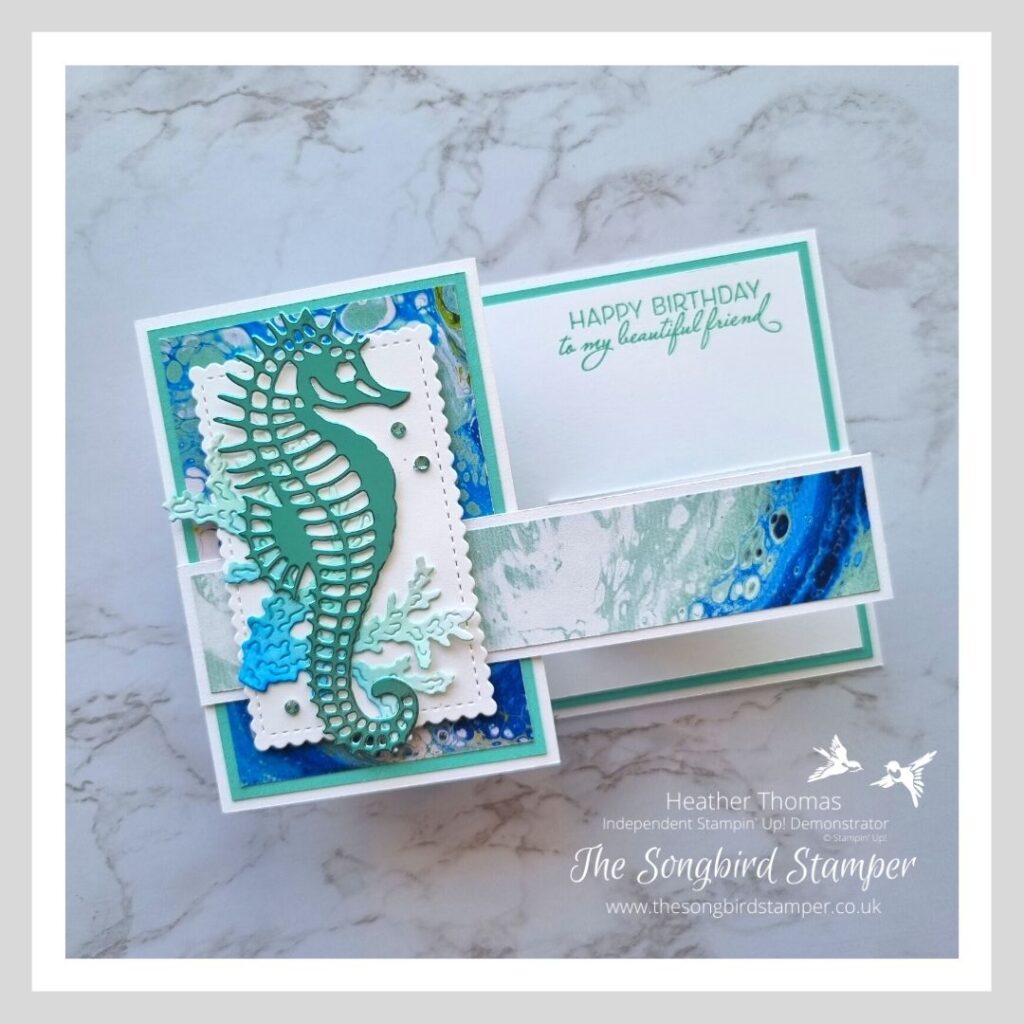
To make the focal point of the card I cut a Basic White rectangle from the Stitched So Sweetly dies and stuck this onto the left hand panel with dimensionals. The gorgeous seahorse from the Sea Life Dies is cut with the Coastal Cabana coloured foil card and the seaweed from the Seascape dies was cut from Basic White cardstock that has been inked with Coastal Cabana and Pacific Point ink using the blending brushes.
A few of the new Blue Rhinestone Gems and the card is finished.
Thank you so much for stopping by today, I hope that you have enjoyed this post showcasing the paper trimmer and showing how to make a masculine z-fold card. For more ideas, techniques, tricks and tips with some of your favourite craft supplies, please do keep hopping around using the links below, and to purchase any of the items I have used here today, simply click on the photo links underneath.
Until next time, Happy Stamping xx
Product List Designer Series Paper")
 Specialty Paper")


- Shop with me online – spend over £20 and receive 10% in Stampin’ Rewards – that’s 10% of your order price back to spend on a future order!
- Click Here to come and join our amazing team of Songbird Stampers, a whole new world of fun and friendship (and discounts!!) await you. Want more information? Why not check out all the FAQs over on the Join My Team page
- Why not follow me on Facebook, for live videos, projects and updates – The Songbird Stamper
- Or Subscribe to me on YouTube – The Songbird Stamper

I am incredibly excited to be offering this awesome Happy Hedgehog Class in May, both in person and via zoom on the following dates:
Fareham – Thursday 12th May – 10am – 1pm
Denmead – Friday 27th May – 9.30am – 12.30pm
ZOOM – Saturday 21st May – 10am – 1pm
The price of the class is £30 (for stamps and kit) or £42 (for stamp and punch bundle) (plus P&P if required)
Bookings are now open and you can reserve your place at either an In Person Class or a Zoom Class using the buttons below…
Stunning card. I adore our paper trimmer also.
I love your card Heather and the paper trimmer is a must have tool for any card maker !!
This is a spectacular card! Love the DSP used and die cuts! Love everything about this card! Thank you for the instructions on how to make it! 🙂
Thank you so much indeed! You are very welcome, I hope you have lots of fun making one for yourself!
Heather, I love your cards. Would you be willing to also include the measurements in inches? If not, I will continue to convert on my own. Thank you
Hi Kim, thank you so much, that is so kind of you! I do use inches on some of my projects, but sometimes they just don’t convert nicely at all I find, I must admit I mix and match depending on which is most suitable for the project!