
The theme for this months Tech 4 Stampers blog hop is New Beginnings, and I won’t lie, this one had me stumped for a while, until I settled on making a Centre Step Card. I made this card for my prospective new Stampin’ Up! upline, hence hopefully fitting in to the New Beginnings theme! I can’t wait to rejoin and get going properly again.

I couldn’t find any instructions for making a card that fit what I had in my head, so I went about creating this one on my own! I am not sure if this is technically how you make a centre step card, but it worked for me, so hopefully is will work for you too.
I cut a piece of Thick Basic White card to 14.5cm x 21cm and then scored it on the long side at 10.5cm (in half). Next, still on the long side, I scored it at 2.5cm and 18.5cm, but I didn’t score all the way from top to bottom. Instead I scored leaving a 2cm gap at the top and the bottom.
After I had scored these lines, I turned the card round and cut on the short side at 2cm and 12.5cm, only from score line to score line, as you can see in the photo below.
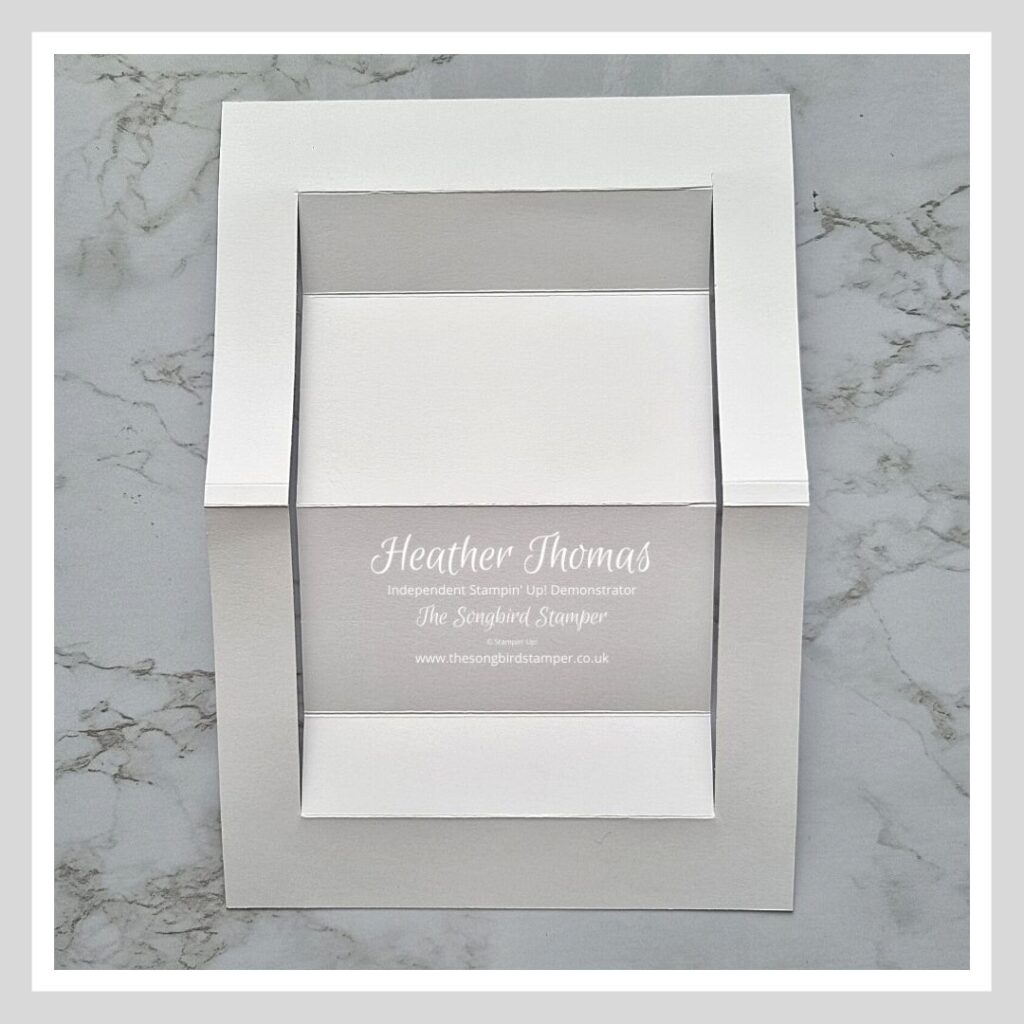
One last step is to turn the card back round and score on the long side again at 5cm and 16cm, again, only between the cut lines. You are then ready to fold the card. The end folds are mountain folds, the next two in are both valley folds and the middle are mountain folds. This will give you the basic construction of your centre step card.
The only problem now was that the middle bit was very low, so I cut a piece of Basic White cardstock to 10.5cm x 9.5cm. I used my blending brush to sponge on some Soft Seafoam ink and stamped a greeting from the Blessings Of Home set in the top left hand corner in black. This piece is then affixed to the middle fold. I hope you can see on the picture below.
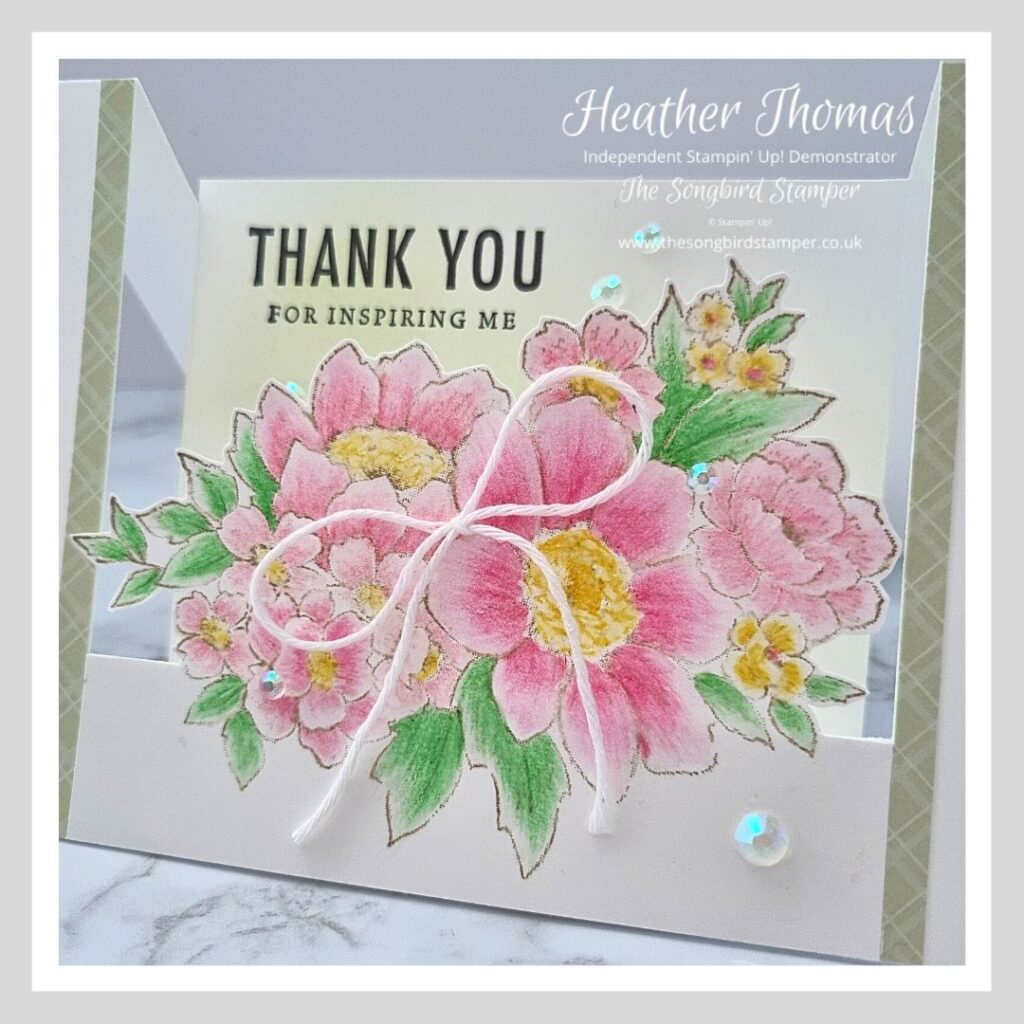
This beautiful image is also from the Blessings of Home stamp set, and was stamped onto a piece of cardstock measuring 10.5cm x 9cm. Stamp it so that the bottom of the leaves is about 50mm from the long edge of the cardstock. I coloured it in using my watercolour pencils in Garden Green, Flirty Flamingo, Rich Razzleberry and Daffodil Delight.
I put the card into the trimmer with the bottom leaves on the left, and cut down from the top and up from the bottom at 2.5cm. Only cut up to the image though! Once you have done this, fussy cut the main part of the image out, leaving it attached to the bottom section of the card.
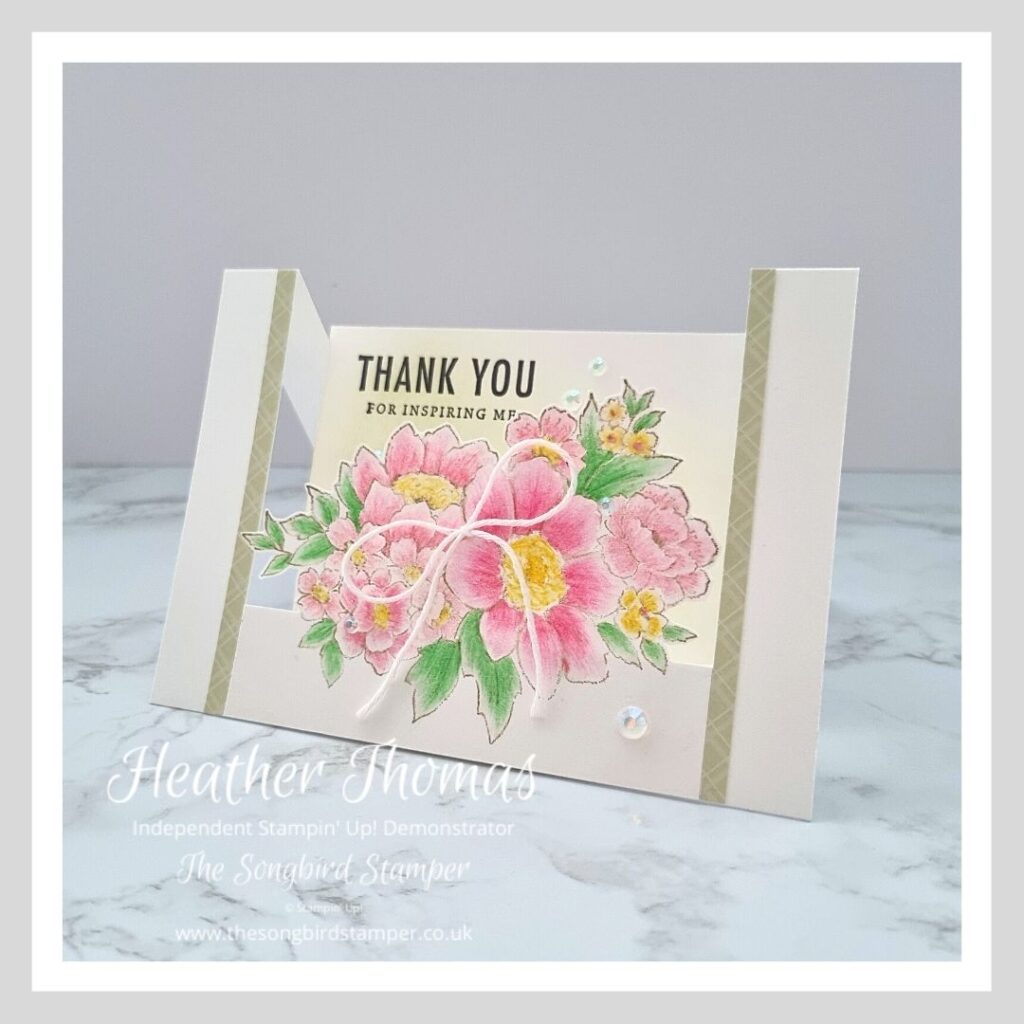
Stick this finished piece onto the centre of the bottom of the centre step card, and then cut two thin strips (0.5cm x 10.5cm) of Soft Seafoam DSP and place them to the left and right, running vertically. Finish the card with a white twine bow and some sparkles. This card will now fit in a standard size envelope.
Please do have a hop around the rest of the Tech 4 Stampers team’s sites, I am sure you will find lots of inspiration for your crafting and cardmaking.
Until next time, Happy Stamping xx
- Shop with me online – spend over £20 and receive 10% in Stampin’ Rewards – that’s 10% of your order price back to spend on a future order!
- Click Here to come and join our amazing team of Songbird Stampers, a whole new world of fun and friendship (and discounts!!) await you. Want more information? Why not check out all the FAQs over on the Join My Team page
- Why not follow me on Facebook, for live videos, projects and updates – The Songbird Stamper
- Or Subscribe to me on YouTube – The Songbird Stamper
Love your card Heather. Very clever design and lovely colours x
Beautiful card Heather. Great fold and cleaver you x
Absolutely gorgeous x
Stunning as always Heather! Tfs
Wow! This is amazing. I should try this for my mom’s birthday, tomorrow. The colors and sentiment are perfect for her.
Ah Thank you so much Michele, I hope your Mum had a fabulous birthday! x