If you love to colour then this Colouring Techniques blog hop is definitely the one for you! Please do have a good look around and see all the techniques, tricks and tips that we have got in store for you today.
I have used my trusty Stampin’ Blends for this card today, I wanted to do something that I rarely see done and that is to use the blends to colour in the background, not just the main image. This can be a little tricky to do without getting a streaky look but I am going to try and help you to achieve some good results here.
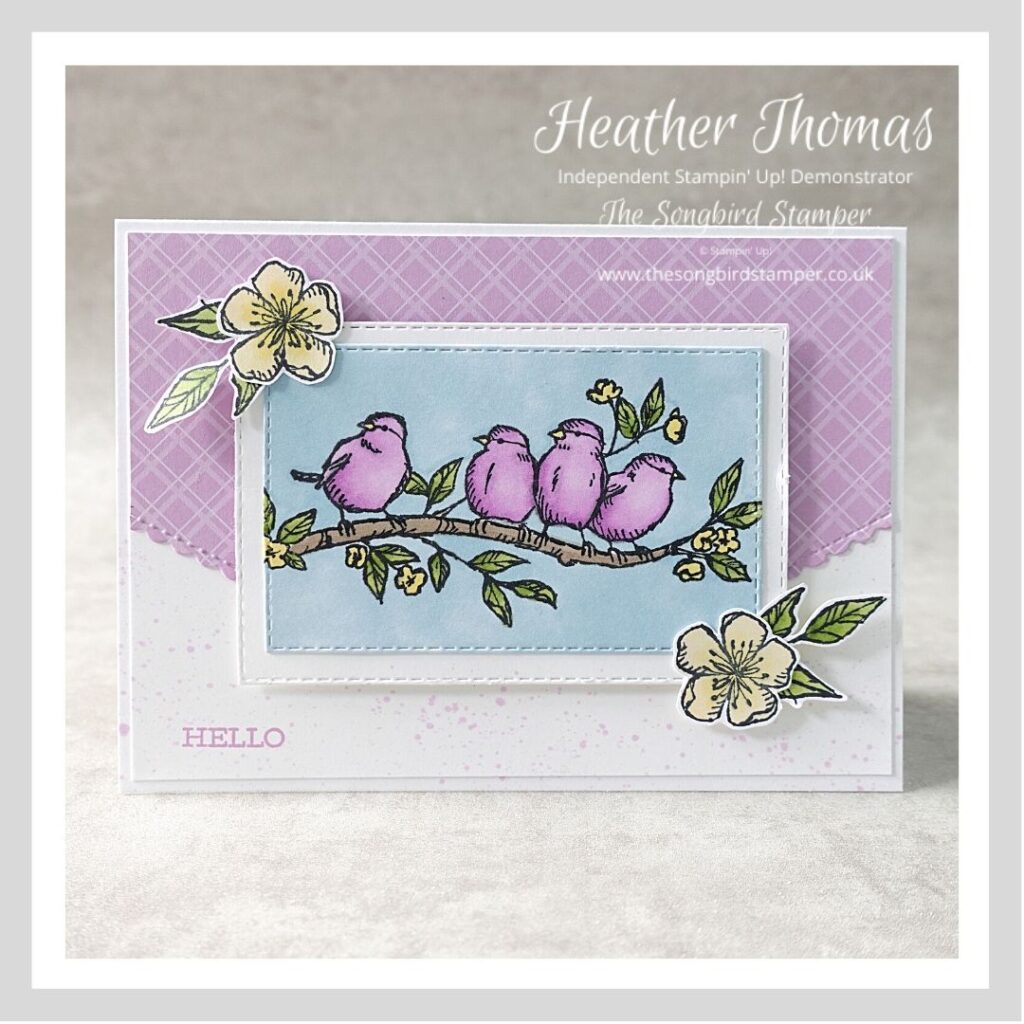
I am so glad that this stamp set Free as a Bird has carried over into the new Annual Catalogue. It is one of my favourite stamp sets, possibly because I am The Songbird Stamper! Colouring in negative space is one of the least used colouring techniques I think, but it really changes the look of our stamps and is a really great one to master.
I stamped the image onto Whisper White cardstock in Memento Black Ink, the best ink to work with when colouring with Alcohol Markers, because the ink won’t bleed. You still do need to give it just a few moments to dry fully before you start colouring though. (The Classic Stamp Pads are also perfect to use!) I then cut the image out using a Stitched Rectangle Die.
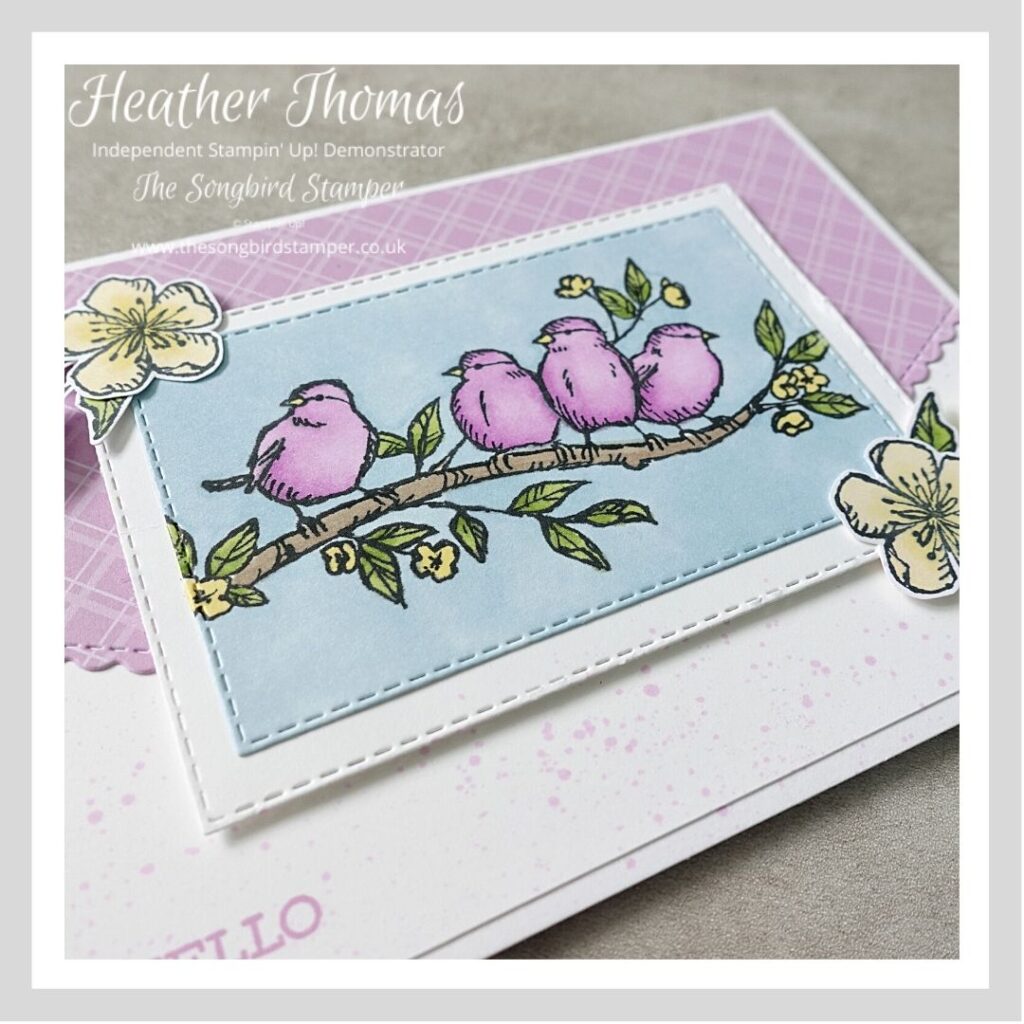
I started by using my light Balmy Blue blend bullet nib to colour in all the spaces that are behind the birds that are closed. What I mean by closed are the areas in between the feet, for example, where there are black stamped lines on either side of the space.
Once this is done, again using the bullet nib, colour in the areas that are tight, but open. The areas where it would be difficult to get a brush tip in quickly and accurately. Don’t come too far out from the edge of the stamped line, just add a line of colour.

Then switch to the brush nib. When colouring large areas, the quicker you can cover the area cleanly the better. You will end up with streaks if you work too slowly or if you have to go back over areas. The aim is to get a clean look and to do this we need to try and get it all done in one pass! That’s why we filled in the tighter areas first, so it doesn’t matter this time if you can’t get right to the edges.
Make sure also that you do colour right over the stitched edge and all the way up to the edge of the cardstock. You don’t want any white bits showing. Then colour in you main image like normal… I have used Fresh Freesia for my birds, not very lifelike but it is such a nice colour!
To assemble the card I cut out a larger Stitched Rectangle Die also in Basic White and layered my coloured piece onto it. The card blank is 14.5cm x 21cm scored at 10.5cm and there is a Basic White panel 14cm x 10cm. To create the splattered background I used the brush tip of the Fresh Freesia Stampin’ Blend to flick ink onto the bottom of this panel. This is possible one of my favourite colouring techniques, so fun!
I used some of the new In Colour DSP and the new Basic Borders dies to create a shaped background which I stuck on top of the Basic White Panel. The main coloured panel is stuck on with dimensionals and I added a couple of flowers and leaves for added interest. The sentiment is simply stamped in the bottom left hand corner before the main panel is stuck onto the card base.

Please do hop on to see the rest of the gang’s projects, but feel free to pop back if you would like to purchase any of the products that I have used here, or if you would be interested in learning many other Alcohol Marker tips and techniques in my Stampin’ Blends course, open for bookings a little later in the year.
Until next time, Happy Stamping xx
Interested in learning more about using Alcohol Markers?

I will be running another Stampin’ Blends Course, starting in September 2021, where, amongst many other things, I will teach the no-line colouring technique, how to add lowlights with greys, using pencils and markers together, creating skin tones and many other techniques too.
The course is still available for £60 as an online version only, with four zoom lessons, a dedicated Facebook group, a comprehensive course guide and several bonus lessons too.
To find out more, or to book your place, just click the button below!
- Shop with me online – spend over £20 and receive 10% in Stampin’ Rewards – that’s 10% of your order price back to spend on a future order!
- Click Here to come and join our amazing team of Songbird Stampers, a whole new world of fun and friendship (and discounts!!) await you. Want more information? Why not check out all the FAQs over on the Join My Team page
- Why not follow me on Facebook, for live videos, projects and updates – The Songbird Stamper
- Or Subscribe to me on YouTube – The Songbird Stamper


Beautiful card Heather x
thank you so much 🙂
Beautiful card Heather, I love it x
thank you very much Mo x
This is such a sweet card. I love those birds!
This is possibly one of my favourite stamp sets!
This is so pretty, Heather. You can always pretend you’ve created a new breed of purple martins!
Haha!! Abolutely, lol, one of the things I love about crafting is that there are no rules!
Thanks for those great tips!
You are very welcome Robbie, thank you, I am glad you found them useful!
Such a beautiful Card, love the colours and technique x
Thank you so much!
Pretty card, love this colour 🙂