I am blog hopping today with an amazing group of Stampin’ Up! demonstrators from the Crafty Collaborations group and we want to bring you the best of our Stamparatus techniques. If you have a stamping platform, read on, because this hop is definitely for you! I am going to show you how to use alcohol markers with heat embossing today, because it is something that frustrated me for a long time until I learnt how to achieve it!
The thing with alcohol markers is that they contain a solvent. I love working with the Stampin’ Blends but for a long time I got really annoyed when I tried to colour in my heat embossed images because the solvents seemed to react with something in the heat embossed powder and started to break it down, ruining my project and my markers too. There is an answer though!
Alcohol Markers with Heat Embossing

The first thing that you are going to need for my technique is a Stamparatus. This is the Stampin’ Up! stamping platform and let me tell you it is amazing for techniques like this. Take the stamp that you want to colour in and put the stamp on the Stamparatus. Don’t forget that you use the black foam mat for photopolymer stamps but you don’t need it for the rubber stamps.
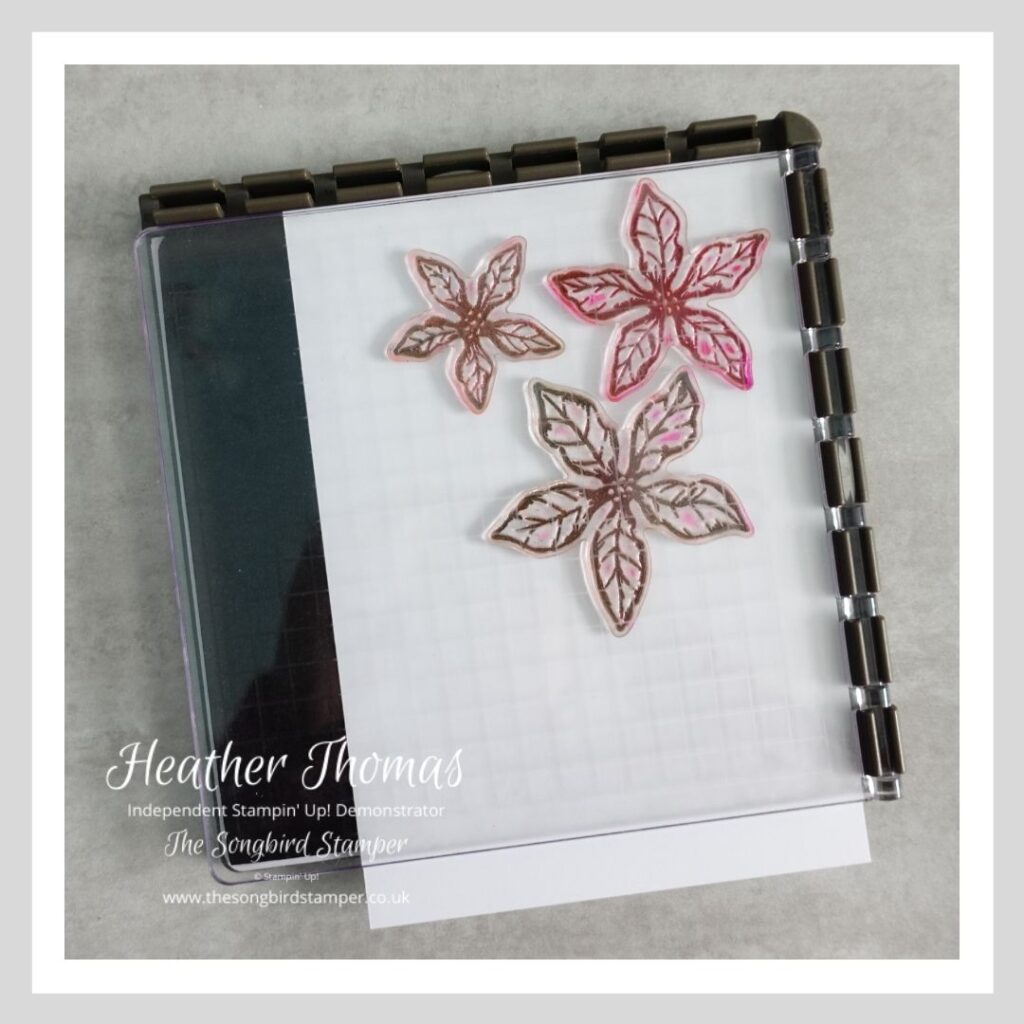
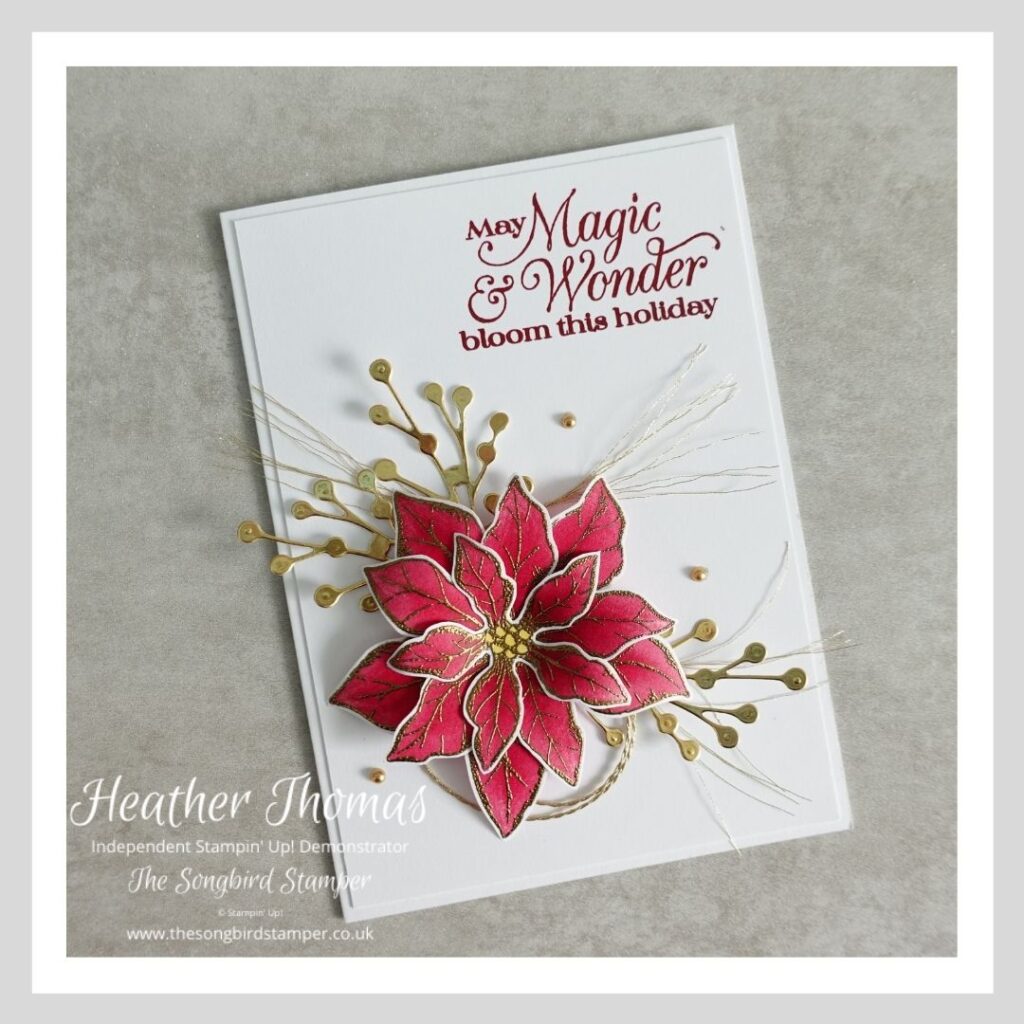
Yes, yes, it is a Christmas stamp set, lol, I just really thought this would be a great set to demonstrate this technique with and hey, I have just made my first Christmas card of the year! This is the Poinsettia Petals stamp set, and co-ordinating dies, and I absolutely love it.
So, but your card right into the top right corner of the Stamparatus and stamp your image in grey ink (you can use any colour really but grey works for me) and then colour it in normally with your Stampin’ Blends. Just DO NOT REMOVE YOUR STAMPS from the Stamparatus. Leave them in place. Once you have coloured in your images, place the card back in exactly the same place and stamp again in Versamark, before heating embossing with Gold embossing powder.
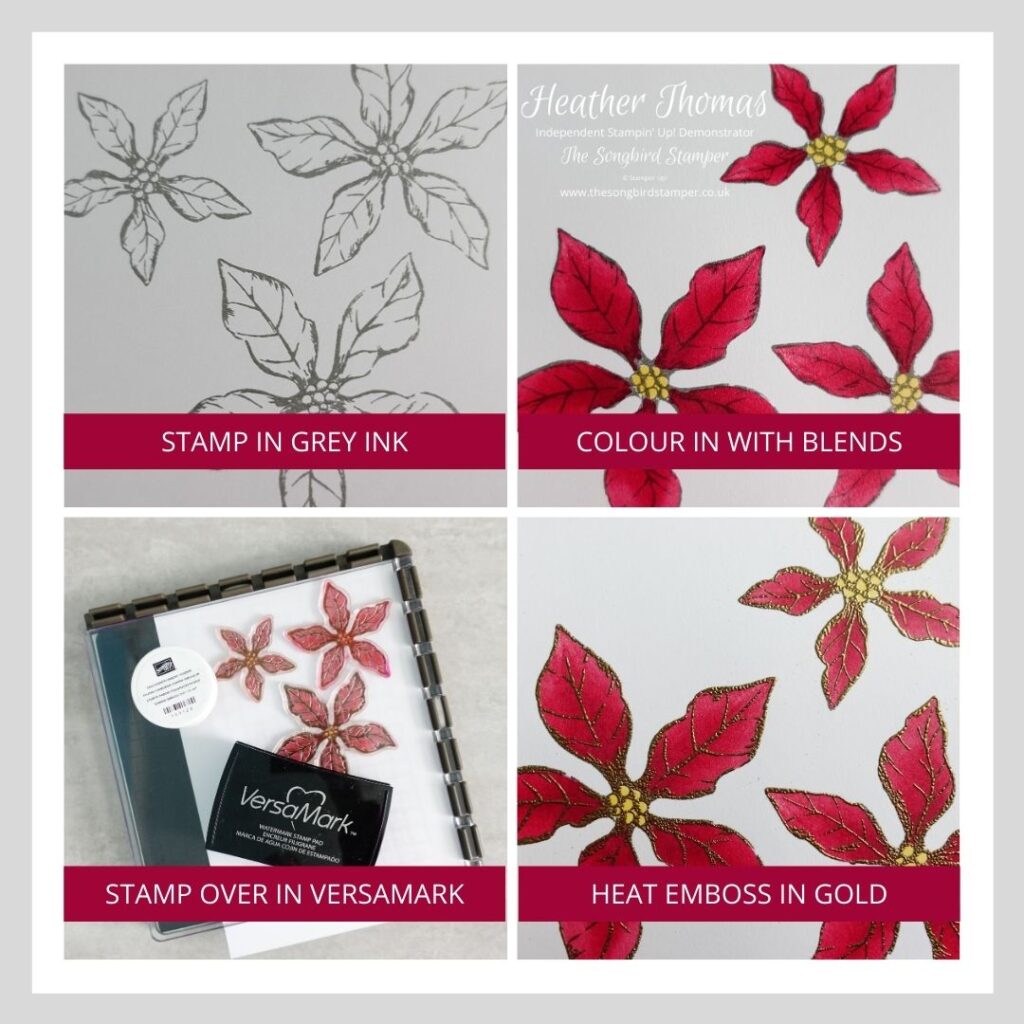
Use the dies or fussy cut the poinsettias out and then overlay them to create one flower. Look how good the gold embossing looks on the Cherry Cobbler – really love this look and how easy it is to achieve with the Stamparatus.
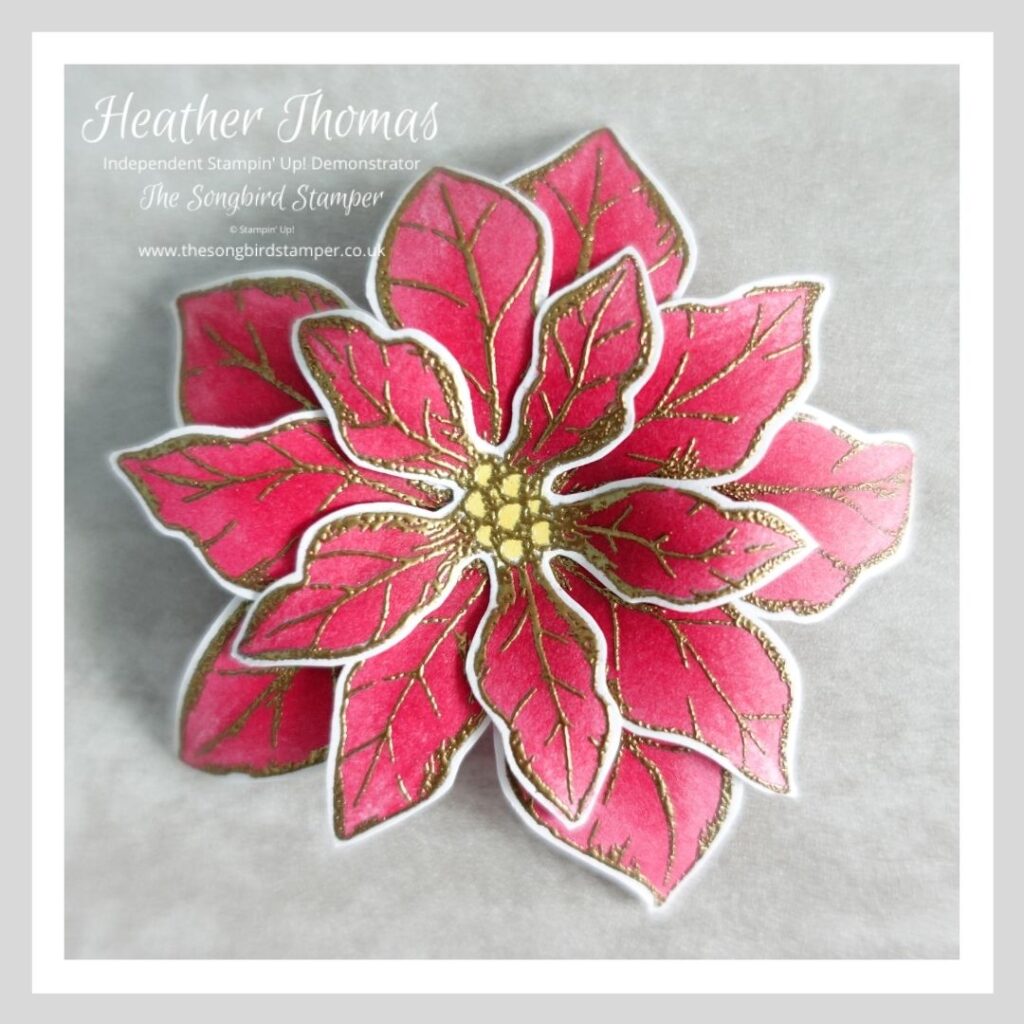
To finish the card I simply cut some sprigs of gold foil, added some gold twine and some metallic pearls and a sentiment in Cherry Cobbler onto a Basic White mat and a Thich Basic White card base. Easy peasy. I really do hope that I have helped to show you how to use your alcohol markers with heat embossing
Please do hop on to see the rest of the gang’s projects, but feel free to pop back if you would like to purchase any of the products that I have used here, or if you would be interested in learning many other Alcohol Marker tips and techniques in my Stampin’ Blends course, open for bookings a little later in the year.
Until next time, Happy Stamping xx
- Shop with me online – spend over £20 and receive 10% in Stampin’ Rewards – that’s 10% of your order price back to spend on a future order!
- Click Here to come and join our amazing team of Songbird Stampers, a whole new world of fun and friendship (and discounts!!) await you. Want more information? Why not check out all the FAQs over on the Join My Team page
- Why not follow me on Facebook, for live videos, projects and updates – The Songbird Stamper
- Or Subscribe to me on YouTube – The Songbird Stamper
Interested in learning more about using Alcohol Markers?

I will be running another Stampin’ Blends Course later this year, probably starting in August and running for four lessons, one every six weeks. We will cover things such as basic blending and shading, no-line colouring, using pencils and markers together, creating skin tones and many other techniques too. If you would like more information about this course, please fill in the form below and I will gladly be in touch in the not too distant future with more details.
")


Wow – I love this! Never too early to make Christmas cards!!
Great technique! Thanks for sharing
Great Technique, stunning card xx
Beautiful card.
I love this idea! And such a beautiful Christmas card!
Ah thank you, it is a fab technique, I hope you give it a go. Now, to remember that I made it come December!
What a brilliant idea. Love this set and I think it’s fine to make Christmas cards ay time of the year 🙂
Lol, I completely agree, and thank you very much!
I am so glad you shared this! I never thought of coloring first, then embossing! Brilliant! And beautiful card, well done Heather!
Thank you very much, it is a lovely technique and I am glad to show you something new to you!
Thank you Heather, a really good technique. It worked well
I am so glad it worked well for you Jeanette 🙂
Awesome technique
Thank you so much Vickie!