Hello & welcome back to the Casually Crafting Design Team Blog Hop where this months theme is ‘HELLO’ – I have used the Sand and Sea Suite from Stampin’ Up! for this months projects. I can’t wait to see what everyone has in store for us this week and expect us all to have completely different interpretations of this months theme.
Being in our third National Lockdown it is more important than ever to reach out to our friends and family to say hello, and what better way than to send a handmade card, and maybe a little gift too.
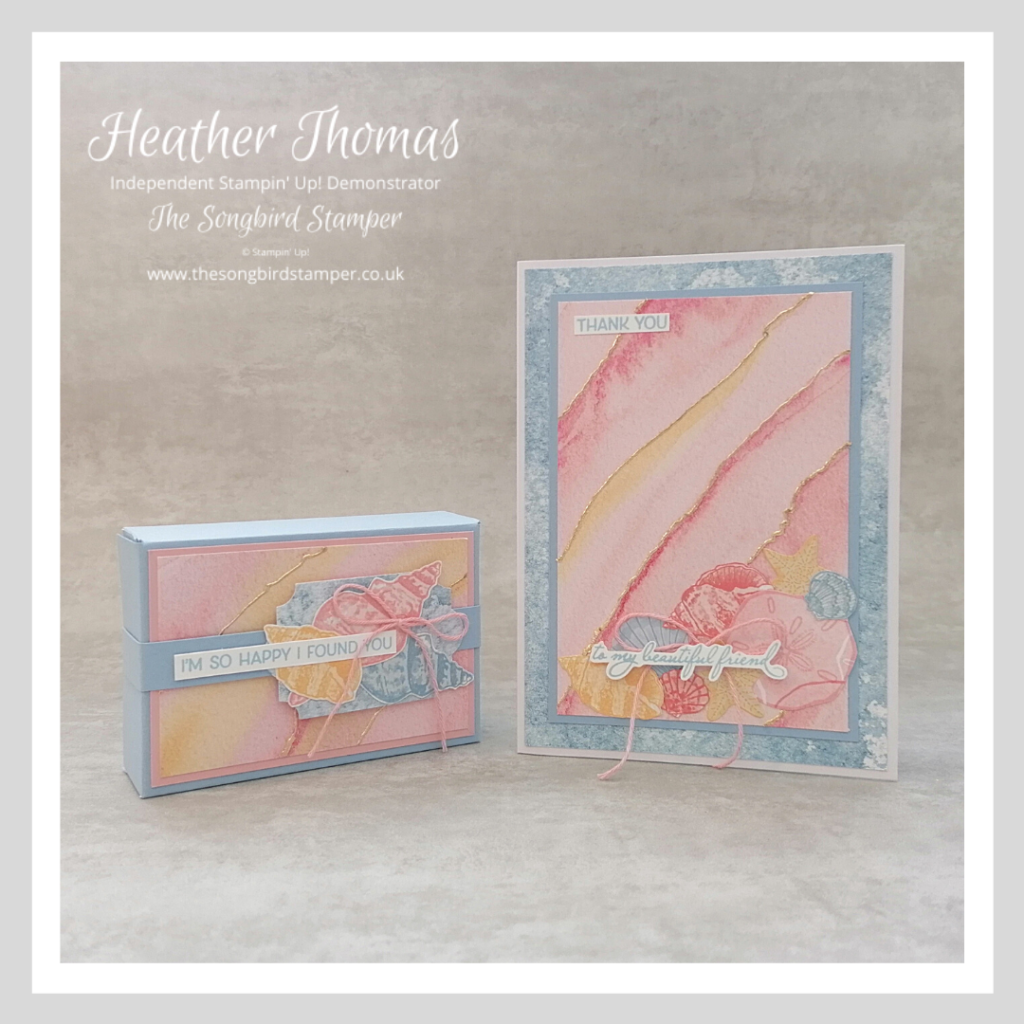
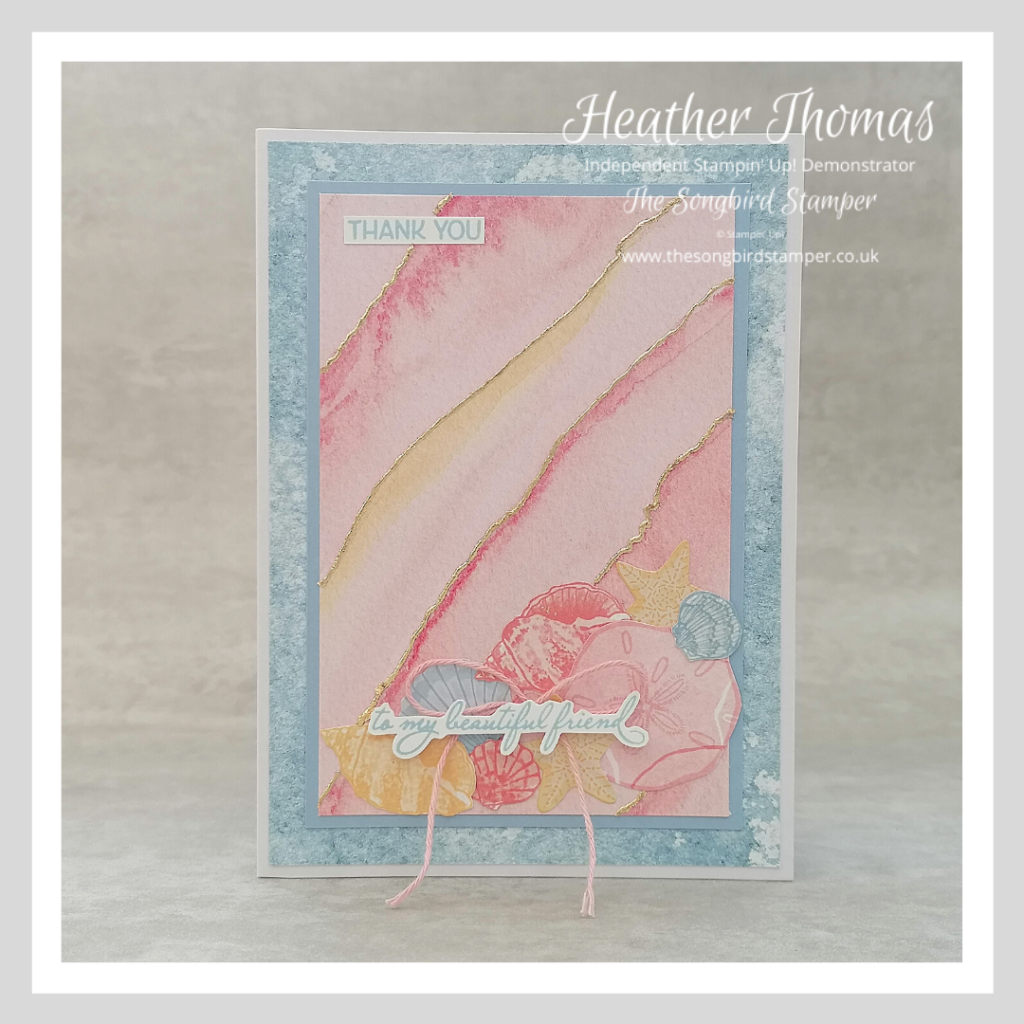
I have used the glorious Sand and Sea suite of products from Stampin’ Up! to make this card and gift box today, which fits a bar of soap perfectly. I absolutely love the colours in the papers of this suite, and the paper which I have used for the main panel here really reminded me of the patterns that can be created with alcohol inks. Sometimes you get gold streaks running through these art works, and it inspired me to try to add the gilding flakes to the paper.
I did this by running a very thin line of Tombow Multi-Purpose Liquid Glue along the ‘streaks’ of the paper, waiting for to dry and then adding the gilding flakes. I was really pleased with how it came out!
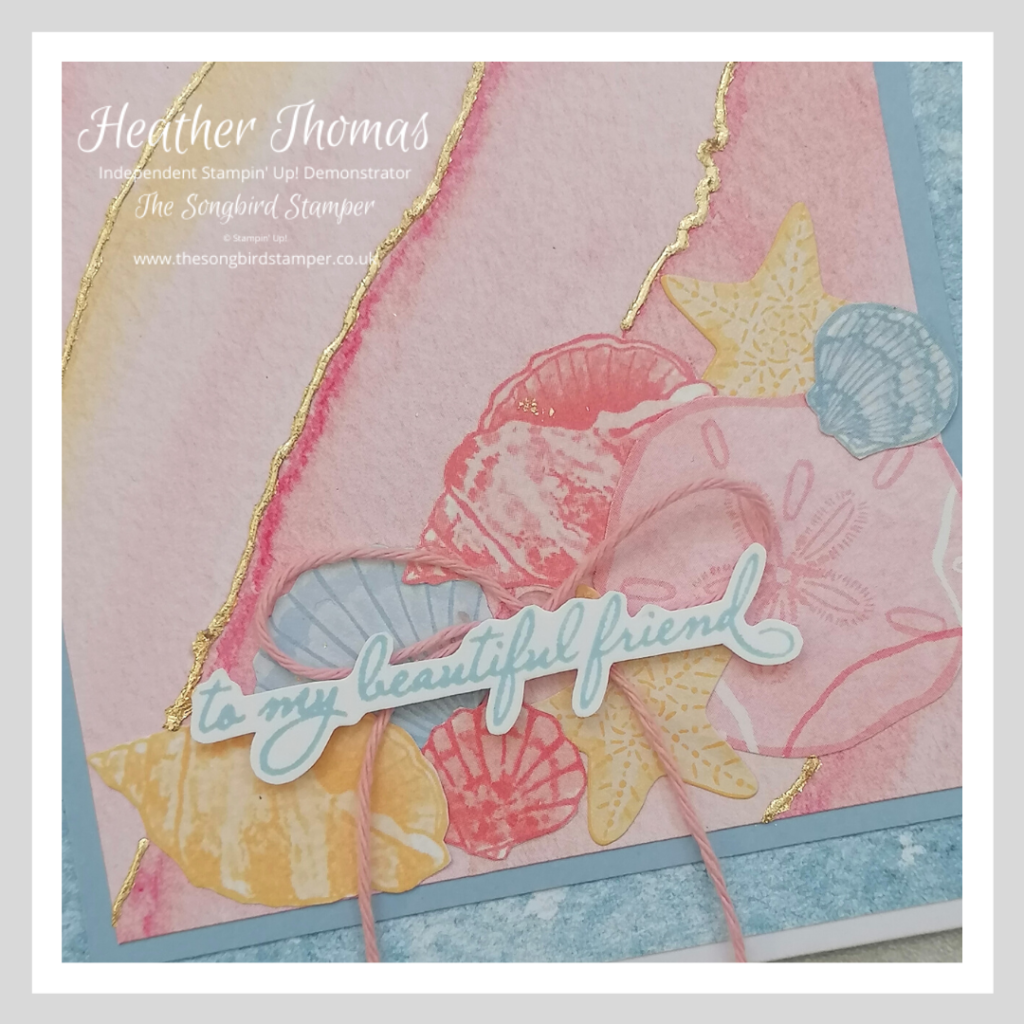
The focal point of the card is made using the Seaside Shells stickers and elements of the Designer Series Paper fussy cut and laid down. The sentiment is also fussy cut, but you could just use the paper trimmer if you aren’t a fan!
The little box is one of m favourite to make. It is so straighforward and there is hardly any waste which is something I love. Start with a piece of A4 cardstock and cut it in half to 14.8cm. Score it on the short side at 3cm on either side and on the long side at 3cm, 9cm, 12cm and 18cm using either your Paper Trimmer with the scoring blade or the Simply Scored Scoring Tool.
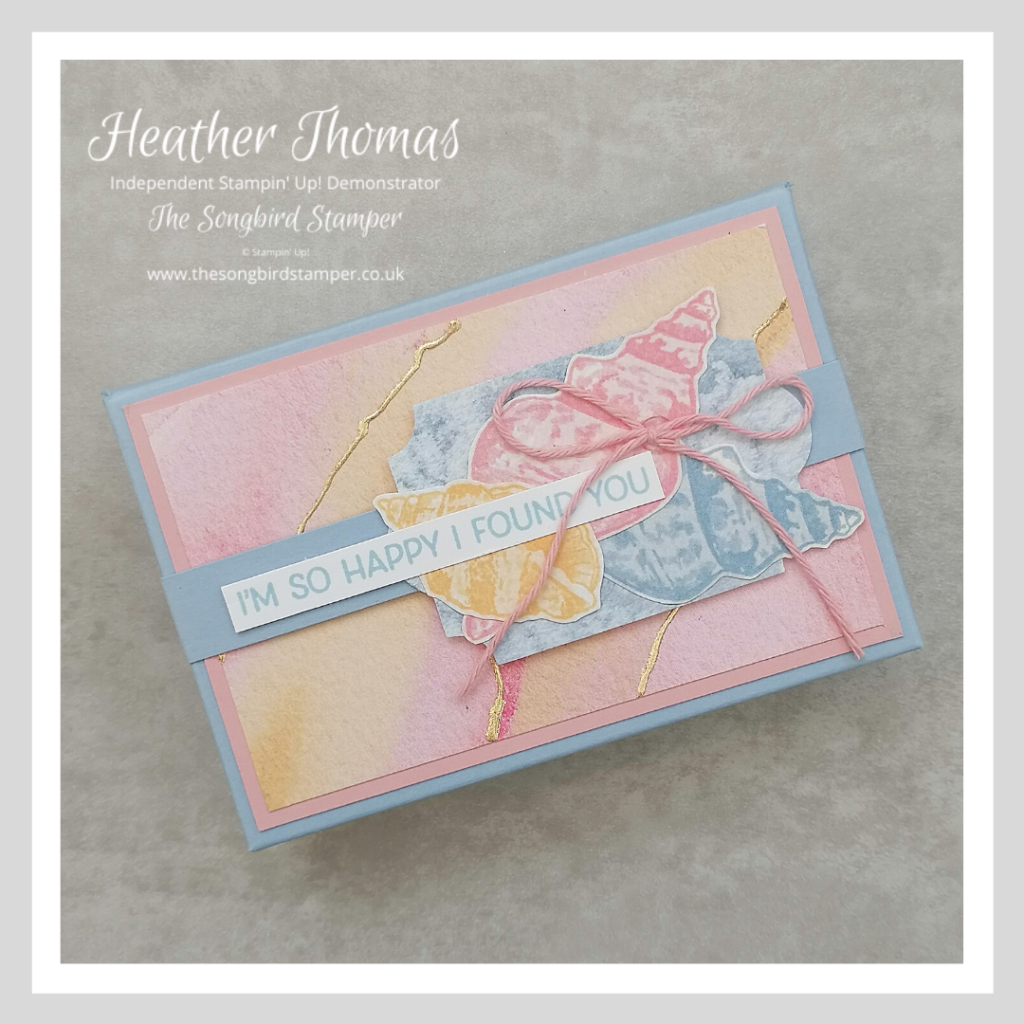
Fold and burnish all of the score lines then turn all of the outer edge squares into flaps by ‘notching’ with a pair of scissors. Just cut down the score line and then take a sliver off with your scissors. Cut a semicircular notch in one end of the card, on the short side, in the very middle, this will create a thumb hole for opening the box.
Using either wet glue or strong tape, start at the end opposite to the one with the semicircle cut out of it – glue the flaps onto the inside of the longer panels. Now glue the middle flaps onto the inside of the SAME long panels. This will be the base of your box. Finally, glue the flaps next to the semicircle cut out onto the inside of the longer panels. This will be the lid of the box, which will close by slotting over the base. I hope that makes sense!
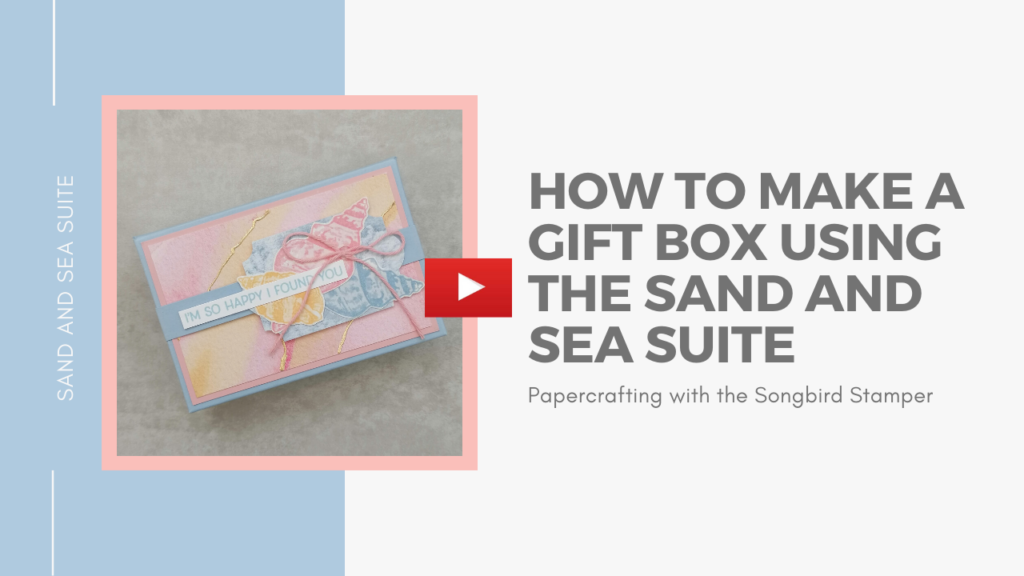
Cut a mat of Blushing Bride cardstock to 8.5cm x 5.5cm and a piece of Designer Series Paper to 8cm x 5cm and then create a belly band by gently folding a strip of card around the box, before burnishing the crease lines and sticking in place. Decorate the belly band how you wish, using punches, stickers and Designer Series Paper.
Don’t forget to come back after you have finished the hop to purchase any of the products that you may want to create these projects, but for now, enjoy hopping and seeing what the rest of the Casually Crafting Design Team have been to this month on the theme of HELLO. I can’t wait to see what projects they have for you!!
Until next time – Happy Stamping xx
Product List


Amazing, not long purchased this set and now I have a few starting point ideas. I especially love the gold line trick on the DSP. TFS x
Beautiful projects Heather, so pretty. I haven’t inked this set…. yet but you’ve definitely inspired me!
You used one of my favorite sets! Thank you so much for your projects, it is sunning 🙂
I love the wave effect with tombow and gilding flakes. Lovely projects.