I was so loving colouring with the Stampin’ Blend alcohol markers that I coloured in several of these gorgeous cake images from the Happy Birthday to You stamp set. If you like the look of this stamp set then read to the end to find out how you can win one of these for yourself. I have paired it here with the Best Dressed Designer Series Paper. This has some lovely floral patterns and I have chosen one with light pastel shades.
I coloured the image in with Mint Macaron, So Saffron, Crumb Cake and Petal Pink Blends, before cutting it out with the awesome paper snips, scissors which really cut beautifully around intricate stamps.
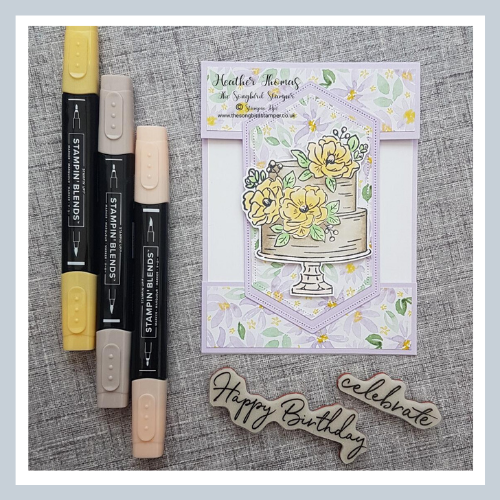
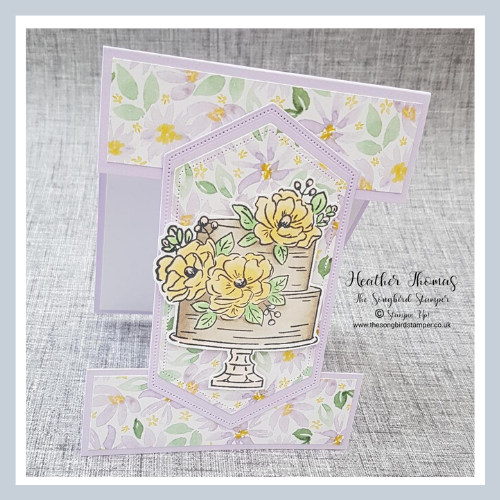
I wanted to use the Stitched Nested Labels dies as well, as I just love the stitched effect and the shape of them. I decided to use them to create a broken card, one where you use a shaped piece of card to bridge a gap made by cutting the centre piece of your card away.
To start with, take a piece of card measuring 10.5cm x 28 cm and score it on the long side at 14cm. Next, you are going to need to cut it at 3.5cm and 10.5cm. Once you have made the first cut, leave this piece in place while you slide everything along to 10.5cm and cut again. There are probably other ways of doing this but this is the way I found the easiest.
You need to keep the biggest bit of card and the smallest, don’t throw this away! Cut two pieces of Designer Series Paper to 10cm x 3cm and stick these onto the two rectangles of your card.
Use the biggest die to cut a piece of matching card stock and the second biggest to cut a piece of Designer Series Paper. Layer the two together and these will make the centre section of your card.
Fold and burnish on the score line, and then take the small piece of card and line it up with the bottom of your card. Put a small amount of liquid glue on the top and bottom of the back of your nested dies and place this down so as to join the two bits of your base card back together again.
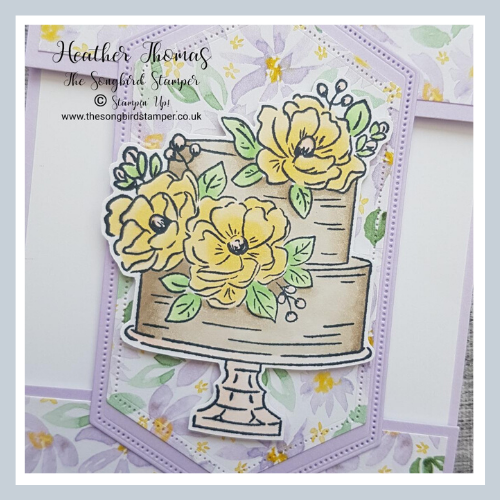
Pop some dimensionals onto the back of your cut out cake and then stick it onto the front panel. I chose not to put a greeting onto the front, so as to keep the focus on the central image, but you could always change this up if you wanted to.
I did put a Whisper White layer inside, for my sentiment, which I cut to 13.5cm x 10cm. I used the Peaceful Moments stamps which have some amazing words for lots of different occasions.
You can get this adorable stamp set for FREE with a qualifying spend, over £45, from now until the end of March, or until supplies last.
There is another way to get this stamp set though, and that is by entering my competition on my Facebook page. Everyone who likes comments and shares my post with this card will be entered into a prize draw to win this very set, so head on over to my Facebook Business Page to check this out…
The Songbird Stamper on Facebook
- Shop with me online – spend over £20 and receive 10% in Stampin’ Rewards – that’s 10% of your order price back to spend on a future order!
- Click Here to come and join our amazing team of Songbird Stampers, a whole new world of fun and friendship (and discounts!!) await you. Want more information? Why not check out all the FAQs over on the Join My Team page
- Why not follow me on Facebook, for live videos, projects and updates – The Songbird Stamper
- Or Subscribe to me on YouTube – The Songbird Stamper
")


 Designer Series Paper")


