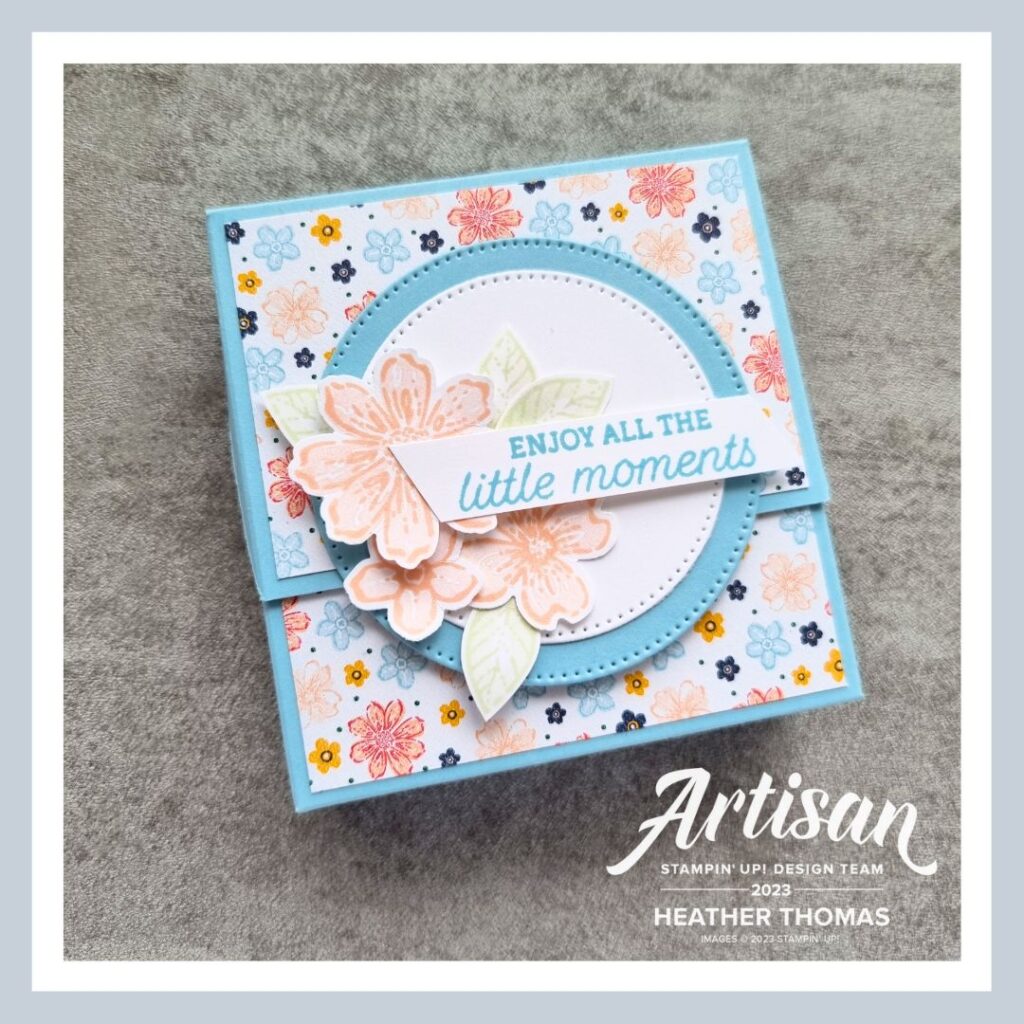
The theme for this month’s Stamptastic Friends Blog Hop is ‘Favourite Tool’ and I must say I was stuck for choice to begin with, as I love so many of our tools, but in the end I decided I would be lost without my trusty Paper Trimmer, so decided to make this Diagonal Lid Box to demonstrate just how useful a little paper trimmer can be.
Every month the Stamptastic Friendse come together to share with you the very best of Stampin’ Up! with cards and projects on a specific theme. Thank you so much for stopping by today and please do hop around the rest of the blogs using the links at the bottom of my post to see what else the team have in store for you.
I love making gift boxes, and this diagonal lid box is just a little bit different, but still very easy to make, once you have got the measurements sussed! I must say this took me a few goes, but I have all the measurements here for you, so you won’t need to work it out like I did!
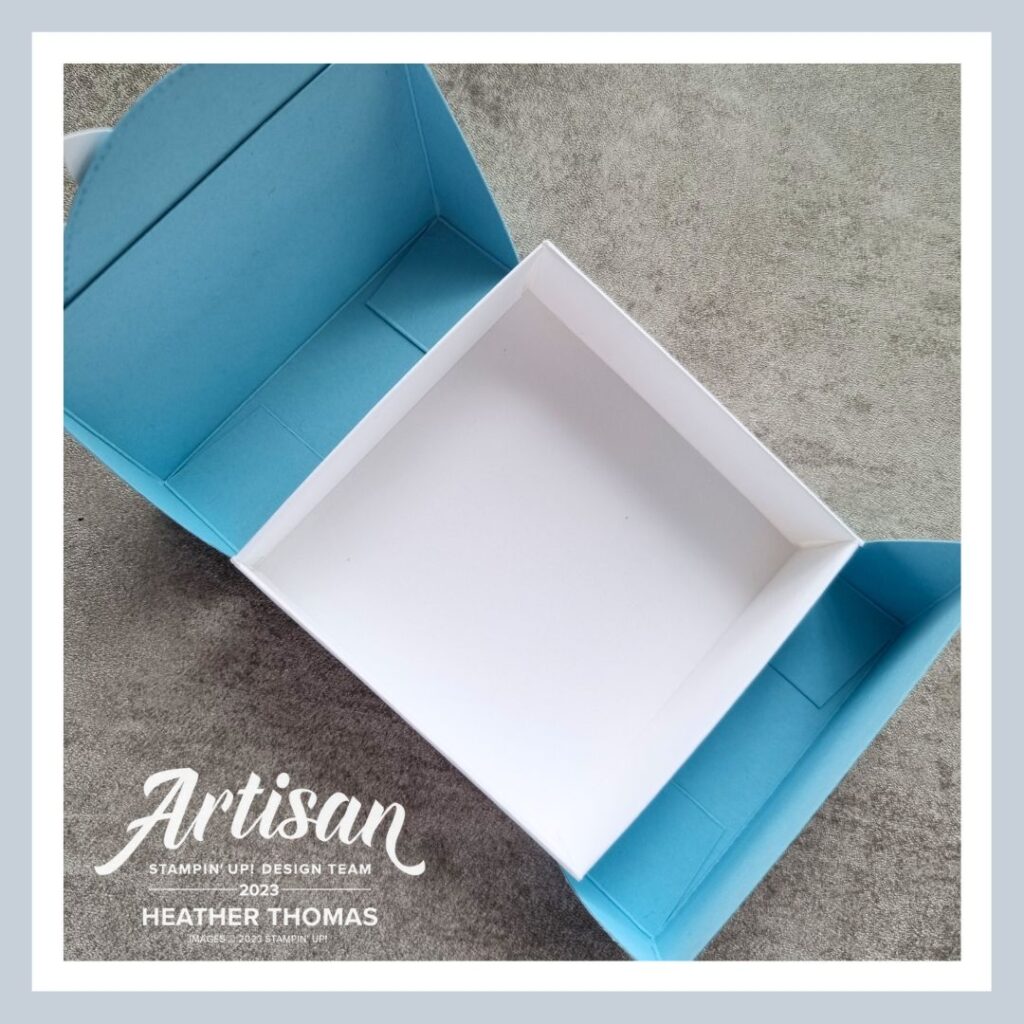
To make the box, you will need a piece of Thick Basic White cardstock, for the inner, and a piece of coloured cardstock for the outer. I chose Balmy Blue as it paired beautifully with the papers from the Regency Park Designer Series Paper pack. Cut your thick white card to 7 1/8″ x 7 1/8″ and then score it on all four sides, firstly at just under 1″ and then at 1 15/16 of an inch. The 16ths of an inch are the smallest lines on the imperial line.
Cut away the outer three squares on each side, and turn the one remaining square into a tab, which you will then glue and stick to make a box. Notch the outer flaps and then tuck them in on themselves to make a reinforced box base.
The Balmy Blue piece is cut to 9 13/16″ x 5 1/4″, and is scored on the long side at 2 1/4″, 3 1/4″, 6 9/16″ and 7 9/16″. It is scored on the short side at 1″ on either side. Cut away the centre flaps, on either side, then taper the four outer flaps so that you can create the diagonal lid box. See the template below. (Not to scale!!)

You can now assemble the outer section by creating the tabs from the square sections and gluing it to the inner edge. Then all you need to do is add your white base inside the outer section and gently close the diagonal lid on both sides.
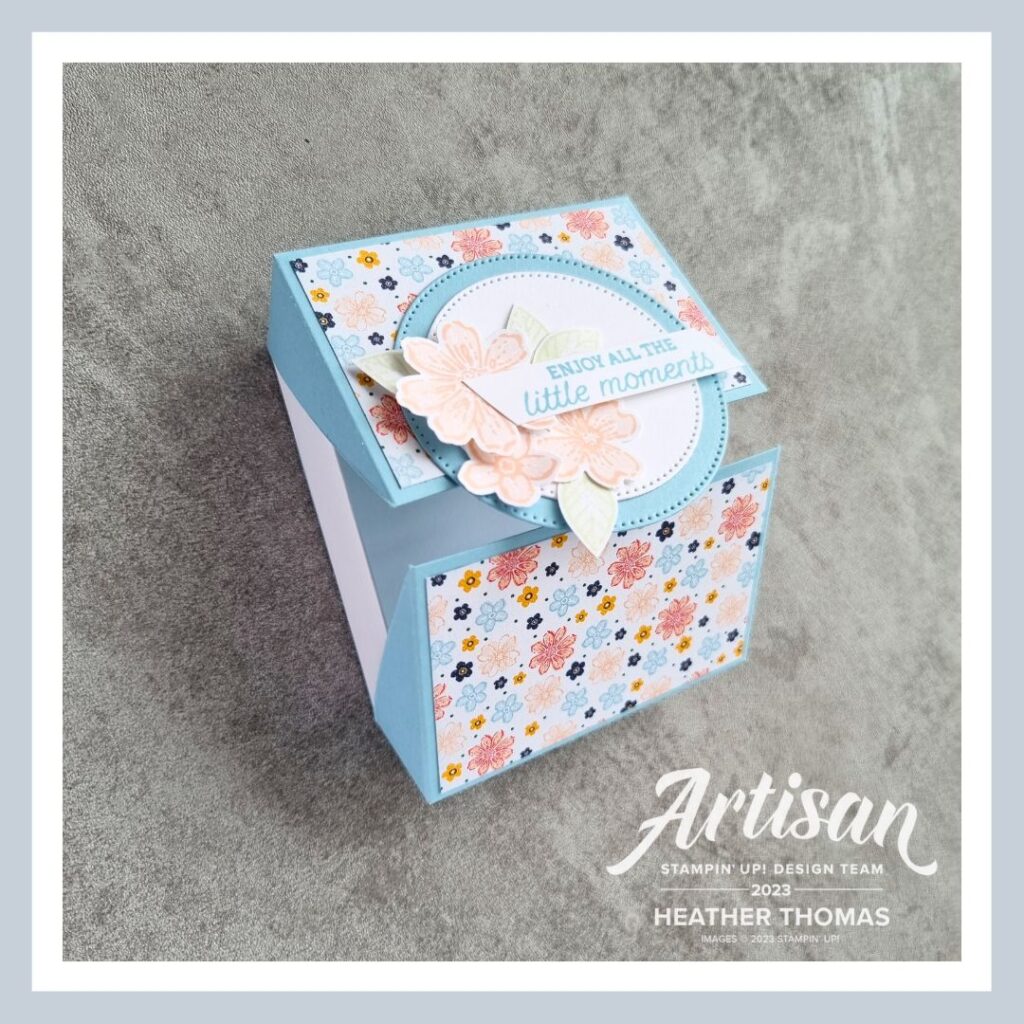
To decorate, I used the Stylish Shapes dies and the Petal Park bundle, in Petal Pink and Soft Sea Foam. The sentiment was from the Easter Bunny stamp set, perfect for a little treat box like this.
That’s all from me for today, but it you are inspired to have a go at making this project, you can purchase all of the tools you need by visiting my online store, using the links below. For now though, please do hop around the rest of the team’s posts to see what they have in store for you.
Until next time, Happy Stamping xx
Product List")
 Designer Series Paper")


- Shop with me online – spend over £20 and receive 10% in Stampin’ Rewards – that’s 10% of your order price back to spend on a future order!
- Click Here to come and join our amazing team of Songbird Stampers, a whole new world of fun and friendship (and discounts!!) await you. Want more information? Why not check out all the FAQs over on the Join My Team page
- Why not follow me on Facebook, for live videos, projects and updates – The Songbird Stamper
- Or Subscribe to me on YouTube – The Songbird Stamper
Combined Colouring Course

Bookings are now open for my new Combined Colouring Course, on Saturday 23rd November 2024 and Saturday 30th December 2024, with two full day zoom classes running from 10.30am until 4.30pm. All of the classes are recorded into a Private Facebook Group too, so you can watch and rewatch as many times as you like. The course also includes a comprehensive written course guide, with accompanying worksheets.
There are two options for this course, a product based option (available UK only) and an online only option (available WORLDWIDE). The online only version is £80 and the product based version is £180 – for which you get access to the whole course, the course guide, £176 worth of product and free postage too.
If you would like to learn all my tips, tricks and techniques, please do visit this page to sign up or register your interest today!
Heather this little diagonal box is gorgeous and I can’t wait to have a go at making one myself. Your projects always inspire me !