I had a Songbird Stampers Team Meeting last week and was asked by one of my lovely teamies if we could learn how to make a stepper card. I have made a couple of these in the past but not many so away I went to re-learn how to do this!
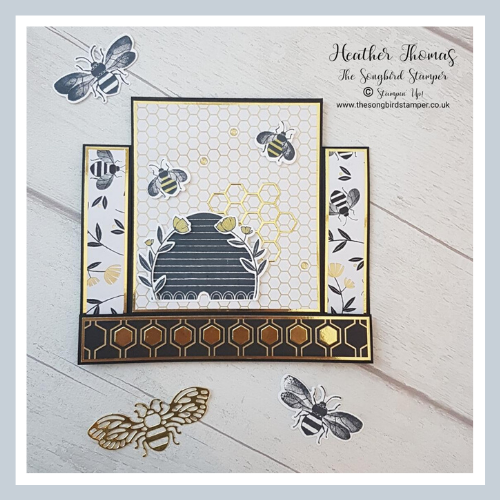
I knew straight away that I wanted to use the Honey Bee Bundle and the Golden Honey Designer Series Paper which is FREE during Sale-a-Bration with a purchase over £45. It has the most gorgeous designs in Black, White and Foiled Gold. Stunning, and a perfect match for those little honey bees.
I started with a piece of Basic Black Cardstock measuring 6″ x 11″. With the short side at the top, on my trimmer, I lined up one of the edges with the 1″ mark. I then used the cutting blade to cut down from 1″ to 6 1/2″. I then flipped the card over and repeated on the other side. Hopefully the picture below will help with all of these measurements.
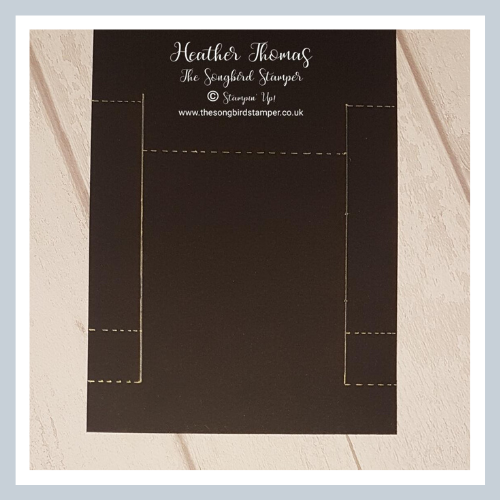
With the long side at the top, I scored from the outer edge to the cut line on either side at 1″, 2″ and 6 1/2″. I also scored between the cut lines at 5 1/2″
It is then just a case of deciding which score lines need to be folded which way. There are two names for folds, valley folds and mountain folds. Valley folds are named because they end up looking like a valley and mountain folds end up looking like a mountain. I hope you can see from my picture which folds will go which way.
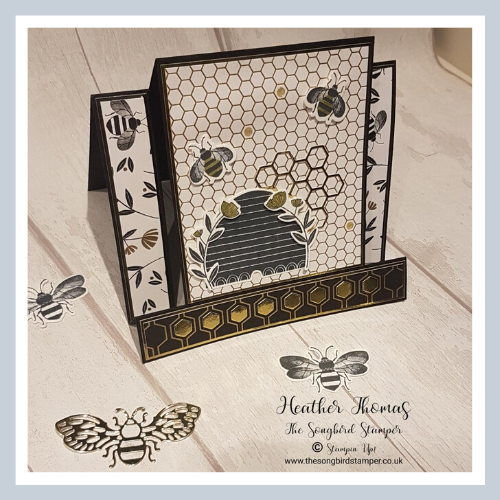
I used some gold foil sheets as mats for the Designer Series Paper because they really help to finish the project nicely. The centre mat is 3 7/8″ x 4 3/8″, the bottom mat is 7/8″ x 5 7/8″ and the side mats are 4 3/8″ x 7/8″.
The centre DSP layer is 3 3/4″ x 4 1/4″, the bottom layer is 3/4″ x 5 3/4″ and the side layers are 4 1/4″ x 3/4″.
To decorate I stamped and die cut some of the honey bees, some of the foliage stems and one of the beehives. This is such a cute little set with lots of elements which can be arranged however you want to. I also used some of the honeycomb, die cut out of gold foil. Can you see at the bottom of the card where I used the leftover hexagons on the DSP? I really enjoyed making use of those.
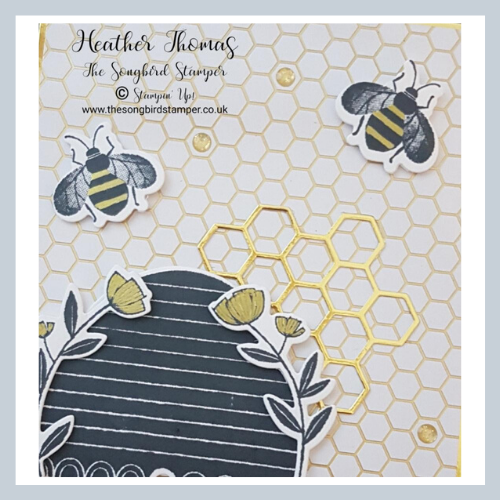
Last, but by no means least, I used some of the gold glitter enamel dots to add a little bit of bling. I hope you like it!
We certainly had a lot of fun crafting together as a team. We tend to meet once every two months for a little get together at my home in Waterlooville. Stampin’ Up! provides such wonderful opportunities for people, whether they want to just learn lots of new crafting techniques or whether they want to grow their hobby into a self sufficient one or even into a small business.
The beautiful thing about it is that you can do as little or as much as you choose with Stampin’ Up! I certainly joined so that I could get myself a discount on all of the fabulous products but have stayed because it quite literally has changed my life, and I get so much out of sharing what I love with you guys and with my customers and my team.
If you have got any questions on what joining my team means, please do head on over to the JOIN MY TEAM page to learn more, or just send me a message, it would be great to hear from you.
Until next time, Happy Crafting…. xx
- Shop with me online – spend over £20 and receive 10% in Stampin’ Rewards – that’s 10% of your order price back to spend on a future order!
- Click Here to come and join our amazing team of Songbird Stampers, a whole new world of fun and friendship (and discounts!!) await you. Want more information? Why not check out all the FAQs over on the Join My Team page
- Why not follow me on Facebook, for live videos, projects and updates – The Songbird Stamper
- Or Subscribe to me on YouTube – The Songbird Stamper


