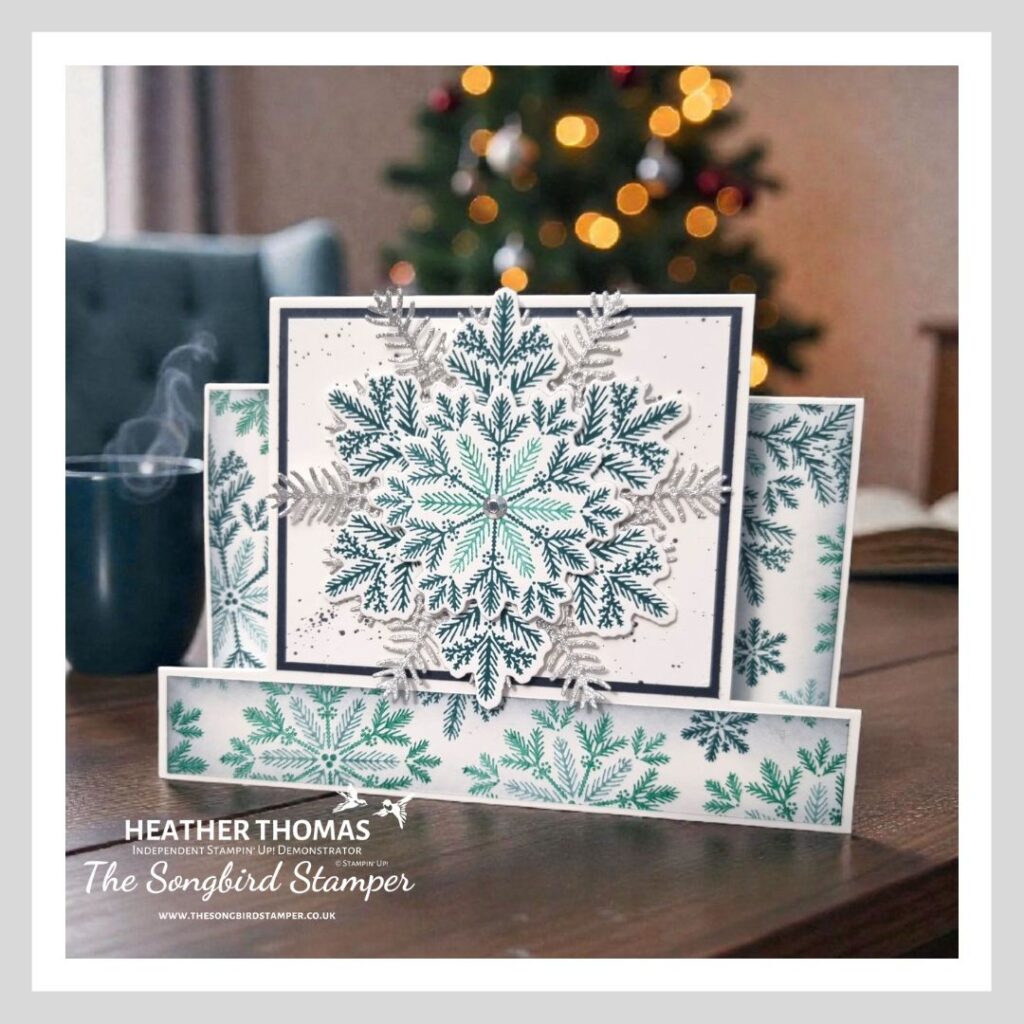
Hello and welcome to the Be Inspired blog hop, where our theme this month is Feeling Festive, and I am going to show you how to make a centre step card – the best bit is that you get to choose how to decorate it! I have gone for a bright, fresh, wintry snowflake card, but you could just as easily switch this up for beautiful florals too.

The centre step card is such a fun one to make, and really quite easy too, especially if you have the metric blade guide on your Stampin’ Up! Trimmer. All you need is a piece of cardstock measuring 21cm x 14.9cm. Simply line it up, with the short side at the top, on your trimmer at 2.5cm and cut from 2.5cm down to 13cm. Move it across to the 12.4cm mark and, again, cut down from 2.5cm to 13cm.
Rotate the card round so that the long edge is at the top, and the cut lines are towards the left, then line up at 2.5cm and trim from either edge of the card to the score line. Do the same at 5cm and 13cm. Keeping it the same orientation, move back a little to the 10.5cm mark and score between the two score lines. These are all the score lines you need.
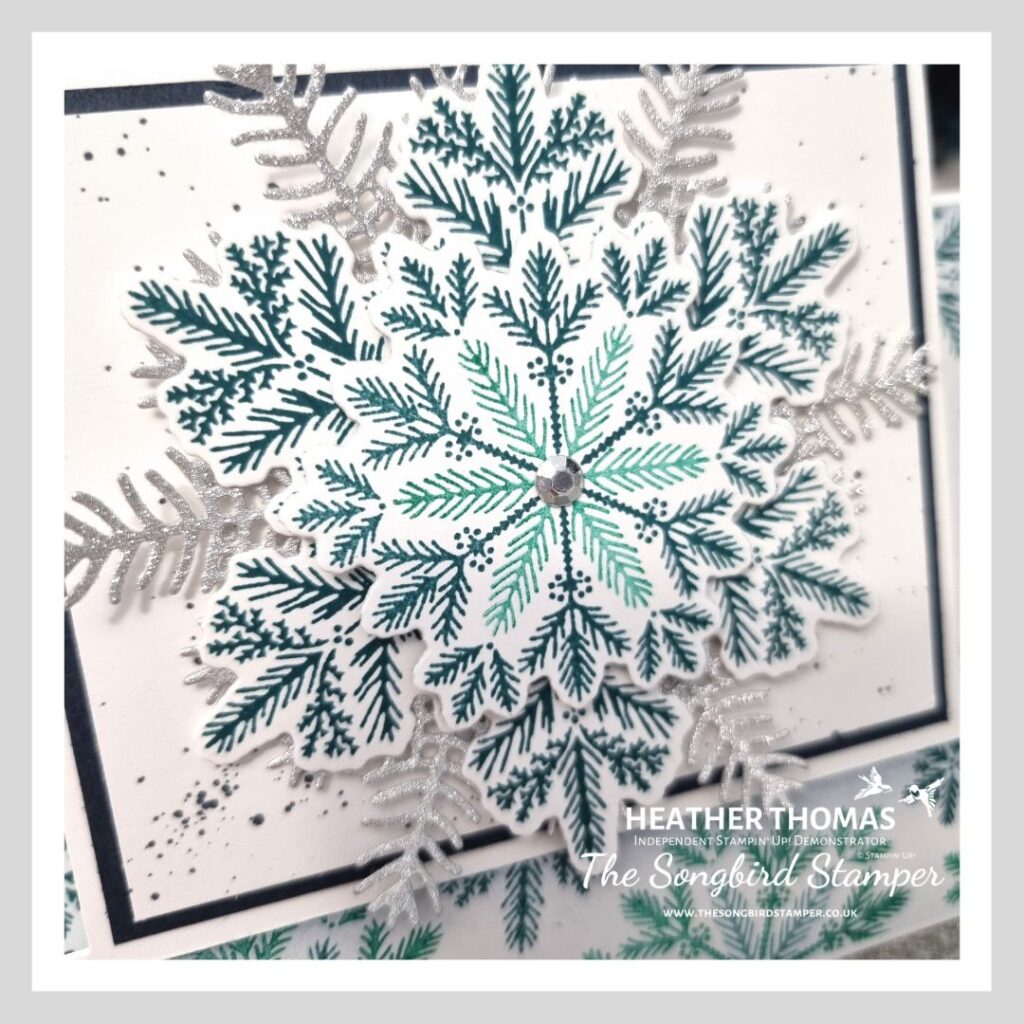
I made my own Designer Series Paper for this card, using the Delicate Pines stamp set, and the colours Pretty Peacock, Shaded Spruce and Secret Sea, but you can use any DSP that you like. All you need are three pieces, one measuring 14.4cm x 2.2cm and two measuring 7.6cm x 2.2cm.
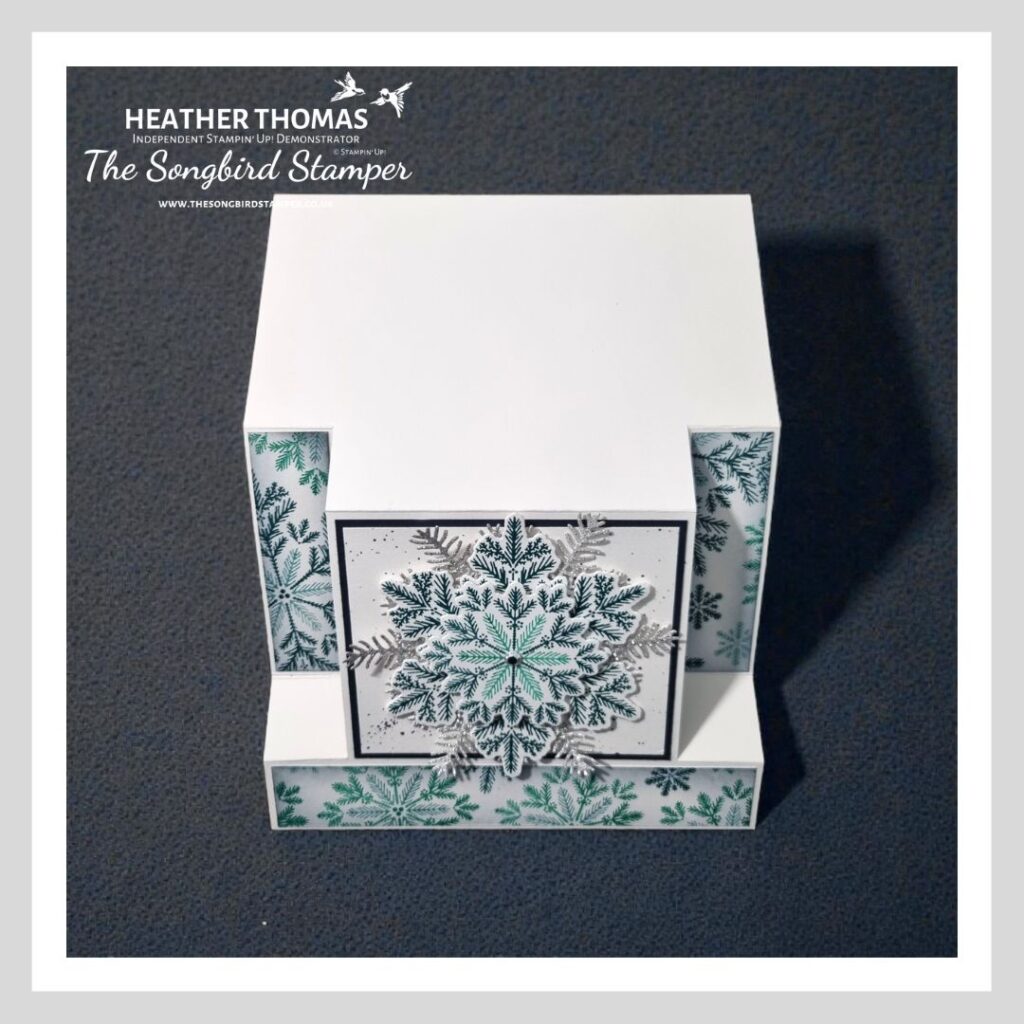
The front mat measures 9.3cm x 7.6cm and the front layer measures 8.9cm x 7.2cm. That is all the cutting done, and now for the fun part, the decoration! I’ve popped the photo below to hopefully help you see where the mountain and valley folds are for folding – I hope you can see.
I used the same Delicate Pines bundle to decorate this centre step card, with a bit of ink splattering with my Stampin’ Blend, too. I simply stamped out one of the large snowflakes and one of the smaller snowflakes and layered them together with dimensionals. I cut out three of the pine snowflake branches (that sounds wrong, but I didn’t know what else to call them!) in silver glimmer paper and added underneath for a hint of bling.
I can’t wait to see what everyone else has made for us this month – please do hop along using the button below and head to Stesha Bloodhart…

![Delicate Pines Bundle (English) [ 166074 ]](https://assets1.tamsnetwork.com/images/EC042017NF/166074s.jpg "Delicate Pines Bundle (English) [ 166074 ]")
![Pretty Peacock Classic Stampin’ Pad [ 150083 ]](https://assets1.tamsnetwork.com/images/EC042017NF/150083s.jpg "Pretty Peacock Classic Stampin’ Pad [ 150083 ]")
![Secret Sea Classic Stampin' Pad [ 165285 ]](https://assets1.tamsnetwork.com/images/EC042017NF/165285s.jpg "Secret Sea Classic Stampin' Pad [ 165285 ]")
![Shaded Spruce Classic Stampin' Pad [ 147088 ]](https://assets1.tamsnetwork.com/images/EC042017NF/147088s.jpg "Shaded Spruce Classic Stampin' Pad [ 147088 ]")
![Basic White A4 Thick Cardstock [ 159230 ]](https://assets1.tamsnetwork.com/images/EC042017NF/159230s.jpg "Basic White A4 Thick Cardstock [ 159230 ]")
![Paper Trimmer [ 152392 ]](https://assets1.tamsnetwork.com/images/EC042017NF/152392s.jpg "Paper Trimmer [ 152392 ]")
![Paper Trimmer Metric Blade Guide [ 154980 ]](https://assets1.tamsnetwork.com/images/EC042017NF/154980s.jpg "Paper Trimmer Metric Blade Guide [ 154980 ]")
![Secret Sea Stampin’ Blends Combo Pack [ 165289 ]](https://assets1.tamsnetwork.com/images/EC042017NF/165289s.jpg "Secret Sea Stampin’ Blends Combo Pack [ 165289 ]")
![Blending Brushes [ 153611 ]](https://assets1.tamsnetwork.com/images/EC042017NF/153611s.jpg "Blending Brushes [ 153611 ]")
![Peaceful Garden 12" X 12" (30.5 X 30.5 Cm) Glimmer Paper [ 165929 ]](https://assets1.tamsnetwork.com/images/EC042017NF/165929s.jpg "Peaceful Garden 12\" X 12\" (30.5 X 30.5 Cm) Glimmer Paper [ 165929 ]")
- Shop with me online – spend over £20 and receive 10% in Stampin’ Rewards – that’s 10% of your order price back to spend on a future order!
- Click Here to come and join our amazing team of Songbird Stampers, a whole new world of fun and friendship (and discounts!!) await you. Want more information? Why not check out all the FAQs over on the Join My Team page
- Why not follow me on Facebook, for live videos, projects and updates – The Songbird Stamper
- Or Subscribe to me on YouTube – The Songbird Stamper
Pingback: Be Inspired - Feeling Festive - Coastal Crafter Emma Goddard
Beautiful card, Heather. I love this fun-fold design. Enjoy your day!
Ahh, thank you so much indeed, it is such a great fold! And you, too, have a great day 🙂